Recently I have to pass JSON data to REST Service and did not have any simple Client handy. But created very simple Java program which read JSON data from file and sends it to REST service.
Representational State Transfer (REST) has gained widespread acceptance across the Web as a simpler alternative to SOAP- and Web Services Description Language (WSDL)-based Web services. Key evidence of this shift in interface design is the adoption of REST by mainstream Web 2.0 service providers—including Yahoo, Google, and Facebook—who have deprecated or passed on SOAP and WSDL-based interfaces in favor of an easier-to-use, resource-oriented model to expose their services. In this article, Alex Rodriguez introduces you to the basic principles of REST.
Let’s start coding this:
- Create RESTFul Web Service
- Java file: CrunchifyRESTService.java
- web.xml file
- Create RESTService Client
- CrunchifyRESTServiceClient.java file
Another must read: Spring MVC Example/Tutorial: Hello World – Spring MVC 3.2.1
Step-1
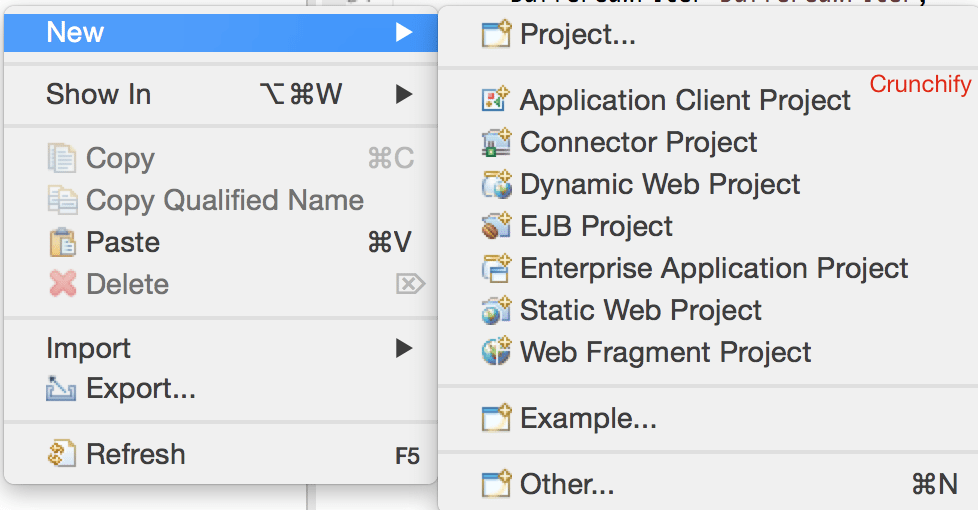
In Eclipse => File => New => Dynamic Web Project
. Name it as “CrunchifyTutorials
”. Below tutorial also works with Tomcat 8
.
Step-2 Create Deployment Descriptor File
If you don’t see web.xml
(deployment descriptor) under WebContent\WEB-INF\
then follow these steps.
Open web.xml
and replace content with below contents:
<?xml version="1.0" encoding="UTF-8"?> <web-app xmlns="http://java.sun.com/xml/ns/javaee" xmlns:xsi="http://www.w3.org/2001/XMLSchema-instance" xsi:schemaLocation="http://java.sun.com/xml/ns/javaee http://java.sun.com/xml/ns/javaee/web-app_3_0.xsd" version="3.0"> <display-name>CrunchifyRESTJerseyExample</display-name> <welcome-file-list> <welcome-file>index.html</welcome-file> <welcome-file>index.htm</welcome-file> <welcome-file>index.jsp</welcome-file> <welcome-file>default.html</welcome-file> <welcome-file>default.htm</welcome-file> <welcome-file>default.jsp</welcome-file> </welcome-file-list> <servlet> <servlet-name>Jersey Web Application</servlet-name> <servlet-class>com.sun.jersey.spi.container.servlet.ServletContainer</servlet-class> <load-on-startup>1</load-on-startup> </servlet> <servlet-mapping> <servlet-name>Jersey Web Application</servlet-name> <url-pattern>/api/*</url-pattern> </servlet-mapping> </web-app>
Step-3 Convert Project to Maven Project
Follow this tutorial: https://crunchify.com/how-to-convert-existing-java-project-to-maven-in-eclipse/. Here is my pom.xml file.
<project xmlns="http://maven.apache.org/POM/4.0.0" xmlns:xsi="http://www.w3.org/2001/XMLSchema-instance" xsi:schemaLocation="http://maven.apache.org/POM/4.0.0 http://maven.apache.org/xsd/maven-4.0.0.xsd"> <modelVersion>4.0.0</modelVersion> <groupId>CrunchifyTutorials</groupId> <artifactId>CrunchifyTutorials</artifactId> <version>0.0.1-SNAPSHOT</version> <packaging>war</packaging> <build> <sourceDirectory>src</sourceDirectory> <plugins> <plugin> <artifactId>maven-compiler-plugin</artifactId> <version>3.1</version> <configuration> <source>1.8</source> <target>1.8</target> </configuration> </plugin> <plugin> <artifactId>maven-war-plugin</artifactId> <version>2.4</version> <configuration> <warSourceDirectory>WebContent</warSourceDirectory> <failOnMissingWebXml>false</failOnMissingWebXml> </configuration> </plugin> </plugins> </build> <dependencies> <dependency> <groupId>asm</groupId> <artifactId>asm-all</artifactId> <version>3.3.1</version> </dependency> <dependency> <groupId>com.sun.jersey</groupId> <artifactId>jersey-bundle</artifactId> <version>1.14</version> </dependency> <dependency> <groupId>org.json</groupId> <artifactId>json</artifactId> <version>20090211</version> </dependency> </dependencies> </project>
Step-4
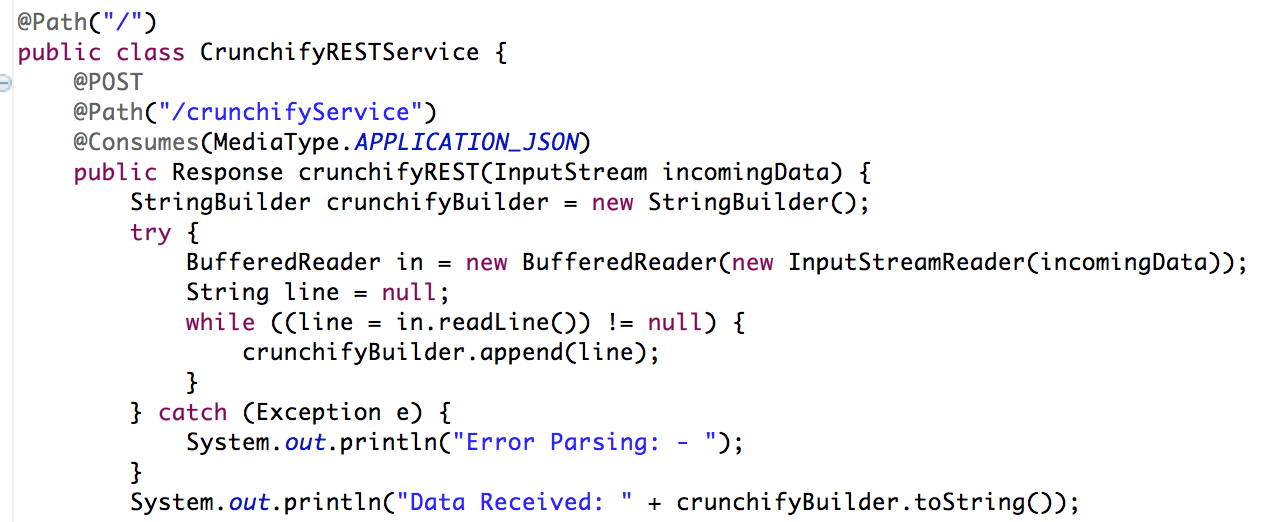
Create RESTFul service: CrunchifyRESTService.java
. Here we will create two services:
/api/crunchifyService
– POST call – we will use this with our test/api/verify
– GET call – just to make sure service started successfully
package com.crunchify.tutorials; /** * @author crunchify.com * */ import java.io.BufferedReader; import java.io.InputStream; import java.io.InputStreamReader; import javax.print.attribute.standard.Media; import javax.ws.rs.Consumes; import javax.ws.rs.GET; import javax.ws.rs.POST; import javax.ws.rs.Path; import javax.ws.rs.Produces; import javax.ws.rs.core.MediaType; import javax.ws.rs.core.Response; @Path("/") public class CrunchifyRESTService { @POST @Path("/crunchifyService") @Consumes(MediaType.APPLICATION_JSON) public Response crunchifyREST(InputStream incomingData) { StringBuilder crunchifyBuilder = new StringBuilder(); try { BufferedReader in = new BufferedReader(new InputStreamReader(incomingData)); String line = null; while ((line = in.readLine()) != null) { crunchifyBuilder.append(line); } } catch (Exception e) { System.out.println("Error Parsing: - "); } System.out.println("Data Received: " + crunchifyBuilder.toString()); // return HTTP response 200 in case of success return Response.status(200).entity(crunchifyBuilder.toString()).build(); } @GET @Path("/verify") @Produces(MediaType.TEXT_PLAIN) public Response verifyRESTService(InputStream incomingData) { String result = "CrunchifyRESTService Successfully started.."; // return HTTP response 200 in case of success return Response.status(200).entity(result).build(); } }
Step-5
Deploy project CrunchifyTutorials
on Tomcat. Web project should be deployed without any exception.
- Right Click on
Servers tab
in Eclipse - Click on
Add and Remove...
Project - Add Project CrunchifyTutorials to right
Configured:
side. - Click on
Publish
- Click on
Start
Step-6 Verify REST service
Rest service should be accessible using this URL: http://127.0.0.1:8080/CrunchifyTutorials/api/verify
If you try to access http://127.0.0.1:8080/CrunchifyTutorials/api/crunchifyService then you will see error code 405 - Method not allowed
– which is valid response. As you can see it’s POST call and should expect some data with the request.
Let’s move on.
Step-7
Copy below JSON content and put it under C:\\CrunchifyJSON.txt
file for windows or /Users/<username>/Documents/CrunchifyJSON.txt
file if Macbook.
{ "tutorials": { "id": "Crunchify", "topic": "REST Service", "description": "This is REST Service Example by Crunchify." } }
Step-8
Create REST Call Client: CrunchifyRESTServiceClient.java.
Please change path to CrunchifyJSON.txt
in below program.
package com.crunchify.tutorials; import java.io.BufferedReader; import java.io.FileInputStream; import java.io.InputStream; import java.io.InputStreamReader; import java.io.OutputStreamWriter; import java.net.URL; import java.net.URLConnection; import org.json.JSONObject; /** * @author crunchify.com * */ public class CrunchifyRESTServiceClient { public static void main(String[] args) { String string = ""; try { // Step1: Let's 1st read file from fileSystem // Change CrunchifyJSON.txt path here InputStream crunchifyInputStream = new FileInputStream("/Users/<username>/Documents/CrunchifyJSON.txt"); InputStreamReader crunchifyReader = new InputStreamReader(crunchifyInputStream); BufferedReader br = new BufferedReader(crunchifyReader); String line; while ((line = br.readLine()) != null) { string += line + "\n"; } JSONObject jsonObject = new JSONObject(string); System.out.println(jsonObject); // Step2: Now pass JSON File Data to REST Service try { URL url = new URL("http://localhost:8080/CrunchifyTutorials/api/crunchifyService"); URLConnection connection = url.openConnection(); connection.setDoOutput(true); connection.setRequestProperty("Content-Type", "application/json"); connection.setConnectTimeout(5000); connection.setReadTimeout(5000); OutputStreamWriter out = new OutputStreamWriter(connection.getOutputStream()); out.write(jsonObject.toString()); out.close(); BufferedReader in = new BufferedReader(new InputStreamReader(connection.getInputStream())); while (in.readLine() != null) { } System.out.println("\nCrunchify REST Service Invoked Successfully.."); in.close(); } catch (Exception e) { System.out.println("\nError while calling Crunchify REST Service"); System.out.println(e); } br.close(); } catch (Exception e) { e.printStackTrace(); } } }
Step-9
Now let’s run Client Program by right click on CrunchifyRESTServiceClient.java and you should see below two outputs
1) in Tomcat Console
2) in Local Client Console
I’m getting this json result in console. But I want this to be displayed in url as json. How can i do that ? Have any idea?
Hi Pavi – If you want to see JSON in browser then use this URL
http://localhost:8080/CrunchifyTutorials/api/crunchifyService
Hi, after doing everything said here,i couldn’t get the post data in url. I’m only getting that verify. if i try to access http://127.0.0.1:8080/CrunchifyTutorials/api/crunchifyService, it is returning “The origin server did not find a current representation for the target resource or is not willing to disclose that one exists.”
But I’m getting the value in console.
Hi Pavithra – could you please send me screenshot and console log? I would like to analyse logs.
In order to see result in browser, please make sure server is running.
Hi,
Im getting client response, but not getting rest service response.
https://uploads.disquscdn.com/images/7d3c32282e99304c0c1ffdb1f84d7e545b7cda3b96ae2f8b5c2c19b0b6c7f23f.jpg
and also got the verify response.
https://uploads.disquscdn.com/images/07042fd69bc281ab6d33dc9e5e7721b5ba6fc81d8bd1275b4effb3e9d4c3cb3c.jpg
but not getting rest service post response. please find the below error image
https://uploads.disquscdn.com/images/b1fba007ec0854f4530f79bc132bd5b1dabc83ac1b684801a5f0f9db991a6646.jpg
Thanks in advance, please help me ASAP.
Hi Elga – thanks for sharing screenshot. Really helpful.
There isn’t anything wrong in 405 HTTP error code as you are hitting web service in Browser which makes GET call. You need to use above attached test code or PostMan client to make POST call.
Your service should expect some data with the request 🙂
I hope this helps. Happy coding.
I am trying to implement this in my local environment based on Java 12 and Tomcat 8.5 in Eclipse IDE 4.12. Initially it did not create the web.xml. I read on other post mentioned in this tutorial to create web.xml in which its mentioned that Java 6 onwards its not recommended to use web.xml for deployments. What is the other option now to develop and deploy the REST services in Java ?
Thanks Imran Patan for details. I’m not sure where you read about not using web.xml but I don’t agree with that.
I still use web.xml in all of my services with Java 13 and latest Eclipse.
Are you facing any issue running Simple Jersey Rest Service?
There are many ways to send JSON data to the server
## 1. Using Ajax
var data = < ?php echo json_encode($data) ?>;
var url = '< ?php echo $url ?>';
jQuery.ajax({
type: "POST",
url: url,
data: JSON.stringify(data),
contentType: "application/json; charset=utf-8",
dataType: "json",
success: function(data){
var jsonObj = jQuery.parseJSON(data);
alert(jsonObj.encPassword);
},
failure: function(errorMsg) {
alert(errorMsg);
}
});
## 2. Using Curl
< ?php $content = json_encode($data); $curl = curl_init($url); curl_setopt($curl, CURLOPT_HEADER, false); curl_setopt($curl, CURLOPT_RETURNTRANSFER, true); curl_setopt($curl, CURLOPT_HTTPHEADER, array("Content-type: application/json")); curl_setopt($curl, CURLOPT_POST, true); curl_setopt($curl, CURLOPT_POSTFIELDS, $content); curl_setopt($curl, CURLOPT_SSL_VERIFYPEER, false); //curl error SSL certificate problem, verify that the CA cert is OK $result = curl_exec($curl); $response = json_decode($result); var_dump($response); curl_close($curl); ?>
## 3. Using Streams
## 4. Raw HTTP Post
Hi there – 100% agree 🙂
Thanks for sharing more details. If you have other working example and want to publish on Crunchify then let us know.
I am getting a exception in java client
java.io.IOException: Server returned HTTP response code: 400 for URL: http://localhost:8080/api/v1/datapoints
at sun.net.www.protocol.http.HttpURLConnection.getInputStream0(HttpURLConnection.java:1894)
at sun.net.www.protocol.http.HttpURLConnection.getInputStream(HttpURLConnection.java:1492)
Hi Vishant – this looks like a HTTP 400 Bad Request.
Could you send me details stack trace? Above log is not complete.
I consistently succeed to replicate the results of the tutorial until I reached Step 9. I even managed to replicate the results of step 9 one time. But now every time I try to run the CurnchifyRestServiceClient, I get the error below. I do not believe that I changed anything. I only closed and reopened Eclipse. I even tried to reconstruct the entire application from the beginning again (several times), but I always get the error shown. I have verified that the Eclipse Tomcat server is monitoring port 8080.
The one time that I got it to work I was using Tomcat 7. But after that one time, it failed consistently using Tomcat 7. I switched to Tomcat 9 and copied the tags from the tutorial into my web.xml. Similarly, I copied only the tags to the automatically constructed pom.xml file. I also tried adding an index.html file to the WEB-INF folder as suggested by another article, but that did not help.
Do you have any suggestions?
—————–
HTTP Status 404 – Not Found
Type Status Report
Description The origin server did not find a current representation for the target resource or is not willing to disclose that one exists.
Apache Tomcat/9.0.7
Pilot error. I was running on server instead of running as java application.
Got it. Thanks for an update. I’m glad it worked for you.
you wrote:
Step-4
Create RESTFul service: CrunchifyRESTService.java. Here we will create two services:
/api/crunchifyService – POST call – we will use this with our test
/api/verify – GET call – just to make sure service started successfully
Question: What do I click to create the RESTful Service? E.g. Right Click on Project Name and then go to New and then go to ….
Then go to
Class
. https://uploads.disquscdn.com/images/13e2aaf35a92cc055137587e1baaba0e8e51dbab95877101a69dd789430d2e32.pngHi, thanks for this tutorial!
I would like to know how can I access this JSON we sent, but using another application? How can I consume it? I thought that we would access the url http://localhost:8080/CrunchifyTutorials/api/crunchifyService and then get the JSON…
Hi Matheus – it depends. Do you want to consume from Java Application, Angular JS UI or esle where?
Basically it should be HTTP Response entity which you need to consume. Share some more details and i’ll be able to guide you.
i got error too when running http://localhost:7001/api/crunchifyService/ in the browser
I’m using weblogic
Error 404–Not Found
From RFC 2068 Hypertext Transfer Protocol — HTTP/1.1:
10.4.5 404 Not Found
The server has not found anything matching the Request-URI. No indication is given of whether the condition is temporary or permanent.
If the server does not wish to make this information available to the client, the status code 403 (Forbidden) can be used instead. The 410 (Gone) status code SHOULD be used if the server knows, through some internally configurable mechanism, that an old resource is permanently unavailable and has no forwarding address.
the server log as below:
Dec 01, 2017 12:02:38 PM org.glassfish.jersey.internal.Errors logErrors
WARNING: The following warnings have been detected: WARNING: A HTTP GET method, public javax.ws.rs.core.Response com.crunchify.tutorials.CrunchifyRESTService.verifyRESTService(java.io.InputStream), should not consume any entity.
Hi tong – could you please double check step-6? Also, please share your sceenshot to understand issue better.
Are you getting below error?
https://crunchify.com/wp-content/uploads/2013/11/404-Method-not-allowed-Expecting-Data-with-POST-call.png
I am getting an 404 message on step 6, my TOmcat console is giving me the below errors:
any ideas?
Hi Luis – can you try following this tutorial: https://crunchify.com/mavenmvn-clean-install-update-project-and-project-clean-options-in-eclipse-ide-to-fix-any-dependency-issue/
Hope it will fix your issue.
It’s not working. tried it a lot of times now
Will you be able to export your project as zip and send me? I do see you have your customer code about
app
.i am getting an error at step 6:
type Status report
message
description The requested resource is not available.
not really sure why, i used the exact code and have done redone the tutorial 3 times.
Hi Luis – could you please share screenshot or detailed exception stack trace?
Hi there,
I’m getting an 404 error a Step-6.
I tried http://localhost:8080/FrenkRestService/api/verify as well as http://127.0.0.1:8080/FrenkRestService/api/verify.
I changed all ‘crunchify’ in the code with ‘frenk’ (while keeping in mind the uppercases), but I’m pretty sure that isn’t causing the error.
I included an image with screenshots of the pom.xml, web.xml and the FrenkRESTService. java files.
Hope you can help me out! Here is a screenshot.
Hi Frenk – pom.xml and web.xml both files look good. Have you tried cleaning your project from scratch again? Try maven -clean install and update maven dependency again to avoid 404 error.
Hi the code works perfect. I tried to change the server to return String instead of Response, and added the StringBuffer to the client after opening the InputStream (like at the end of your client’s code) to receive the string from server. But it seems like I couldn’t receive any string back from the server. What other changes should I change on server/client to return a string to the client (in addition to sending the json from client to server like in your code)? Is it possible to do it both in the same connection? Thanks so much for the code, I couldn’t find anything similar online that is good enough!
Hi Shai Lighter – try making changes at client side to accept string instead of JSON.
Hi I am getting the 404 error on Step-6 Verify REST service. I don’t see the Successfully Started message when I navigate to http://127.0.0.1:8080/CrunchifyTutorials/api/verify
I have followed the steps as outlined – please let me know. Thanks,
Hi AK – Could you please share error message which you getting? Also, quick screenshot may help.
Very helpful article, thank you very much. Everything worked!
You are welcome. Happy coding and keep visiting.
Getting below exception.. pleaase help
Hi Benison – sorry for late reply. Could you please confirm you have below values correctly specified in web.xml file?
Also, could you send me screenshot from Eclipse IDE for debug purpose?
Hi Benison – sorry for late reply. Could you please confirm you have below values correctly specified in web.xml file?
Where u have updated the code.. am not getting please help Crunchify.
Hi Benison – didn’t get your question. Could you please provide more details?
Hi,
when i am using below url,got some error.
http://127.0.0.1:7007/CrunchifyTutorials/api/verify
HTTP Status 404 – /CrunchifyTutorials/api/verify
type Status report
message /CrunchifyTutorials/api/verify
description The requested resource is not available.
Hi Rajesh – could you help create NEW TOPIC here: https://crunchify.com/category/java-tutorials/
Please provide all detailed exception stack trace and screenshots. It will help debug an issue in details.
Thank you for response. But that is now resolved.
Could please tell me clearly.
one more:
I have so much confusing
How to run apacheHttpRestClient and CrunchifyRESTServiceClient?
I created Json file also.
Please find screenshots and reply as soon as possible.
Hi I am new to Jersey.I am trying to write a client for Delphix server.Please help me how can I wirte client based on the below curl commands
Create Delphix API Session
$ curl -s -X POST -k –data @- http:// delphix-server/refer/json/delphix/session
-c ~/cookies. txt -H “Content-Type: application/json” <<EOF
{
"type": "APISession",
"version": {
"type": "APIVersion",
"major": 1,
"minor": 4,
"micro": 3
}
}
EOF
Delphix Login
$ curl -s -X POST -k –data @- http://delphix-server/refer/json/delphix/login
-b ~/cookies.txt -H "Content-Type: application/json" <<EOF
{
"type": "LoginRequest",
"username": "delphix_username",
"password": "delphix_password"
}
EOF
please help on this
Hi there – didn’t get your question. Could you please explain your requirement in details? Screenshot would help.
Hi again,
I changed my ‘pom.xml’ and ‘web.xml’ files in order to run my project by using the old versions of Jersey project (1.14) and keeping the old path in the ‘web.xml’ file:
com.sun.jersey.spi.container.servlet.ServletContainer
But nothing. :'(
What am I doing wrong?
Any help would be welcome. Thanks in advance.
Hi Abelardo – could you try cleaning up your project and updating all maven dependency again?
1. Eclipse -> Clean Project
2. Right click on project -> Maven -> Update Project
3. Right click on project -> Run As -> Maven Build -> Provide “Goals” parameter (clean install) -> Run.
Hi again,
I am trying to execute this example but I have encountered the following error:
Since your explanation refers a year ago, I updated the versions of the jars file which inside the pom.xml file and as well as I updated the ‘web.xml’ file:
-> “pom.xml” file:
org.glassfish.jersey.containers
jersey-container-servlet-core
2.22.2
-> ‘web.xml’ file:
Jersey Web Application
org.glassfish.jersey.servlet.ServletContainer
1
Attached to this message you can see a snapshot where the content of the file ‘jersey-container-servlet-core.jar’ is showed; also, you can view the ServletContainer class file is under the dir: ‘org.glassfish.jersey.servlet’
Do you know what’s wrong?
Any help would be welcome.
Apache showed the 404 error. 🙁
Thanks in advance.
Hola:
A mí me sale este error :
¿A qué es debido?
Gracias.
HTTP Status 404 –
type Status report
message
description The requested resource is not available.
Apache Tomcat/7.0.47
Any idea?
Hi Alexandre Fett – Could you please share complete stack trace? Will help find root cause.
I was really helpful! thanks!
This is my screen. I added my own json file, which works fine. The problem is the REST service itself.
Hi Koos Drost – I’ve completely rewrote an article above. Can you try with all latest steps. Issue should be resolved with steps.
Hi all, i’ve inserted my own json file and it generates the following output:
Anyone who understands this error? It looks like the file is processed in the right way.
P.S. http://localhost:8080/CrunchifyTutorials/api/crunchifyService gives a 404..
Thanks in advance!
Hi Koos – above error shows an unavailability of service
crunchifyService
. Try following above steps again as I’ve completely rewrote the tutorial today.Hello, I have exact same problem like Pallivi. It can find the JSONFile.txt but not the Service file. What is the solution? thanks,
Hi there – please try following latest steps and your problem should go away 🙂
Hi App Shah,
After running the client I am also getting the following exception.
Error while calling REST Service
java.io.FileNotFoundException: http://localhost:8080/CrunchifyTutorials/api/crunchifyService
Can you please guide?
Thanks.
Hi Pallavi – could you please share any exception you got while invoking above link?
Hi Pallavi – I’ve completely rewrote an article above. Can you try with all latest steps. Issue should be resolved with steps.
above wher..???
Is that the updated one??
I mean – updated above complete tutorial. If you try from step-1, then it should work as it is without any issue. Let me know if you still face any issue. Don’t forgot to clean your workspace: https://crunchify.com/mavenmvn-clean-install-update-project-and-project-clean-options-in-eclipse-ide-to-fix-any-dependency-issue/
I got this error while calling the REST client, Can anybody help me ?
Error while calling REST Service
java.io.IOException: Server returned HTTP response code: 405 for URL: http://localhost:9191/CrunchifyTutorials/api/crunchifyService
Hi Vamshi – could you please share complete stack trace to debug further?
Please let me know if any changes are needed to deploy this web app in websphere 8.5.5. I am getting file not found exception when calling the service.
Hi Rich – I haven’t tried this on websphere. But could you share exception log here which might help figure out solution.
Hi Chiranjit – there might be an issue with CORS filter on server side. This may help: https://crunchify.com/what-is-cross-origin-resource-sharing-cors-how-to-add-it-to-your-java-jersey-web-server/
Hi, I am at step 4 of your tutorial and I am stuck with these errors.
I created a class and copy-pasted the code at step 4.
How do I go about solving this?
Thanks.
You may need to download these 3 files: asm-3.3.1.jar, jersey-bundle-1.14.jar, json.jar. OR you could add all 3 jar files in your pom.xml file if you have maven project. I’ve updated tutorial with maven dependencies.
looks like javax related lib files are not fetch by your maven, try this POM.xml
hpe it works
4.0.0
CrunchifyTutorials
CrunchifyTutorials
0.0.1-SNAPSHOT
war
http://maven.apache.org
jboss
http://repository.jboss.org/maven2
asm
asm-all
3.3.1
com.sun.jersey
jersey-bundle
1.14
org.json
json
20090211
src
maven-compiler-plugin
3.1
1.6
1.6
maven-war-plugin
2.4
WebContent
false
HTTP Status 405 – Method Not Allowed
type Status report
message Method Not Allowed
description The specified HTTP method is not allowed for the requested resource.
Getting this error when i use POST in the rest service program, if i replace it with GET then the error goes and at the console prints only “data received” what is teh reason and what should i do to get this ouput
Hi Samyukta – there might be an issue with CORS filter on server side. This may help: https://crunchify.com/what-is-cross-origin-resource-sharing-cors-how-to-add-it-to-your-java-jersey-web-server/
Update: If you try to access http://127.0.0.1:8080/CrunchifyTutorials/api/crunchifyService then you will see error code 405 – Method not allowed – which is valid response. As you can see it’s POST call and should expect some data with the request.
what is in your JSON.txt file?
doesnt working for me, dispaly nothink or if i will print incomingData.toString() then i have: org.apache.catalina.connector.CoyoteInputStream@19eeb098
Help me please
Hi Adam – not sure what error you are getting. Can you share screenshot?
Hi Shah,
Same as Adam, i encounter the same issue. can you please let me know what need to fix ?
Error
Total String :org.apache.catalina.connector.CoyoteInputStream@7f32e910
For the following Code
I fix the above problem as follow, it may help some body who are looking to fix the problem.
Thanks Husal.
Thank you very much, it woks fine. But I have two little problems, I hope you can help me.
1) On my web.xml file I have the and tags for the root path to the pages (.jsp) in struts2. But If I delete these tags, your example works fine. I don’t know If this is well done or no.
2) I can see the Json datas on the navigator. But If I update the database and refresh the URL, the same Json datas are shown, even though on the database there is a new register.
Thank you for your help.
Hi there – Servlet filters implement intercepting filter pattern. While servlet is the ultimate target of web request, each request goes through a series of filters. Every filter can modify the request before passing it further or response after receiving it back from the servlet. It can even abstain from passing the request further and handle it completely just like servlet (not uncommon). For instance caching filter can return result without calling the actual servlet.
For point 2 – i’m not sure what is your logic. You may need to update above code which fetches data from DB and show.
Where is the Servlet?! (com.sun.jersey.spi.container.servlet.ServletContainer)
It’s coming from .jar file which you could download from here: http://www.java2s.com/Code/Jar/j/Downloadjerseybundle114jar.htm
Or if you have Maven Project. Try adding this to your pom.xml file.
Worked well, thanks a lot for the simple and useful example.
Thanks Nuwan.
Pl explain abt to deploy the app … i got the below error while running ur sample ….Error while calling REST Service
java.io.FileNotFoundException: http://localhost:8080/RestAPI/api/crunchifyService
Hi Jagav – could you please share a screenshot from eclipse. Must be some issue with project structure.
I have the same error:
Error while calling REST Service
java.io.FileNotFoundException: http://localhost:8080/CrunchifyTutorials/api/crunchifyService
What is the solution ?
Hi Ari Volcoff – Please make sure you have file at this location:
If mac: /Users//Documents/crunchify-git/JSONFile.txt
If windows: c://temp//JSONFile.txt (or your preferred location)
Can you please shafe the json file
Hi Ramesh – You could use this file data: https://crunchify.com/wp-content/uploads/code/JSONFile.txt
Also, updated above tutorial. Thank for stopping by Ramesh.
If you error is HTTP Status 405 – Method Not Allowed try to change @POST for @GET
Hi Jagav – thanks for reporting an issue. I’ve completely rewrote an article above. Can you try with all latest steps. Issue should be resolved with steps.
Changes:
1. converted project to maven
2. Removed lib folder dependencies
3. CrunchifyJSON.txt file data added
4. Steps on how to add project to tomcat server
5. Explanation on 405 error
6. Added /api/verify method
7. Client code updated with local file location
Hi, I am trying to develop webservices for a data collection server. I understand the restful services part of the schema, but what does the independent data collection server have to do differently to serve data to webservices? To be clear, “Data server – Webservices – third party client” is the overall schema. When a client requests data from webservices, how does it get it from the data server? HTTP request? Data server should send HTTP responses? Please explain.