WordPress powers more than 42.3% of the web according to w3techs.com.
It’s no secret that WordPress is the most powerful blogging platform in the world right now. I’ve started working with WordPress long time back sometime around 2008.
- Are you a fresh graduate?
- Wanted to start your first fresh new blog?
- Do you have a very interesting Niche Topic to share with readers.
- Want to become a sensational entity in this world?
Well, all of these starts with starting putting your thoughts in front of people. Without a right blog and audience it may be hard to sell your ideas. WordPress platform was very basic during early days but have came across lots of tips and tricks on how to get started and customize your first WordPress blog.
How to Start a Self-Hosted WordPress Blog Right way?
In this tutorial we are going to go over steps on how to start your first Self-Hosted WordPress site. To become a professional blogger from personal blogger is not tough but takes lots of dedication and thinking. Earning money shouldn’t be your primary goal, instead provide best reader experience is the key to success. Making Money Online comes next.
This tutorial works for you if you have below questions:
- First Steps With WordPress
- Creating and Publishing Your First WordPress Blog Post
- Start Blogging: Your First WordPress Blog Setup
- How to Launch a Self-Hosted WordPress Blog
- 10 Essential First Steps When Starting A WordPress Blog
- How to Start a WordPress Blog in 5 Minutes
- How to start a wordpress blog website
- How to start a wordpress blog with godaddy
- How to start a wordpress blog with hostgator
- How to start a wordpress blog from scratch
- Bootstrap with WordPress
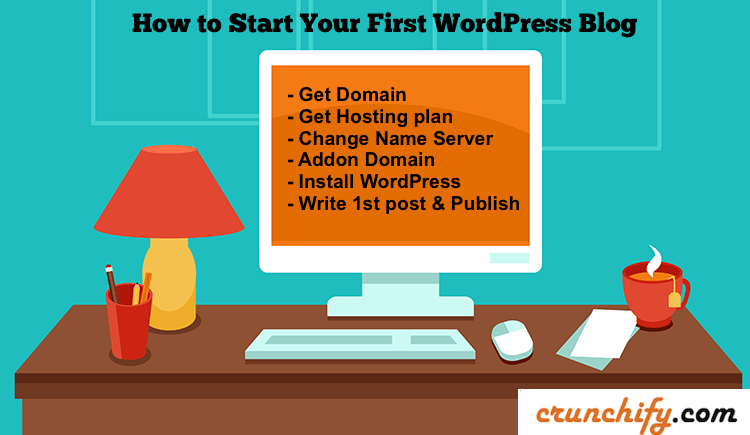
Let’s get started:
Step-1 – Get Domain
First thing you need is to get Good Domain name. In initial days I was hosting all my domains at GoDaddy (just $0.99/year) but now we moved everything to Google Domains. Google Domains is in market since last 2015 and it’s very stable now. I love all the functionalities it provides. Pretty simple and easy to use.
Choosing a right domain name is very important. There are quite a few factors which you need to consider before choosing right name.
Some of the factors which I personally used for my number of blogs:
- As
.comis a top tier domain extension – I would suggest to get .com if you get it. If it’s not available for you to register then better go for.net, .co, .io. - Before choosing .net, .co or other extension checkout how your preferred but not available .com domain is
popular? If the .com domain is very popular, I would suggest to go choose another name. It will bevery competitive to survivewith identify in that case. - Make sure you have at least below social network handles available for your
site's identity. - Keep your domain name
Short and Simple - I would say –
don't use hyphen( – ) in domain name
Where to register your domain name?
There are number of domain name registrars available in the market. Here are few:
- GoDaddy
- NameCheap
- Google Domains – Google provides
free private registrationoption.
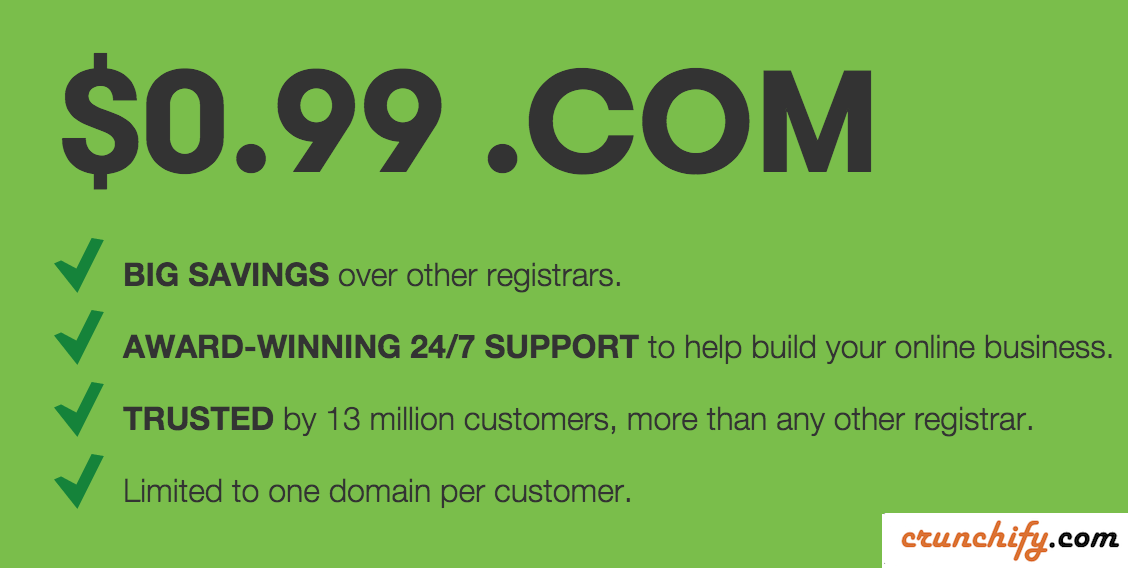
If you want to get your first .com domain for just $.0.99 then go here.
Step-2 – Get Hosting Plan
Once you have good domain name then you need nice and reliable hosting service. For your 1st WordPress blog I would say go for standard shared hosting service by HostGator or Bluehost.
We are hosted at Kinsta.
Now let’s understand hosting plans
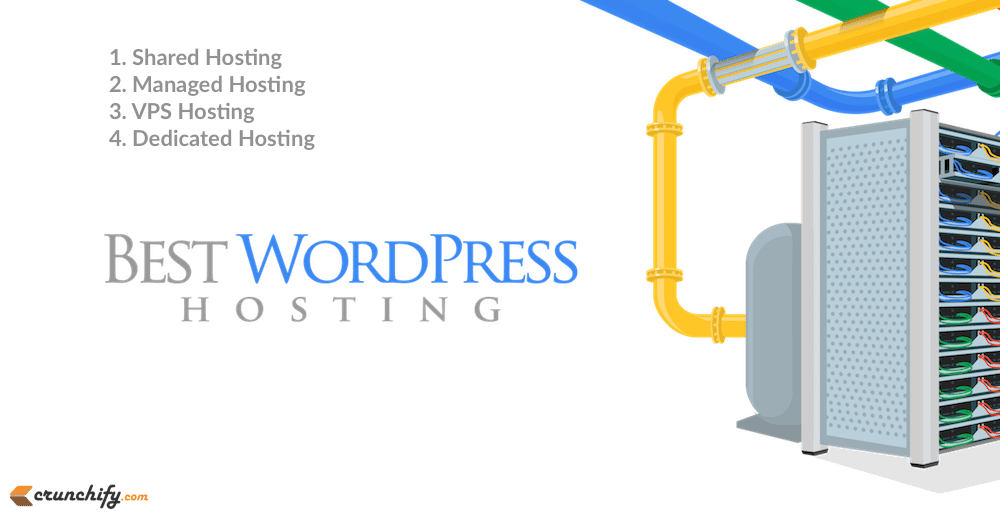
image source: thebloggingbuddha
What is a hosting service?
Service which hosts your all files on Shared Server or Dedicated Server called hosting service. Below are few characteristics:
- Web Hosting or server is much like the space that you rent out to have your business in
- You pay like
~$5/monthup-to~$100/monthas per your need - You will get shared IP/Dedicated IP as per your plan, so you can login and put your blog files there.
- Nowadays almost all hosting service comes with cPanel. Which has 1-click setup for WordPress.
There is a very big competition between hosting providers now. Bluehost, Hostgator, GoDaddy or Kinsta all provides very decent service plan. Choose one which suites you.
NOTE:These are affiliate links – we make some commission if you use above links to purchase hosting plan.
There are multiple option you would have before choosing best plan. Here are few options and details:
Standard SharedWeb Hosting Details- It comes with Flexible, Easy to Use Control Panel
- Unmetered Bandwidth
- Unlimited domains
- Unlimited Databases
- 99% uptime
- At Least ~30 days money back guarantee
- You share hosting resources like CPU, Memory with other blogs hosted on same Server
Managed/DedicatedWordPress Hosting- It comes with all above features mentioned in Standard Hosting plan
- + Better speed, support and security just related to WordPress
- + Free migration service if you want to move your blog from other hosting service
- + More valuable tips and tricks just related to WordPress
VPS(Virtual Private Server) Hosting- We will discuss this on different tutorial in details
DedicatedHosting- Same – We will discuss this on different tutorial in details
I would say – go for option 1 or 2 and it may not cost your more than ~$10/month for your first blog. Don’t worry about other costly hosting service as you can always move to next higher plan anytime.
Any coupon?
Yeah. Link gives you best discounted rates.
Bluehostgive cheap hosting right now for just $3.25/month. Grab deal here.Hostgatoralso give better deals. Grab deal here.
Want to look for all WordPress deals?
Step-3 – Change Name Server
Once you register for hosting plan, you have to point your Domain’s Name Server to hosting company.
- If you have registered your Domain at GoDaddy then go to
My Account - Click on
Manage buttonnext toDOMAINS

- Click on Gear button and select Manager DNS
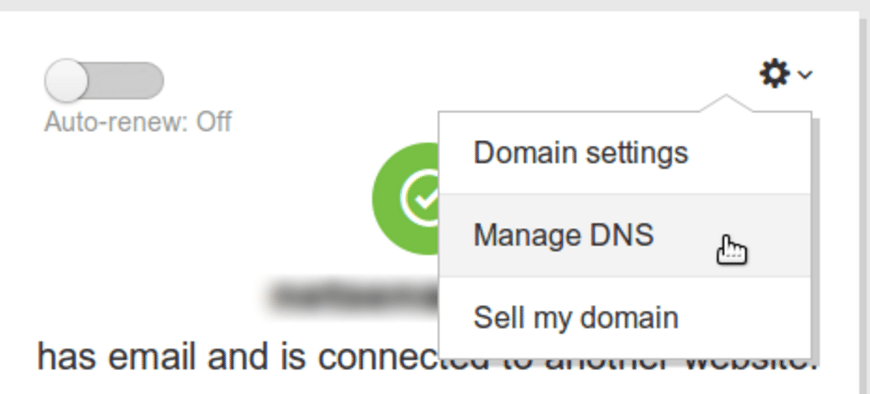
- Change NameServer to below if you have purchased your hosting plan at Bluehost
- ns1.bluehost.com
- ns2.bluehost.com
- Change NameServer to below if you have purchased your hosting plan at Hostgator
- ns1.hostgator.com
- ns2.hostgator.com
- Make sure to check and
double confirmName Server (NS) in your hosting service’scPanelaccount.
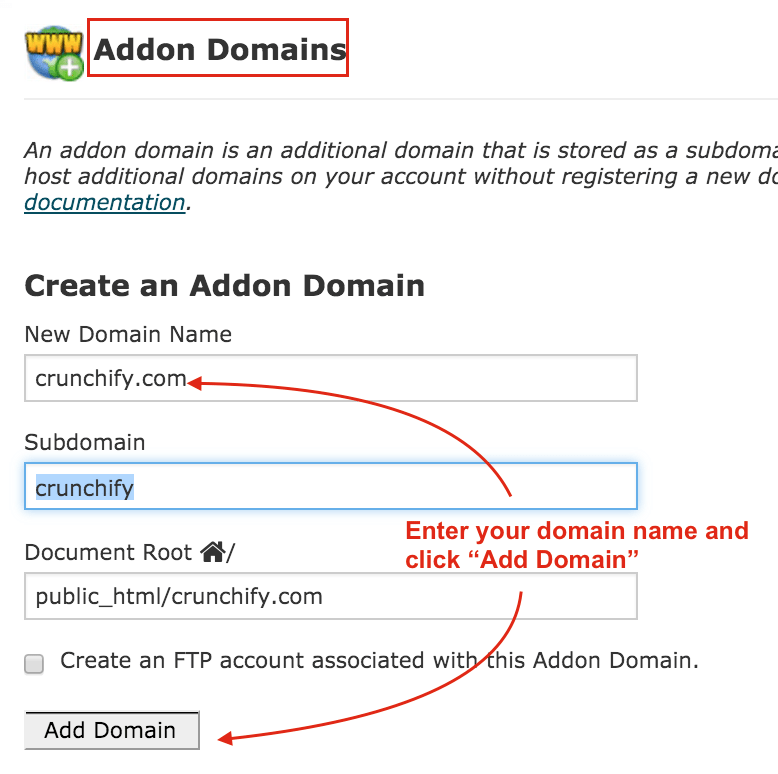
Step-4 – Add your Domain to cPanel
NOTE: sometime Bluehost or Hostgator gives your free domain during registration. In that case you may not need to perform this step. Domain might be added to your cPanel automatically.
But in other case – follow below steps:
- Login to
cPanel - Click on
Addon Domain
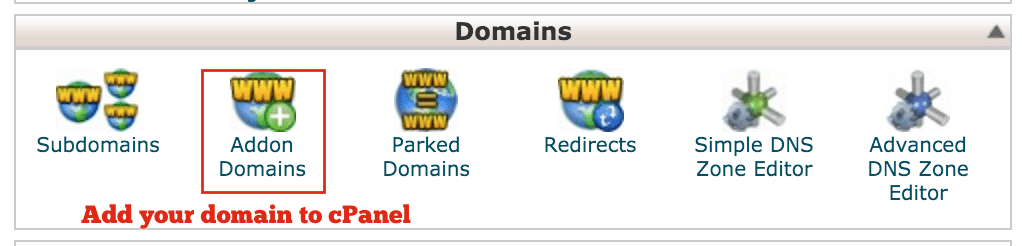
- Provide below information and click
Add Domain
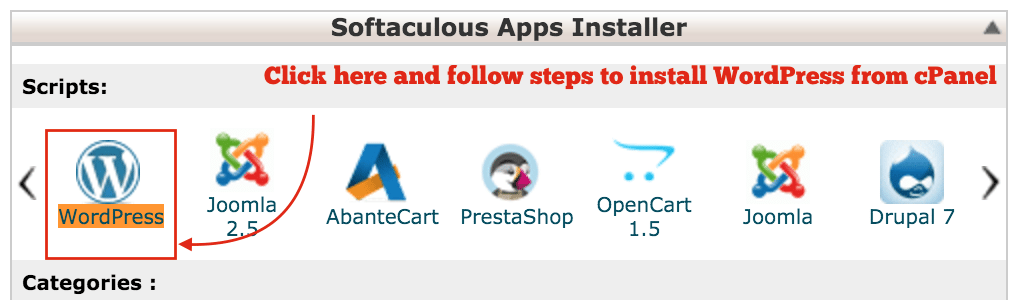
Step-5 Install WordPress
WordPress comes with WordPress.com and WordPress.org option.
- WordPress.com is mainly controlled by team Automattic, company behind WordPress only
- WordPress.org is a
self-hosted versionand that’s what we need in our case - Search for WordPress in cPanel
- Select your domain and follow steps to install WordPress
Step-6 – Login and post your first post
Once you have installed WordPress successfully, follow below steps to post your first post.
Loginto WordPress Admin Panel. In my case:https://crunchify.com/wp-admin/. Change URL and replace Crunchify with your domain name- Click on
Postsfrom Left Sidebar - Click on
Add New - Write your first post and click on
Publish button
And you are all set. Congratulations. Your site is up and running.
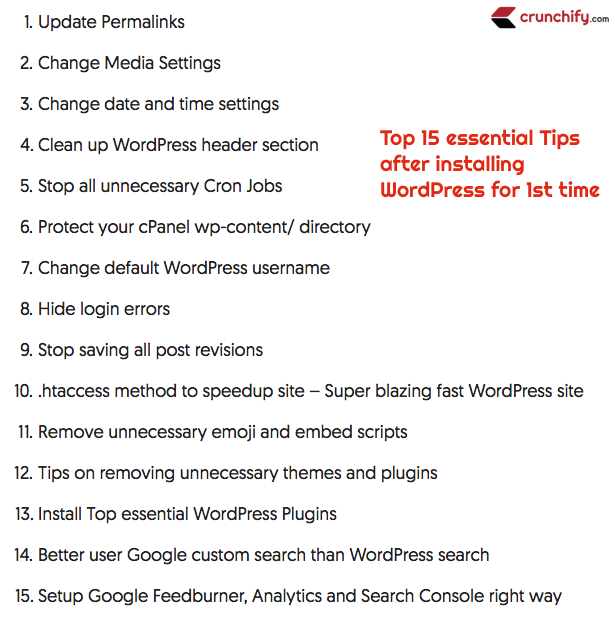
Now what? What should I do after installing WordPress for first time?
Remember– installing WordPress is just a first step. After installing WordPress for first time it’s time for you to go for 2nd step:15 essential stepsyou need to perform to speedup and optimize your site with solid security. Orclick belowto go directly to tutorial.
Tutorial covers all 15 below steps to fine-tune WordPress 🙂