How To Create A WordPress Plugin and Getting Started with WordPress Plugin Development?
Are you a new WordPress developer? Have you started working on WordPress recently? Are you looking to create new WordPress Plugin?
How to create wordpress plugin from scratch? Well, you are at right place.
In this tutorial we will go over how to create your Hello World WordPress Plugin from scratch. This is a step by step guide on WordPress plugin development tutorial .
Before we get started here is a WordPress plugin design and what we are going to do:
- We will create simple Hello World WordPress Plugin
- Create file
crunchify-hello-world.phpwhich has all Plugin code - Create
readme.txtfile with basic information - Plugin will have below functionalities
- New menu
Crunchify PluginunderSettingsmenu - New Plugin
admin page - User will have option to
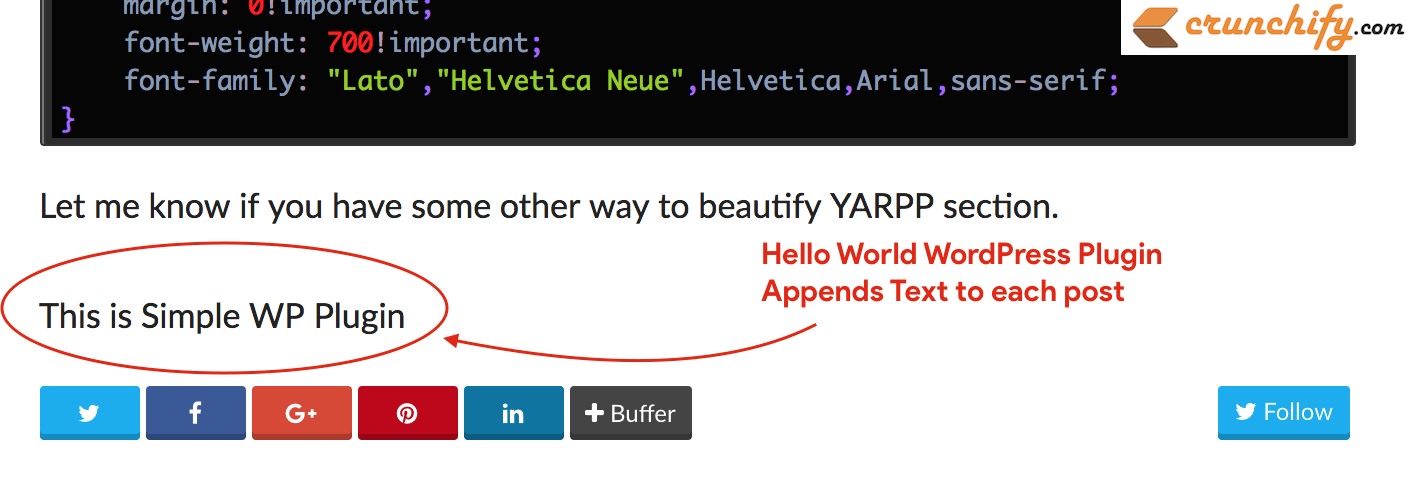
add valueto oneTextfield Save buttonto save setting- Plugin will
append saved textvalue to bottom ofevery post
- New menu
Let’s get started:
Step-1 Create Plugin Metadata.
Create file crunchify-hello-world.php and put below code first.
<?php
/**
 * Crunchify Hello World Plugin is the simplest WordPress plugin for beginner.
 * Take this as a base plugin and modify as per your need.
 *
 * @package Crunchify Hello World Plugin
 * @author Crunchify
 * @license GPL-2.0+
 * @link https://crunchify.com/tag/wordpress-beginner/
 * @copyright 2017 Crunchify, LLC. All rights reserved.
 *
 *            @wordpress-plugin
 *            Plugin Name: Crunchify Hello World Plugin
 *            Plugin URI: https://crunchify.com/tag/wordpress-beginner/
 *            Description: Crunchify Hello World Plugin is the simplest WordPress plugin for beginner. Take this as a base plugin and modify as per your need.
 *            Version: 3.0
 *            Author: Crunchify
 *            Author URI: https://crunchify.com/
 *            Text Domain: crunchify-hello-world
 *            Contributors: Crunchify
 *            License: GPL-2.0+
 *            License URI: http://www.gnu.org/licenses/gpl-2.0.txt
 */
Here below fields are absolutely required and should be unique to your plugin:
- Plugin Name
- Plugin URI
- Description
- Version
- Author
- Author URI
- Text Domain
- Contributors
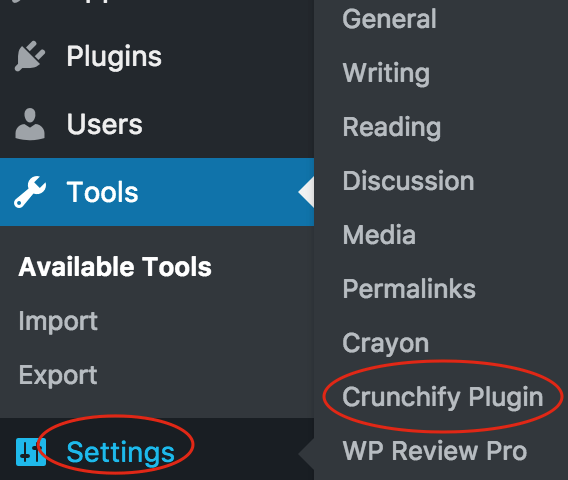
Step-2 Add submenu section
function crunchify_add_menu() {
	add_submenu_page("options-general.php", "Crunchify Plugin", "Crunchify Plugin", "manage_options", "crunchify-hello-world", "crunchify_hello_world_page");
}
add_action("admin_menu", "crunchify_add_menu");
We are using add_action WordPress hook to add submenu for our plugin.
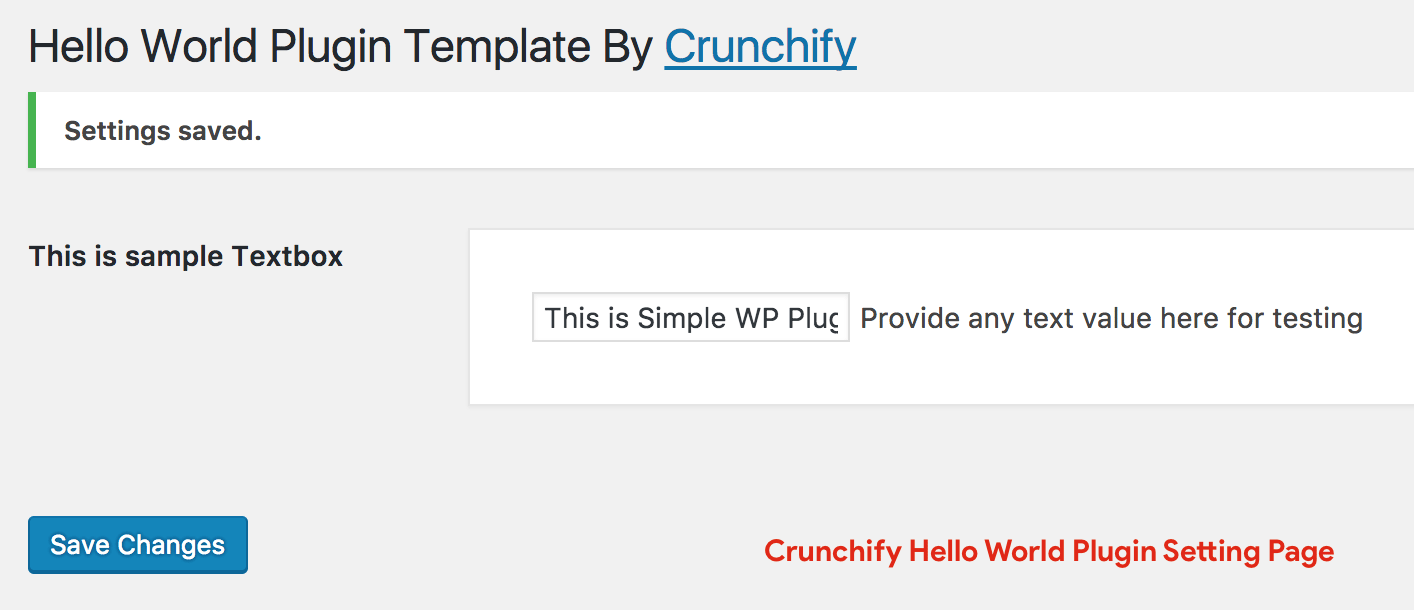
Step-3 Create plugin setting page
In our case Settings -> Crunchify Plugin.
function crunchify_hello_world_page()
{
?>
<div class="wrap">
	<h1>
		Hello World Plugin Template By <a
			href="https://crunchify.com/optimized-sharing-premium/" target="_blank">Crunchify</a>
	</h1>

	<form method="post" action="options.php">
            <?php
	settings_fields("crunchify_hello_world_config");
	do_settings_sections("crunchify-hello-world");
	submit_button();
?>
         </form>
</div>

<?php
}

function crunchify_hello_world_settings() {
	add_settings_section("crunchify_hello_world_config", "", null, "crunchify-hello-world");
	add_settings_field("crunchify-hello-world-text", "This is sample Textbox", "crunchify_hello_world_options", "crunchify-hello-world", "crunchify_hello_world_config");
	register_setting("crunchify_hello_world_config", "crunchify-hello-world-text");
}
add_action("admin_init", "crunchify_hello_world_settings");

function crunchify_hello_world_options() {
?>
<div class="postbox" style="width: 65%; padding: 30px;">
	<input type="text" name="crunchify-hello-world-text"
		value="<?php
	echo stripslashes_deep(esc_attr(get_option('crunchify-hello-world-text'))); ?>" />
	Provide any text value here for testing<br />
</div>
<?php
}
Step-4 Append Saved Textfield value to each post
add_filter('the_content', 'crunchify_com_content');
function crunchify_com_content($content) {
	return $content . stripslashes_deep(esc_attr(get_option('crunchify-hello-world-text')));
}
Complete code:
Here is a complete Hello World WordPress Plugin code. Just copy it below and save to file crunchify-hello-world.php file.
<?php
/**
 * Crunchify Hello World Plugin is the simplest WordPress plugin for beginner.
 * Take this as a base plugin and modify as per your need.
 *
 * @package Crunchify Hello World Plugin
 * @author Crunchify
 * @license GPL-2.0+
 * @link https://crunchify.com/tag/wordpress-beginner/
 * @copyright 2017 Crunchify, LLC. All rights reserved.
 *
 *            @wordpress-plugin
 *            Plugin Name: Crunchify Hello World Plugin
 *            Plugin URI: https://crunchify.com/tag/wordpress-beginner/
 *            Description: Crunchify Hello World Plugin is the simplest WordPress plugin for beginner. Take this as a base plugin and modify as per your need.
 *            Version: 3.0
 *            Author: Crunchify
 *            Author URI: https://crunchify.com/
 *            Text Domain: crunchify-hello-world
 *            Contributors: Crunchify
 *            License: GPL-2.0+
 *            License URI: http://www.gnu.org/licenses/gpl-2.0.txt
 */

/**
 * Adding Submenu under Settings Tab
 *
 * @since 1.0
 */
function crunchify_add_menu() {
	add_submenu_page ( "options-general.php", "Crunchify Plugin", "Crunchify Plugin", "manage_options", "crunchify-hello-world", "crunchify_hello_world_page" );
}
add_action ( "admin_menu", "crunchify_add_menu" );

/**
 * Setting Page Options
 * - add setting page
 * - save setting page
 *
 * @since 1.0
 */
function crunchify_hello_world_page() {
	?>
<div class="wrap">
	<h1>
		Hello World Plugin Template By <a
			href="https://crunchify.com/optimized-sharing-premium/" target="_blank">Crunchify</a>
	</h1>

	<form method="post" action="options.php">
            <?php
	settings_fields ( "crunchify_hello_world_config" );
	do_settings_sections ( "crunchify-hello-world" );
	submit_button ();
	?>
         </form>
</div>

<?php
}

/**
 * Init setting section, Init setting field and register settings page
 *
 * @since 1.0
 */
function crunchify_hello_world_settings() {
	add_settings_section ( "crunchify_hello_world_config", "", null, "crunchify-hello-world" );
	add_settings_field ( "crunchify-hello-world-text", "This is sample Textbox", "crunchify_hello_world_options", "crunchify-hello-world", "crunchify_hello_world_config" );
	register_setting ( "crunchify_hello_world_config", "crunchify-hello-world-text" );
}
add_action ( "admin_init", "crunchify_hello_world_settings" );

/**
 * Add simple textfield value to setting page
 *
 * @since 1.0
 */
function crunchify_hello_world_options() {
	?>
<div class="postbox" style="width: 65%; padding: 30px;">
	<input type="text" name="crunchify-hello-world-text"
		value="<?php
	echo stripslashes_deep ( esc_attr ( get_option ( 'crunchify-hello-world-text' ) ) );
	?>" /> Provide any text value here for testing<br />
</div>
<?php
}

/**
 * Append saved textfield value to each post
 *
 * @since 1.0
 */
add_filter ( 'the_content', 'crunchify_com_content' );
function crunchify_com_content($content) {
	return $content . stripslashes_deep ( esc_attr ( get_option ( 'crunchify-hello-world-text' ) ) );
}
Step-5 Create readme.txt file
Here is a sample WordPress plugin readme.txt file.
=== Crunchify Hello World Plugin ===
Contributors: Crunchify
Donate link: https://www.paypal.com/cgi-bin/webscr?cmd=_s-xclick&hosted_button_id=8ZF6WATLYFELQ
Tags: Hello World Plugin, Crunchify Plugins, Beginner WordPress, WordPress Plugin
Requires at least: 4.5
Tested up to: 4.7.4
Stable tag: 3.0
License: GPLv2 or later
License URI: http://www.gnu.org/licenses/gpl-2.0.html

Create your fist plugin. Crunchify Hello World Plugin is the simplest WordPress plugin for beginner. Take this as a base plugin and modify as per your need.

== Description ==

Crunchify Hello World Plugin is the simplest WordPress plugin for beginner if you want to start creating fresh new plugin. Take this as a base plugin and modify as per your need.

== Installation ==
1. Unpack the `download-package`.
2. Upload the file to the `/wp-content/plugins/` directory.
3. Activate the plugin through the `Plugins` menu in WordPress.
4. Done and Ready.

== Frequently Asked Questions ==

= How to add FAQ question =
* just add your FAQ questions here

== Screenshots ==
1. This is a text label for your first screenshot
2. Add more screenshot labels as new line

== Changelog ==

= 3.0 =
* Initial release
Now what?
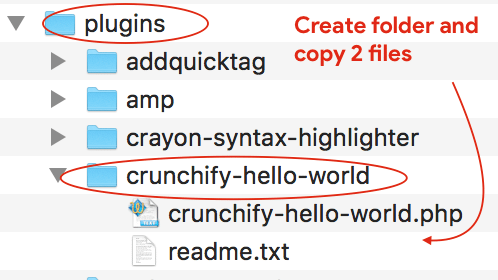
- Just create folder
crunchify-hello-worldunder/plugins folderand add copy both files there.
- Go to Admin Console -> Plugins
- Activate plugin
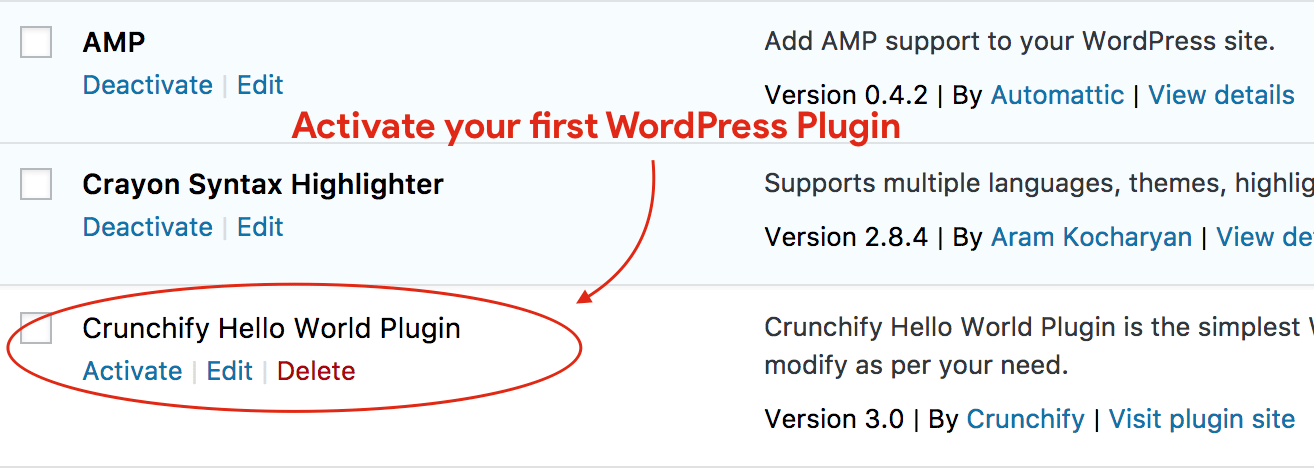
That’s it.
Begin Writing Your First WordPress plugin 🙂
Take this code as a sample of your first WordPress Plugin base and modify as per your need. In next tutorial we will go over some more complex array fields for some more functionality.
Please stay tuned and Happy blogging.