Have you ever tried creating Simple Java Web Service Definition Language in Eclipse? Well, here are few simple steps to create WSDL in Eclipse environment and Generate/Test Client.
Hope you find it useful. Also, if you have any of below questions then you are right location.
- Generating a client from WSDL – Eclipse
- Generating an Apache Axis2 Java client proxy from a WSDL
- Generating a Java client proxy and a sample application
- Generating Web Service Client
- generate client from wsdl using axis2 eclipse
Let’s get started:
Step-1
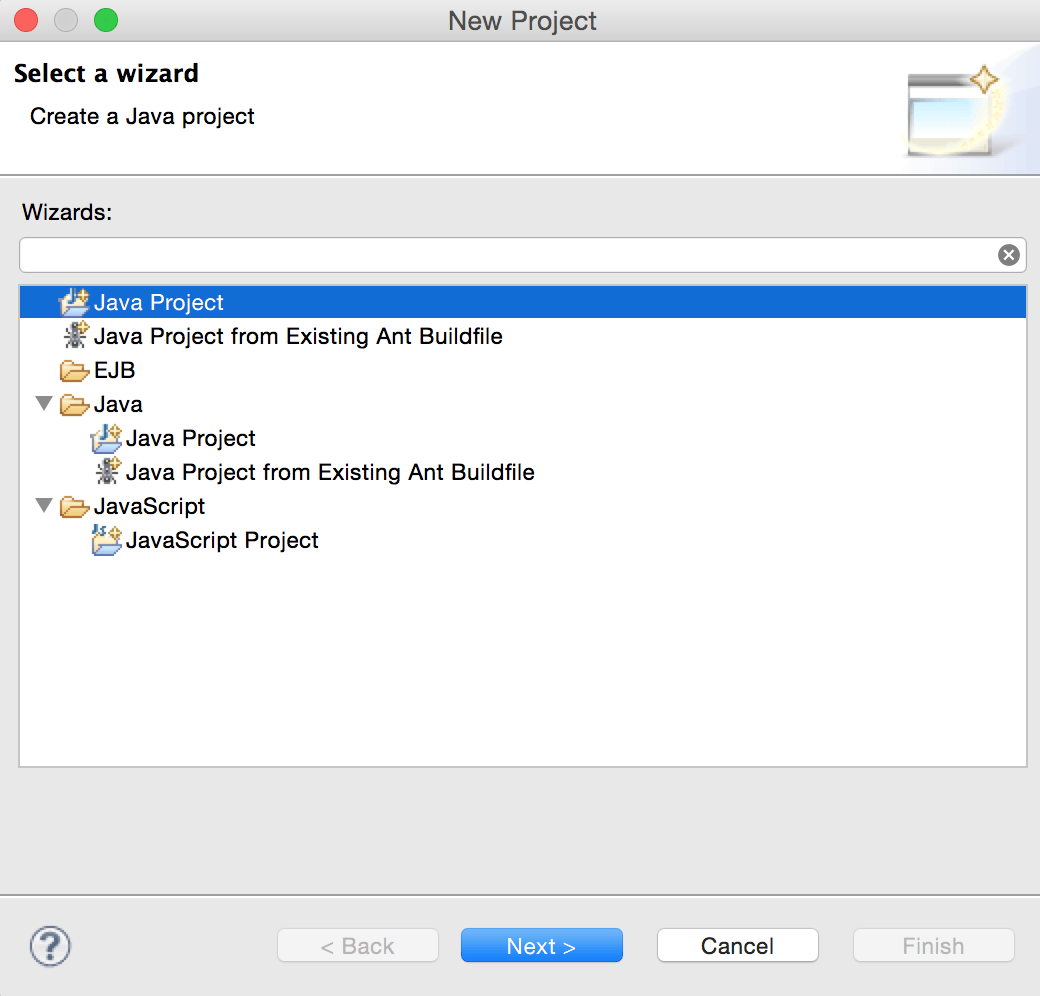
Create Java Project Called “CrunchifyWSDL“. File -> New Project -> Java Project -> Provide Name -> Finish.

Step 2.
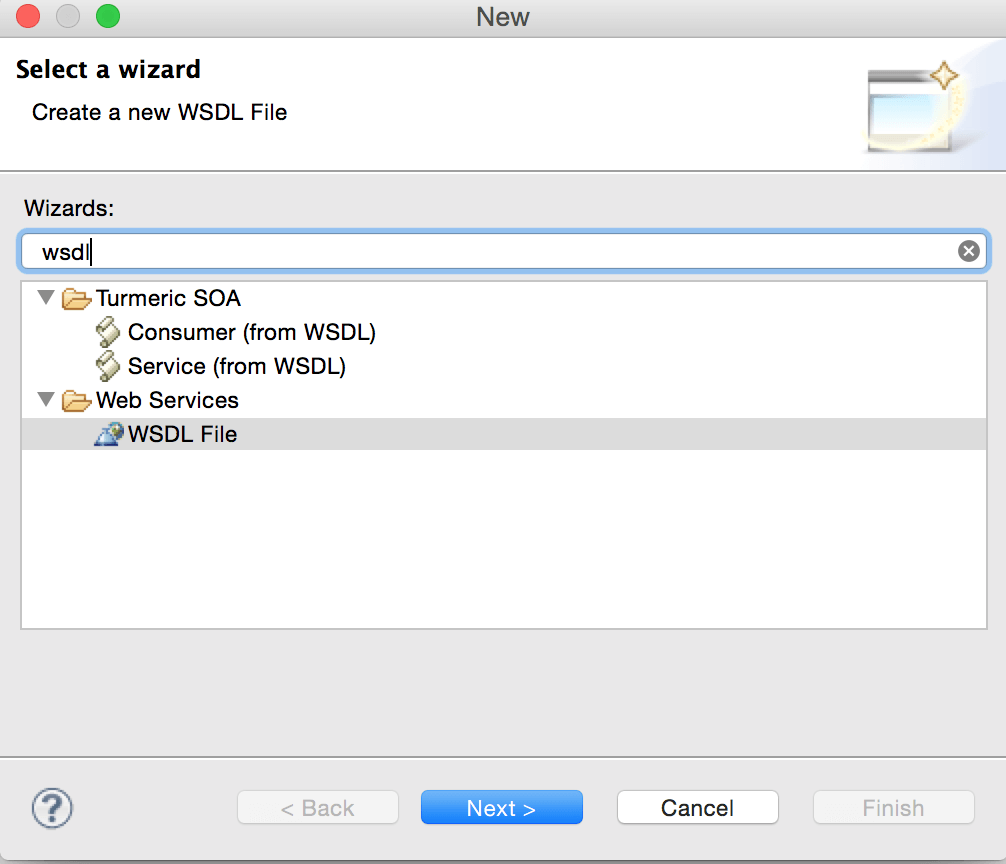
In the workbench, click File > New > Other and select Web Services > WSDL. Click Next.
Step 3.
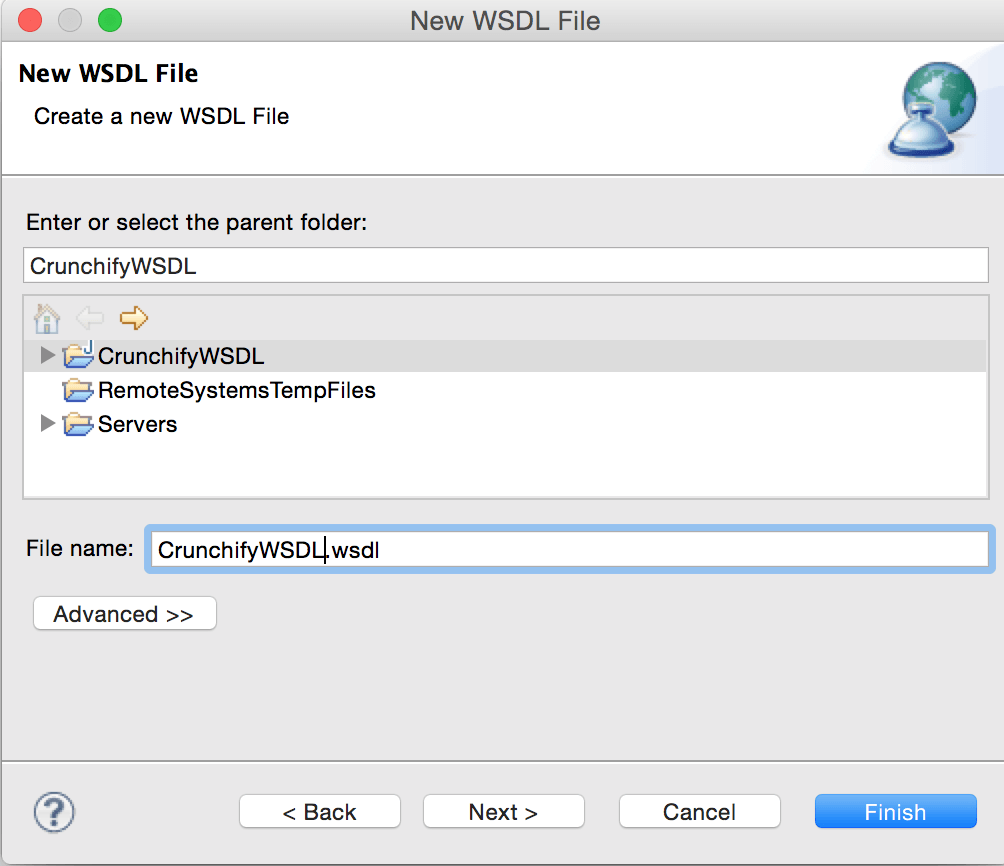
Select the project CrunchifyWSDL that will contain the WSDL file. In the File name field, type the name of the WSDL file, i.e. CrunchifyWSDL.wsdl. The name of your XML file must end in .wsdl.
Step 4.
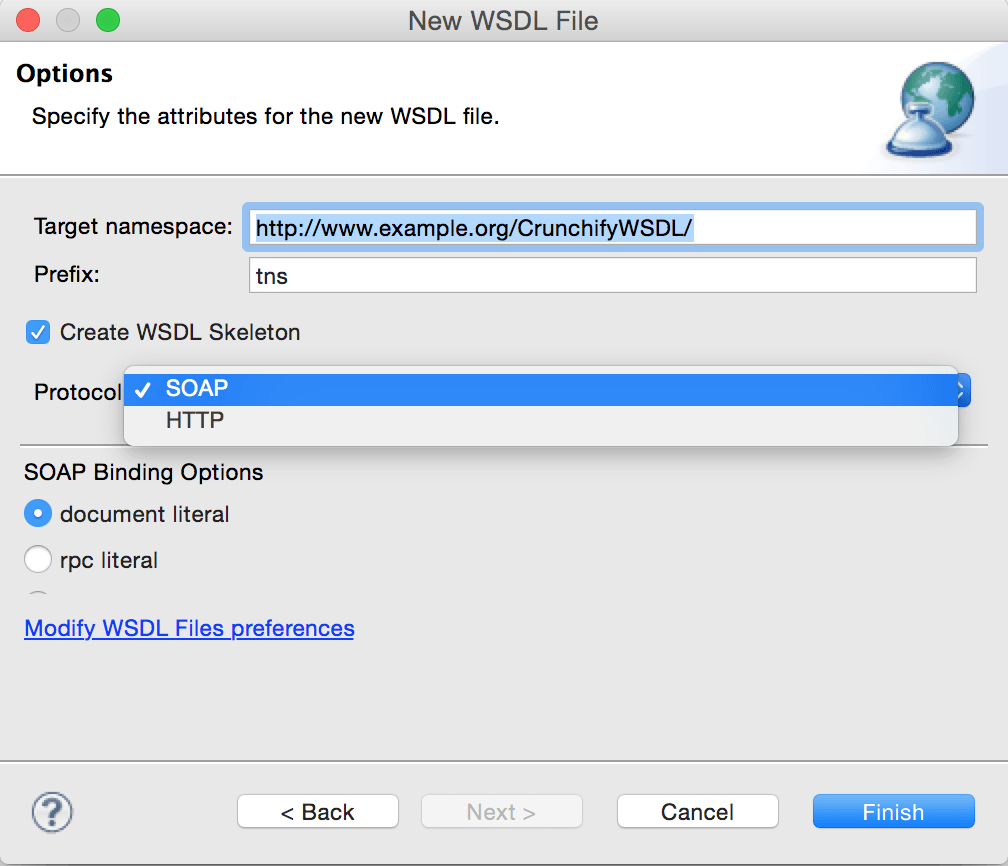
Click Next and enter the following information on the next page of the wizard:
- A Target namespace for the WSDL file or accept the default (http://www.example.org/MyWSDLFile/). The target namespace is used for the names of messages and the port type, binding and service defined in the WSDL file. The value must take the form of a valid URI (for example, http://www.mycompany.com/myservice/)
- The Prefix associated with the target namespace.
- Select Create WSDL Skeleton if you want the wizard to create the skeleton of the WSDL file. This will generate the WSDL elements required for your service, including bindings, ports and messages. You can then modify these to meet the requirements of your Web service .
- If you have chosen to create a WSDL skeleton, select the binding options you want to use in the Protocol drop down. The options are SOAP and HTTP. Use the SOAP protocol when you want to exchange structured and typed information. Use the HTTP protocol when you want your application client to just request or update information.
- If you select SOAP you can then select the encoding style you want to use:
- document literal. Document style messages, literal encoding. Use this style of binding when you want to send SOAP messages that can be validated by an XML validator. All the data types in the SOAP message body are defined in a schema, so the WSDL parts must point to schema elements.
- rpc literal. RPC style messages, literal encoding. Use this style of binding when you want to specify the operation method names in your SOAP messages so a server can dispatch the specified methods. Data types must be defined, so the WSDL parts must point to XSD types.
- rpc encoded. RPC style messages and SOAP encoding. Use this style of binding when you want to encode data graphs in your SOAP messages so a server can deserialize the object data. Data types must be defined, so the WSDL parts must point to XSD types.
- If you select HTTP you can select whether to create an HTTP getter or setter.
- HTTP GET. A GET request fetches data from a Web server based on an URL value and a set of HTTP headers. Use this method when you want to retrieve information specified in the request.
- HTTP POST. A POST request sends additional data to the server, specified after the URL and the headers. Use this method when you want to send data enclosed in the body of the request.
Step 5.
Open newly generated wsdl and change endpoint for testing as mentioned below.

Step 6.
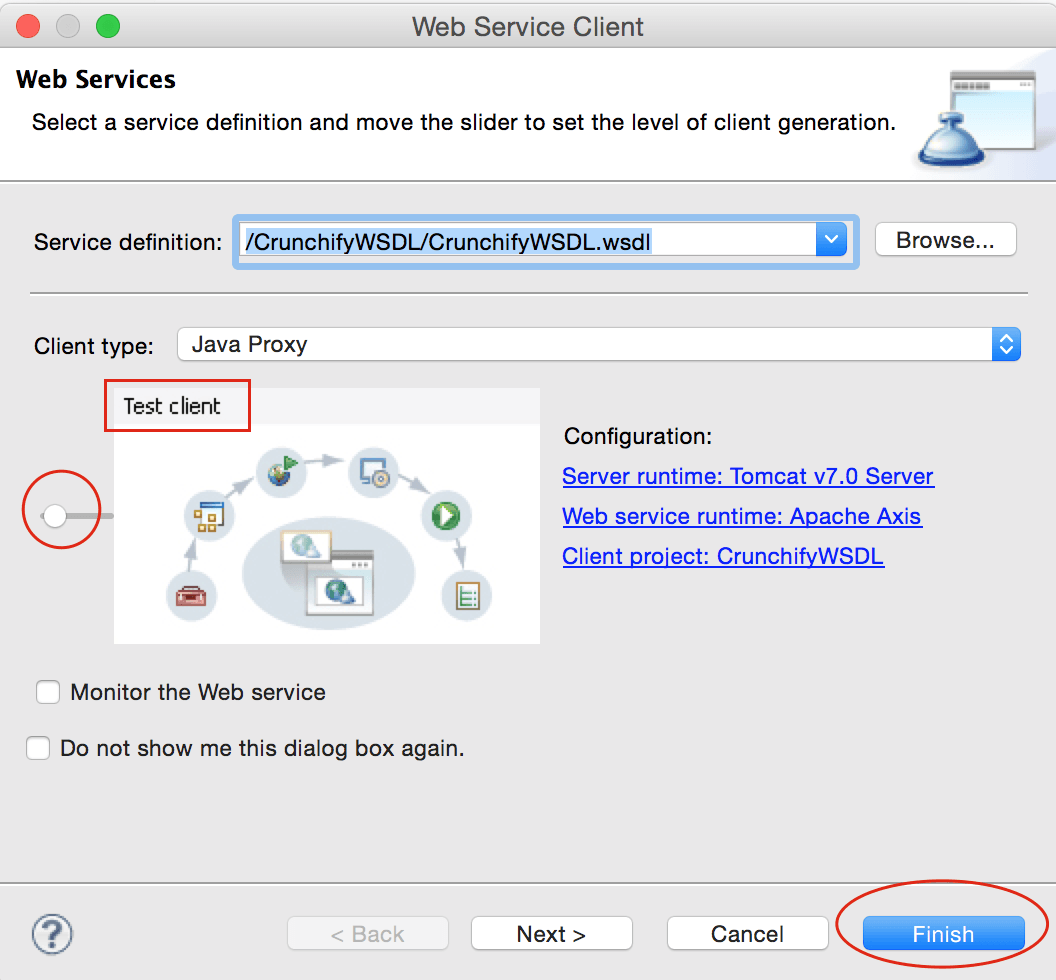
Right Click on CrunchifyWSDL.wsdl -> Web Services -> Generate Client


Step 7.
Select "Test Client" -> Finish.
If you see “org.eclipse.jst.ws.util.JspUtils cannot be resolved to a type” Error in Eclipse then follow these steps: https://crunchify.com/how-to-fix-org-eclipse-jst-ws-util-jsputils-cannot-be-resolved-to-a-type-error-in-eclipse/
Step 8.
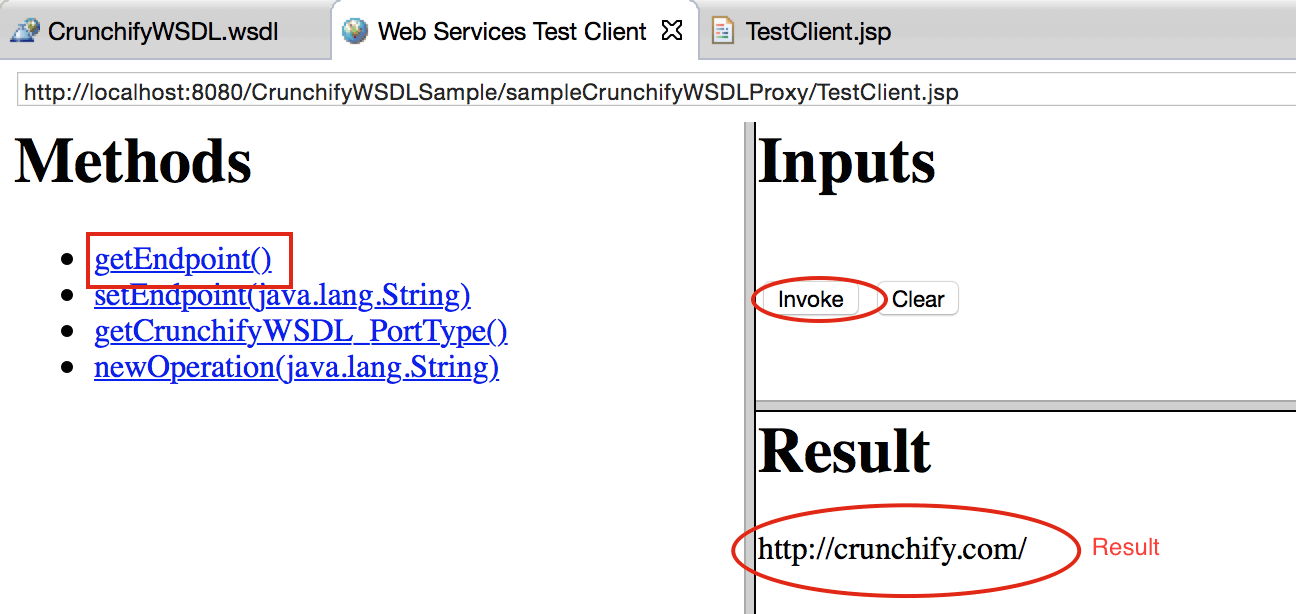
Click on "getEndpoint()" -> Invoke -> See result.
Other points to note:
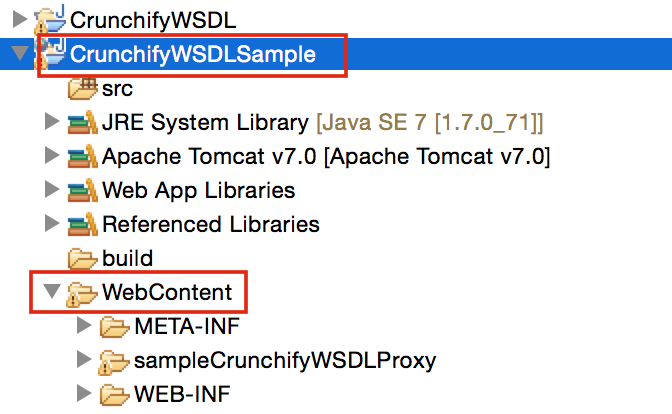
You will see new project “CrunchifyWSDLSample” created in Eclipse.
