I’ve been using WP Super-Cache since last 8 years and there is no doubt it’s the best Caching plugin available for WordPress.
There are more than 38K Plugins available in WordPress Plugin repository. Isn’t that amazing some WordPress Plugins really help enhance your blog’s functionality without any cost to you?
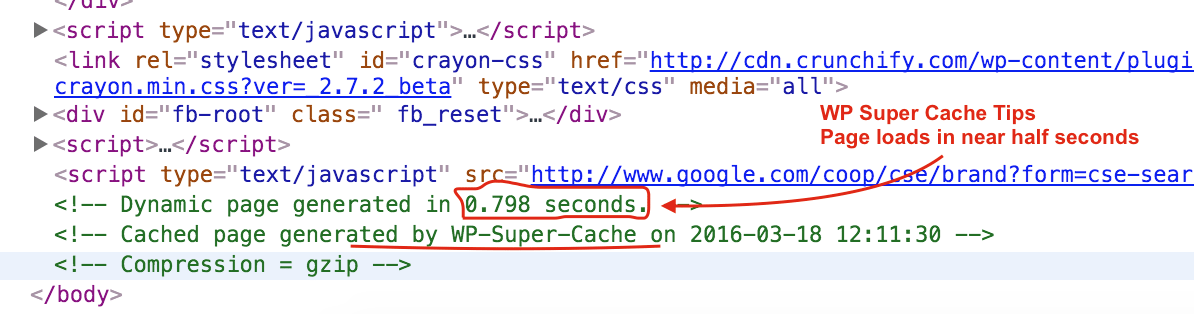
Yeah and WP Super Cache is one of them. In this tutorial we will go over basic wp super cache settings on how to configure it correct way. Let’s checkout Page load time first.
Now question is:
How to Configuring WP Super Cache Properly On High Traffic Site?
Here is a simple benefit. Consider this scenario:
Once you post an article on Social Media sites which have thousands of followers. There might be some possibility that – you may start getting more and more traffic for specific post within few minutes.
WordPress as a framework servers that HTTP request and builds HTML page with the combination of theme and DB data. Do you think you have to make ~1000 calls to DB in case of same post call? I believe, there is no need to generates thousands of requests on your server, rather just send request once to server and then serve the same Static page to all followers.
WP Super Cache plugin generates static html files from your dynamic WordPress blog. After a html file is generated and available under /cache folder, your Web Server will serve that static file instead of processing the comparatively heavier and more expensive WordPress PHP scripts.
The static html files will be served to the vast majority of your users, but because a user’s details are displayed in the comment form after they leave a comment those requests are handled by the legacy caching engine. Static files are served to:
- Users who are not logged in.
- Users who have not left a comment on your blog.
- Or users who have not viewed a password protected post.
99% of your visitors will be served static html files. Those users who don’t see the static files will still benefit because they will see different cached files that aren’t quite as efficient but still better than uncached.
Each and every person may have different setting and observation but we are running Crunchify with this WP Super Cache settings & would like to share the same with my users.
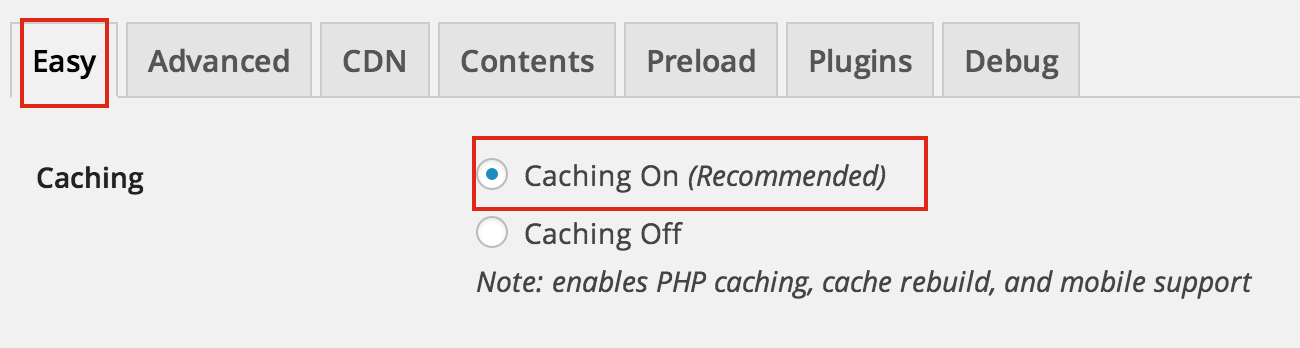
Step-1
Enable WP Super Cache From Easy Tab
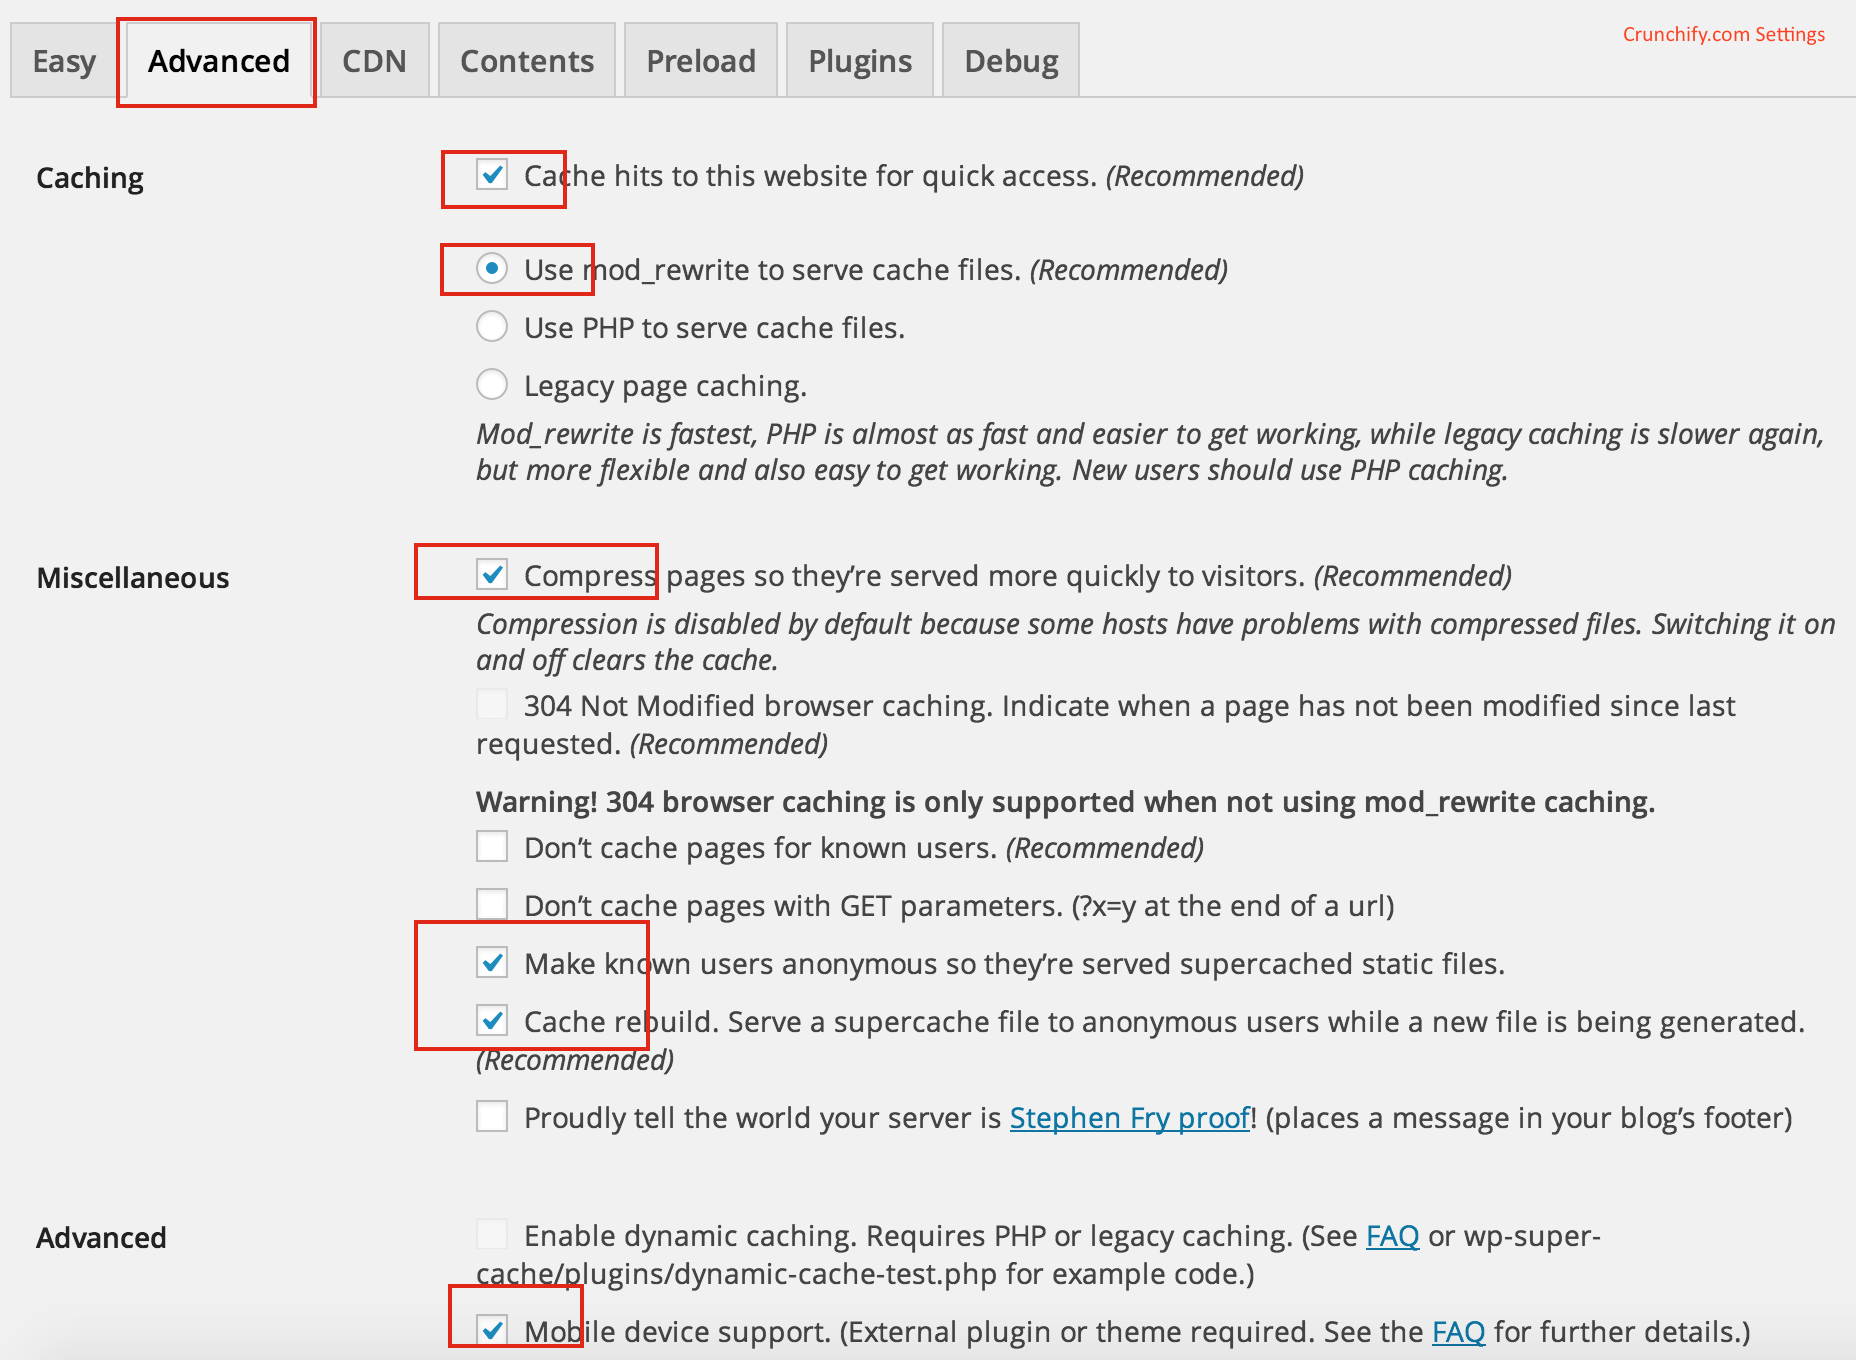
Step-2
Go to Advanced Tab and set below options:
- Cache hits to this website for quick access. (Recommended)
- Use mod_rewrite to serve cache files. (Recommended)
- Compress pages so they’re served more quickly to visitors. (Recommended)
- Cache rebuild. Serve a supercache file to anonymous users while a new file is being generated.(Recommended)
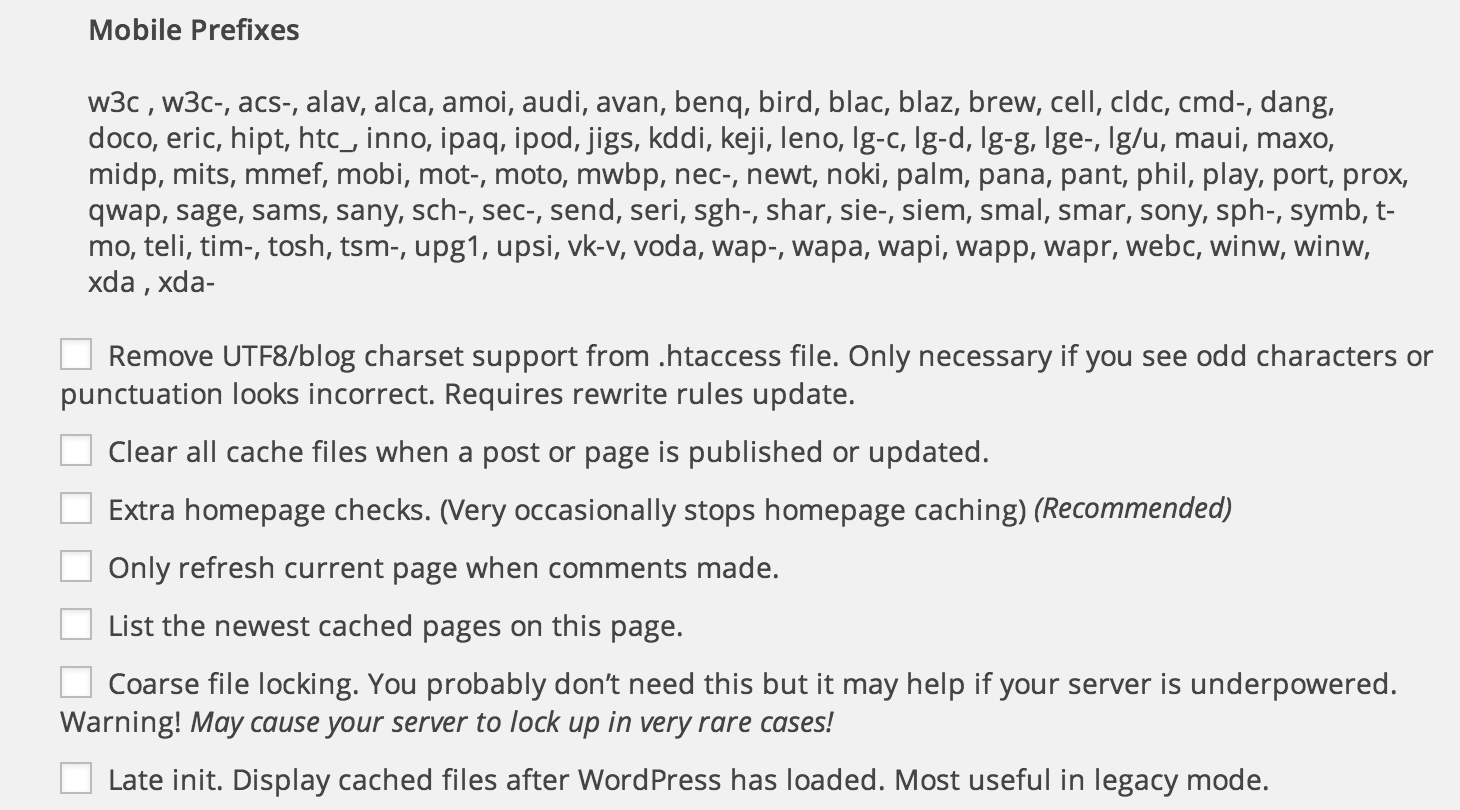
- Mobile device support. (External plugin or theme required. See the FAQ for further details.)
Step-3
- Click on
Update Status - Click on
Update Mod_Rewrite Rules
Step-4
- No selection for below options
Step-5
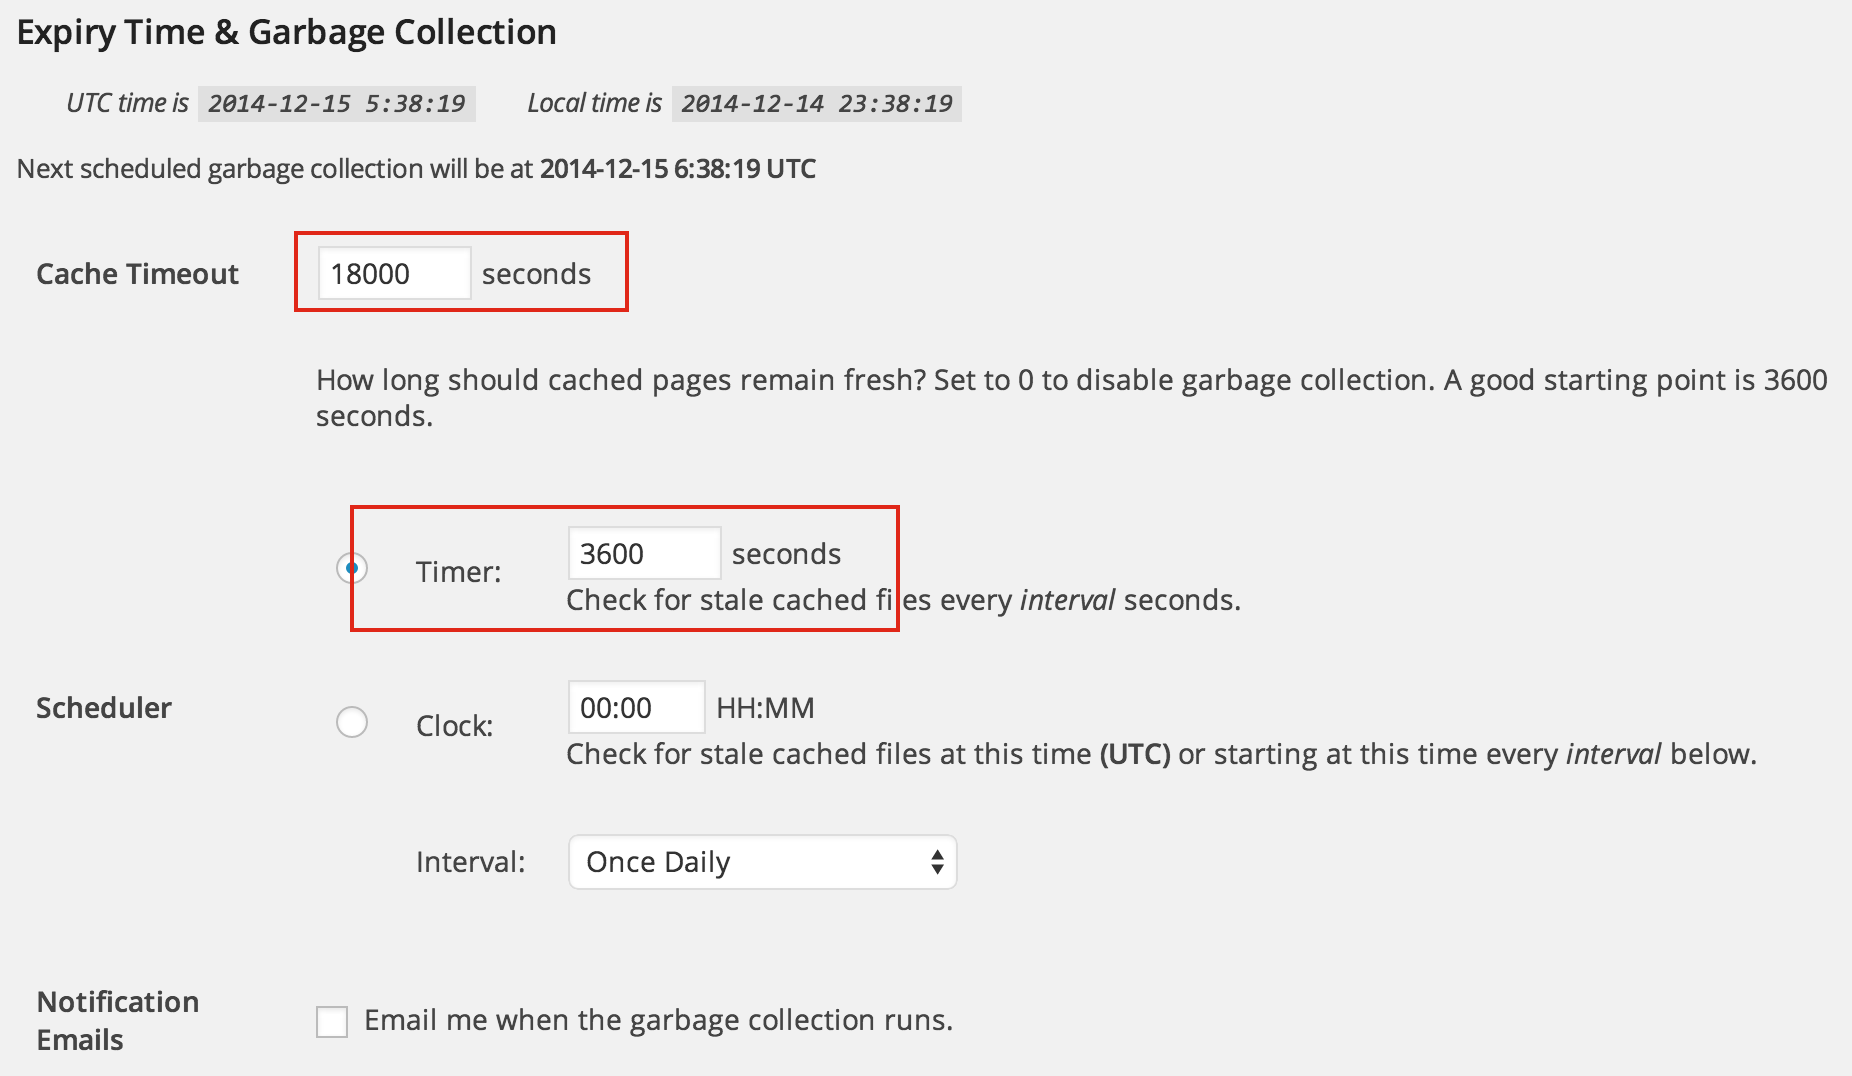
- Choose below Expiry Time & Garbage Collection
Step-6
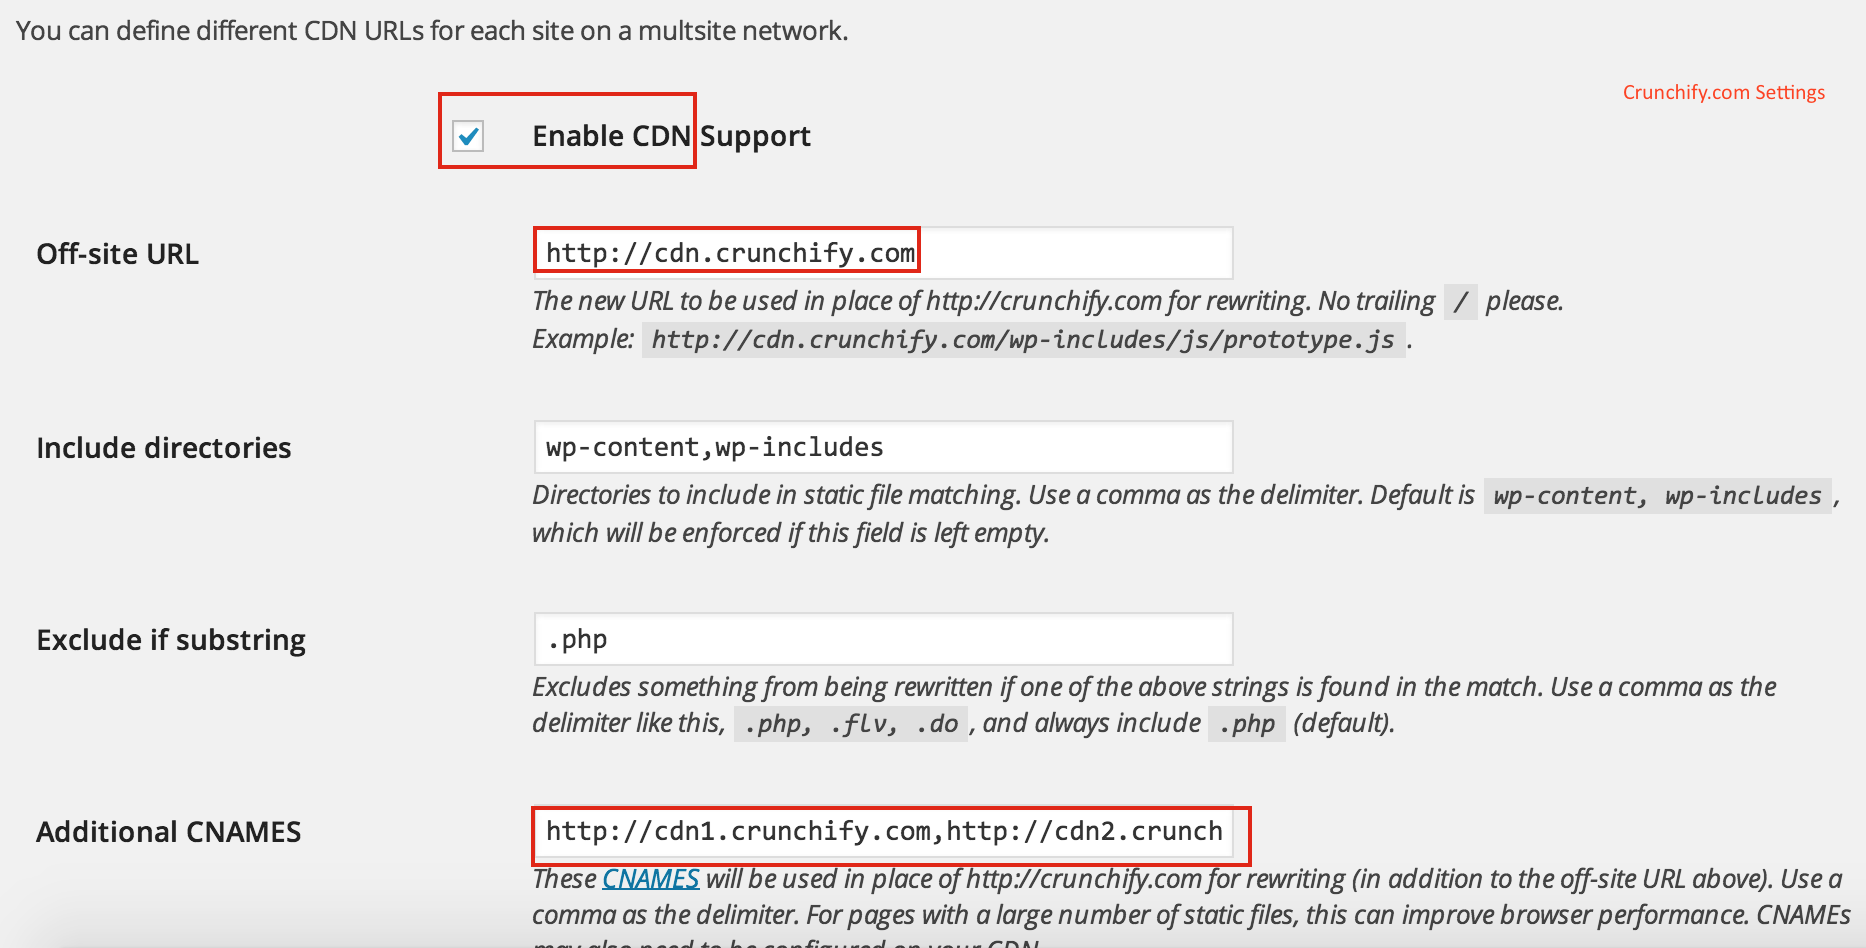
- Crunchify uses MaxCDN service for Content Delivery Network. Provide below options if you are already using it OR just keep box unchecked.
- I’m using 4 CNAMEs:
cdn.crunchify.com,cdn1.crunchify.com,cdn2.crunchify.comandcdn3.crunchify.com
Step-7
Go to Contents Tab and Click Delete Cache button. Keep Preload, Plugins, Debug tab untouched.
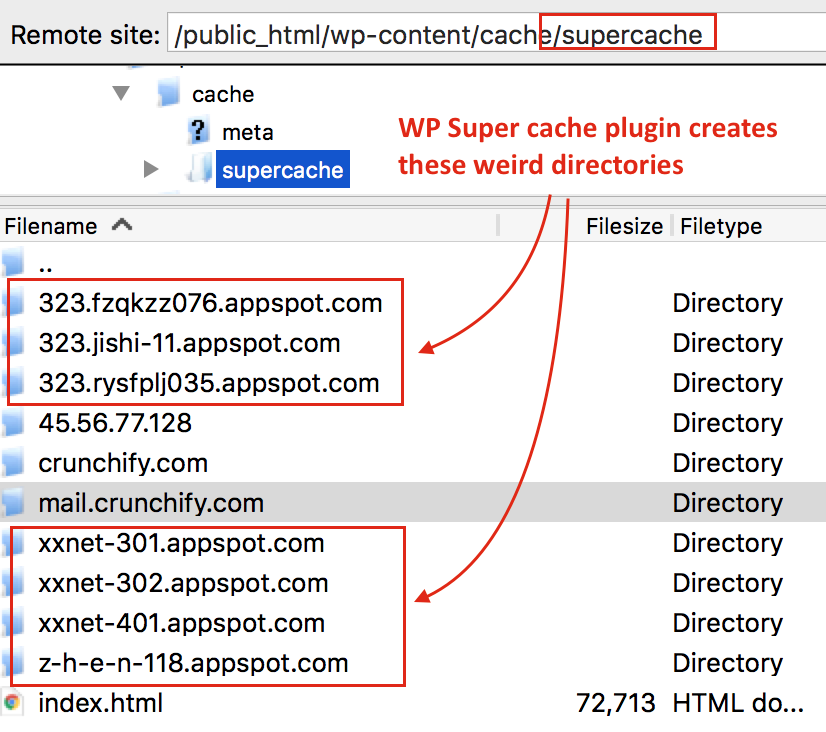
Is WP Super cache plugin creates these weird directories?