Creating WordPress Custom Post Type is very easy as we saw in tutorial How to Create Custom Post Type (CPT) and Custom Taxonomy in WordPress. Please follow that tutorial completely before applying below tips and tricks.
In this WordPress tutorial we will go over list of simple tips and tricks which will help you customize your WordPress Custom Post Type.
Tips-1.
How to get RSS Feed for your Custom Post Type in WordPress?
By default new Posts you create for your Custom Post Type doesn’t appear in your default RSS feed. Well it’s very easy to create custom RSS feed for Custom Post Type and Custom Taxonomy. Just use this pattern and you should be all good with RSS feed.
https://crunchify.com/feed/?post_type=deals
Here deals is a your Custom Post slug which you have used in this register_post_type( 'deals', $args ); in How to create CPT tutorial.
https://crunchify.com/feed/?post_type=deals&type=domain-deals
Where type is a Taxonomy and domain-deals is one of the Taxonomy. In both above URL replace crunchify.com with your sitename and you should be all good.
This tips will work if you have below questions too:
- How to Make a Separate RSS Feed for Each Custom Post
- Do custom post types generate RSS feeds?
- Feed for Custom Post Types
- create custom post type with custom taxonomy

Tips-2.
How to add/enable YARPP on custom post type in WordPress?
On Crunchify we use Yet Another WordPress Posts Plugin to show related posts. Yet Another Related Posts Plugin (YARPP) displays pages, posts, and custom post types related to the current entry, introducing your readers to other relevant content on your site.
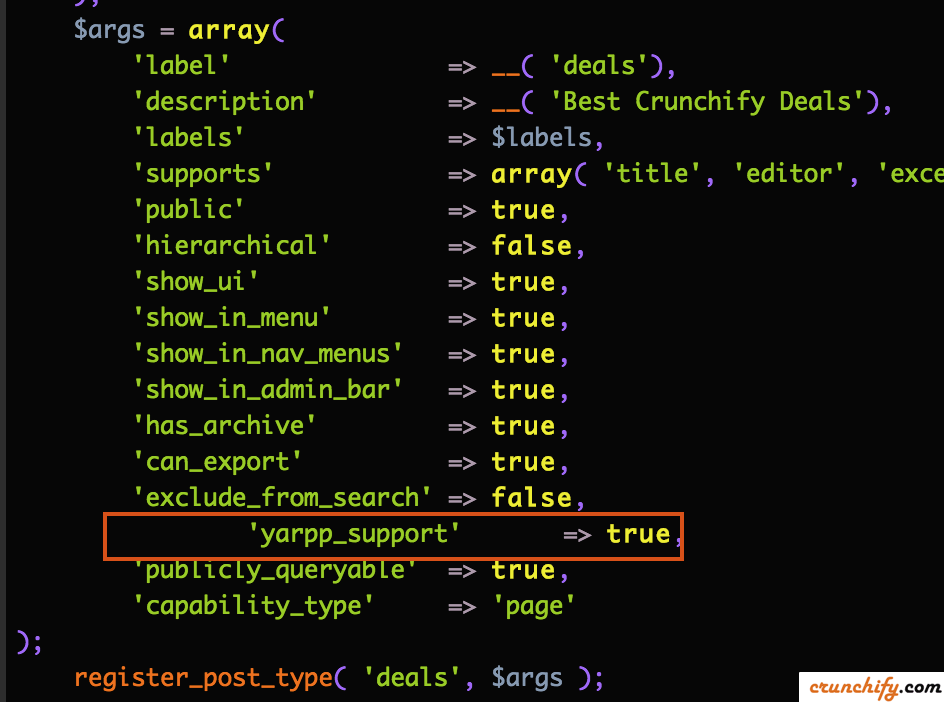
Just add below code to your Custom Post Types arguments. My previous tutorial on creating CPT already has it included 🙂
'yarpp_support' => true,
Once you add above code to functions.php you will see one additional option in YARPP admin setting page.

Tips-3.
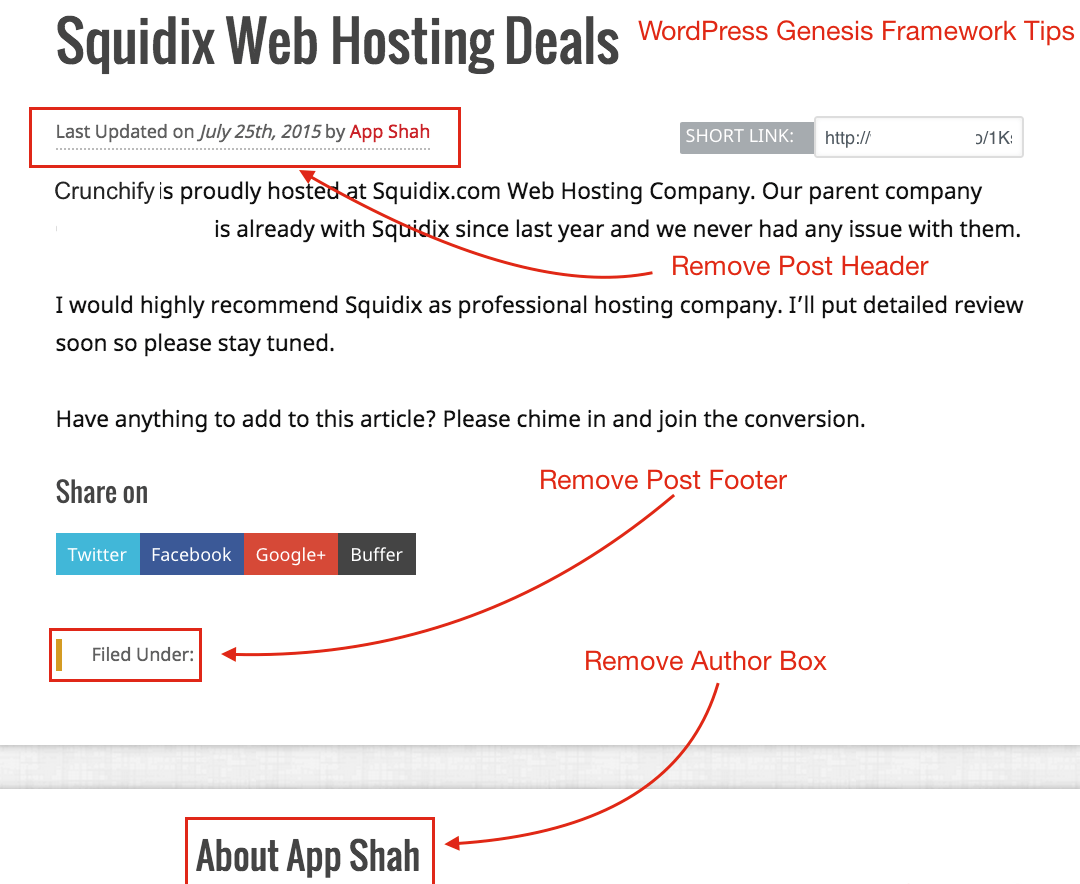
How to Remove Meta Header, Post Meta Footer, Author box and Share buttons in genesis framework?
Creating Custom Post Type is very easy as we saw in tutorial How to Create Custom Post Type (CPT) and Custom Taxonomy in WordPress. Please follow that tutorial completely before applying below tips and tricks.
If you want your custom post to be very clean and focused then you could remove list of below things which simple hook like
- Post Meta Header
- Post Meta Footer
- Author Box
- Share buttons
Just put below code to your WordPress theme’s functions.php file to disable all 4 sections.
add_action ('get_header', 'crunchify_cpt_deals_remove_post_info');
function crunchify_cpt_deals_remove_post_info() {
	if ('deals' == get_post_type()) {
		remove_action( 'genesis_entry_header', 'genesis_post_info', 12 );
		remove_action( 'genesis_entry_footer', 'genesis_post_meta' );
                remove_action( 'genesis_after_entry', 'genesis_do_author_box_single', 8 ); // this is for author box
                remove_filter( 'the_content', 'show_share_buttons'); // removes simple share buttons
	}
}

NOTE: this works if you are using WordPress Genesis Framework. Take a look at Deals page. We have removed all 3 sections from post.
Tips-4.
How to show Custom Post Type Posts on Home/Index/Front Page?
By default Custom Post Type doesn’t appear on Home/Index page. If you want to have it on Home then just add below code to your theme’s functions.php file.
function crunchify_cpt_in_home_loop( $query ) {
    if ( is_home() && $query->is_main_query() )
    $query->set( 'post_type', array( 'post', 'deals') );  // replace deals with your CPT name
    return $query;
}
add_filter( 'pre_get_posts', 'crunchify_cpt_in_home_loop' );
Tip-5. Show CPT in Archive.php file
Please follow this tutorial if you want to add Custom Posts to your Archive.php file.

