At Crunchify we use Google App for Business for our daily communication. Specially I love Gmail and can’t leave without a day. Currently we are using basic version of Google Apps for which we are paying $5/month per user.
I would definitely recommend Google Apps compare to Microsoft Office 365 plan.
Google Apps for Business comes with lots of features and one of them is DKIM (DomainKeys Identified Mail).
What is DKIM?
It lets an organization take responsibility for a message that is in transit in secure way. In this tutorial we will go over steps on how to TXT record from Admin Panel and how to modify your DNS records with it.
If you have any one of below questions then you are at right place.
- DKIM Explained: How to Setup and Use DomainKeys
- Setup
SPF(Sender Policy Framework)and DKIM TXT Records - How to setup DomainKeys (DKIM) and SPF in my DNS
- Domain Key / DKIM Generation Wizard
- How do I add DKIM records to my DNS?
Let’s get started
Section-1: Steps at Google Apps Side
Step-1
- Login to Google Admin Console
Step-2
Navigate to
- Apps
- Google Apps
- Gmail
- Authenticate email
Step-3
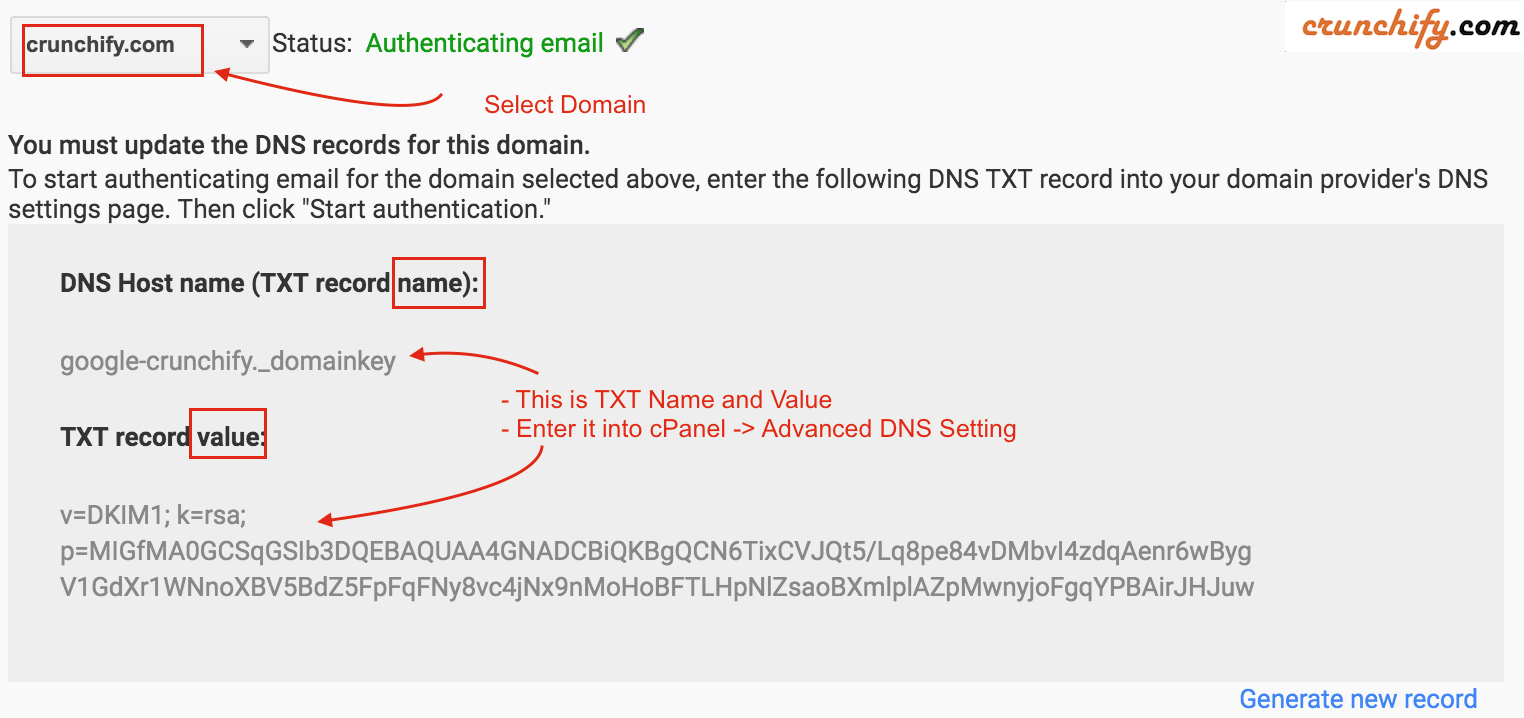
Select your domain and click on Generate TXT record button.
Step-4
You should be able to see TXT record name and value as you see it in above image.
Section-2: Steps at cPanel side
Step-1
Login to cPanel -> Domains -> Advanced DNS Zone Editor

Step-2
Add TXT record

Step-3
Verify that TXT record added successfully.

Step-4
Now go back to Google Apps and click on Start Authentication. And you should be all set.