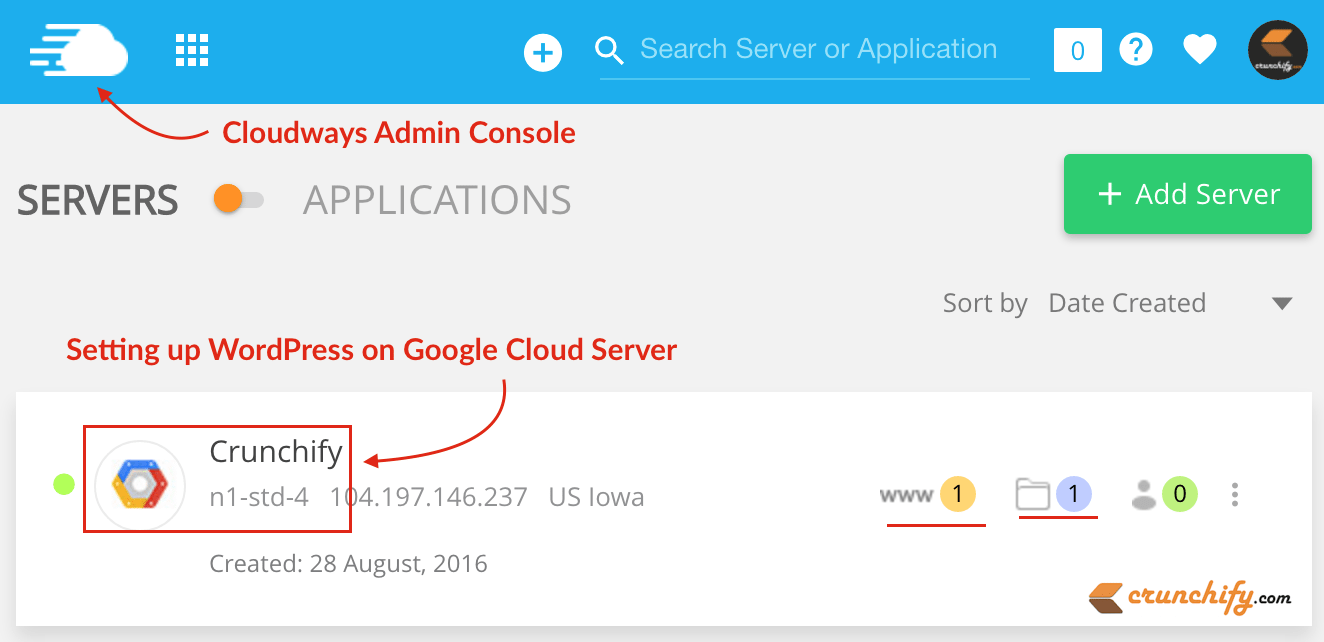
Last week, I got a chance to play with Cloudways Hosting service. I spent couple of days installing multiple applications and creating servers on DigitalOcean and Google Compute Engine.
How is Cloudways different from other hosting providers?
Founded in 2011, Cloudways is a Managed Cloud platform which provides an easy interface for you to deploy your cloud based application with ease. As a WordPress website owner, you may have a lot of options such as choosing the hosting provider that fits best to your needs. Multiple names such as Bluehost, Hostgator and WPEngine are highly resonating in the WordPress ecosystem.
You may have heard about,
- Shared Hosting
- Managed WordPress Hosting
- VPS (Virtual Private Server) Hosting
- Dedicated Server Hosting
And in this new millennial, a new type of hosting has gained a rather more insight namely:
- Cloud hosting
Cloud hosting is a concept on which you can host web applications or WordPress blog on cloud servers. Cloudways has established collaboration with the following Cloud providers:
- DigitalOcean
- Google Compute Engine (GCE)
- Vultr
- Amazon Web Services
Cloudways provides you managed cloud hosting solution that minimize concerns encircling setting up your website. It provides you a simple admin interface giving you single click solutions. All you have to do is choose your pricing plan, and click submit, that’s it. Everything will be ready for you to use in ~5 minutes. We will go over all the steps in details below.
Cloudways Pricing Plans
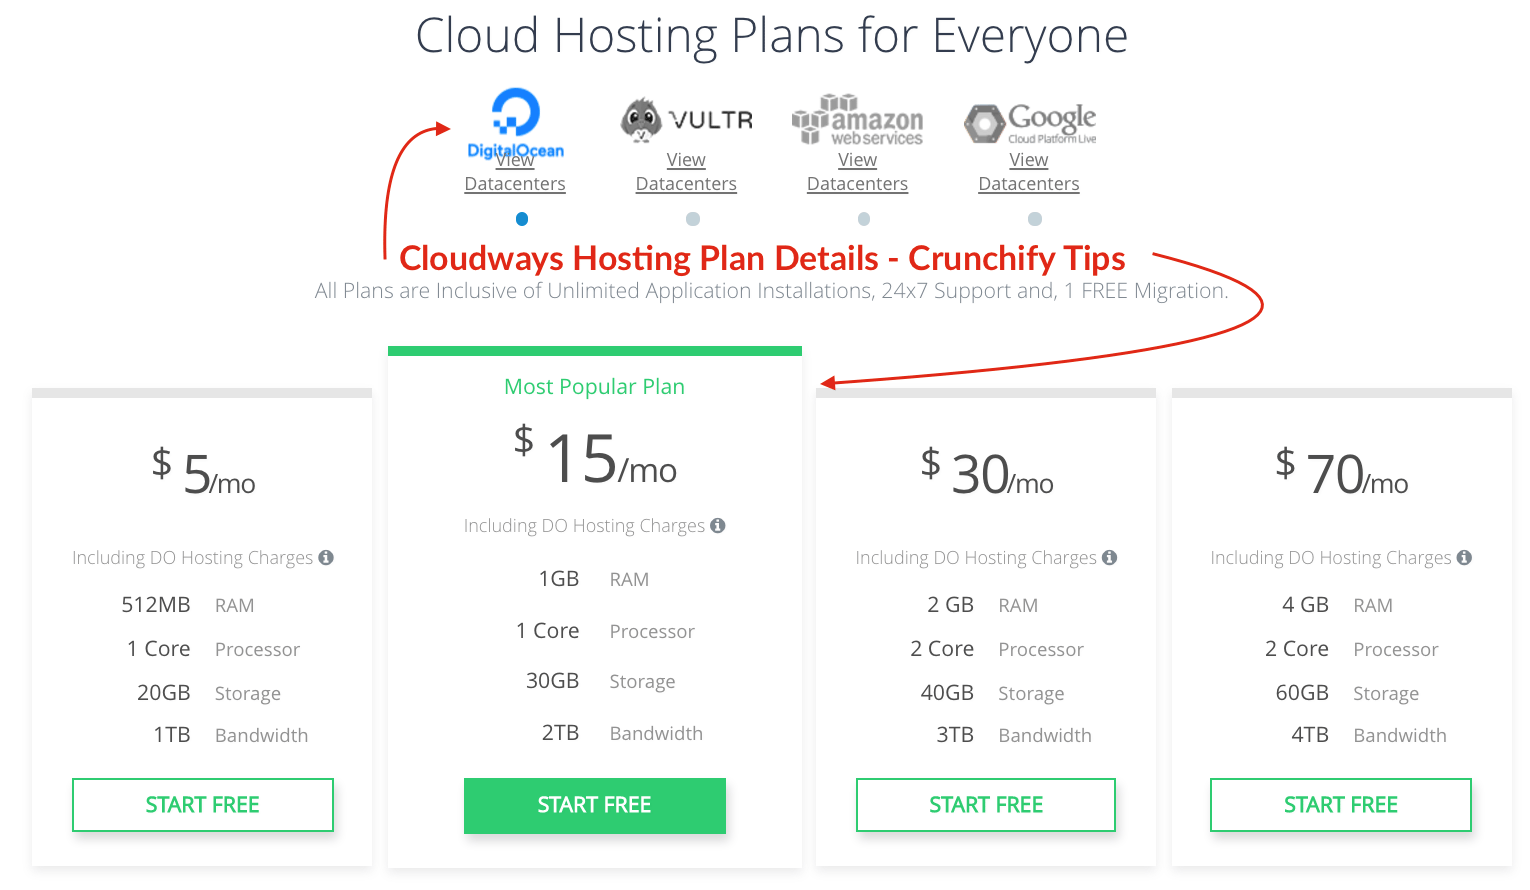
As you can see in the image above, users have a lot of options to choose from. Choose your hosting provider and configuration to get started.
Cloudways pricing plans covers a wide market, it appeals to a blogger who is just starting to an agency looking for high performing servers. If you have any confusion selecting a plan for your site, you can always contact the helpful Cloudways support. The lowest pricing plan at Cloudways goes as low as $5/month.
As Cloudways Managed WordPress hosting provider was different then traditional cPanel console, I would like to share my experience with you. In this tutorial, we will go over the setup steps on how to launch a web application on Google Compute Engine (GCE).
In this tutorial we will go over a few things:
- Steps you need to get started with Cloudways
- Setup Cloudways Server and Application
- Setup Domain and Migration Steps
- Performance Check
Let’s get started:
Step-1 Sign Up
- Sign up at Cloudways: https://www.cloudways.com
- No credit card required.
- If you are not satisfied with the service, you can cancel it at anytime.
Step-2 Choosing Server and Application
- On the next screen, you will see Servers and App Details options
- Click on
Add Server. - Choose
WordPress.
NOTE: If you are planning to have WooCommerce store with Crunchify then Cloudways will automatically install WooCommerce plugin for you. No extra steps required.
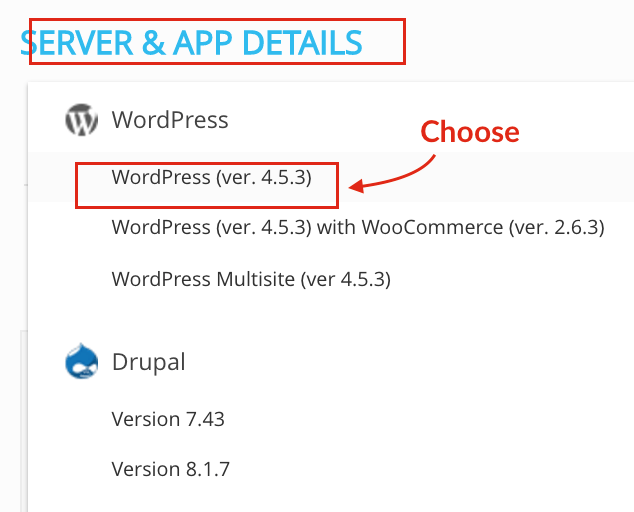
Setup isn’t limited to only WordPress but Server configuration also have options for Drupal, Joomla, Magento Store, Mediawiki, Moodle and a few more and that’s a big plus point.
Step-3 Setting Up Server Configurations
Now on next step, you have options to choose your Server configuration, i.e, CPU, Memory, Storage size and bandwidth.
- Name your
Application - Name your
Server - Choose your
Project - Choose cloud service provider – I choose
Google Compute Engine - Choose server specification
- I choose
n1-std-4with 4vCPU, 15 GB RAM - This is my current configuration at
Squidixhosting
- I choose
- Click on
LAUNCH SERVER
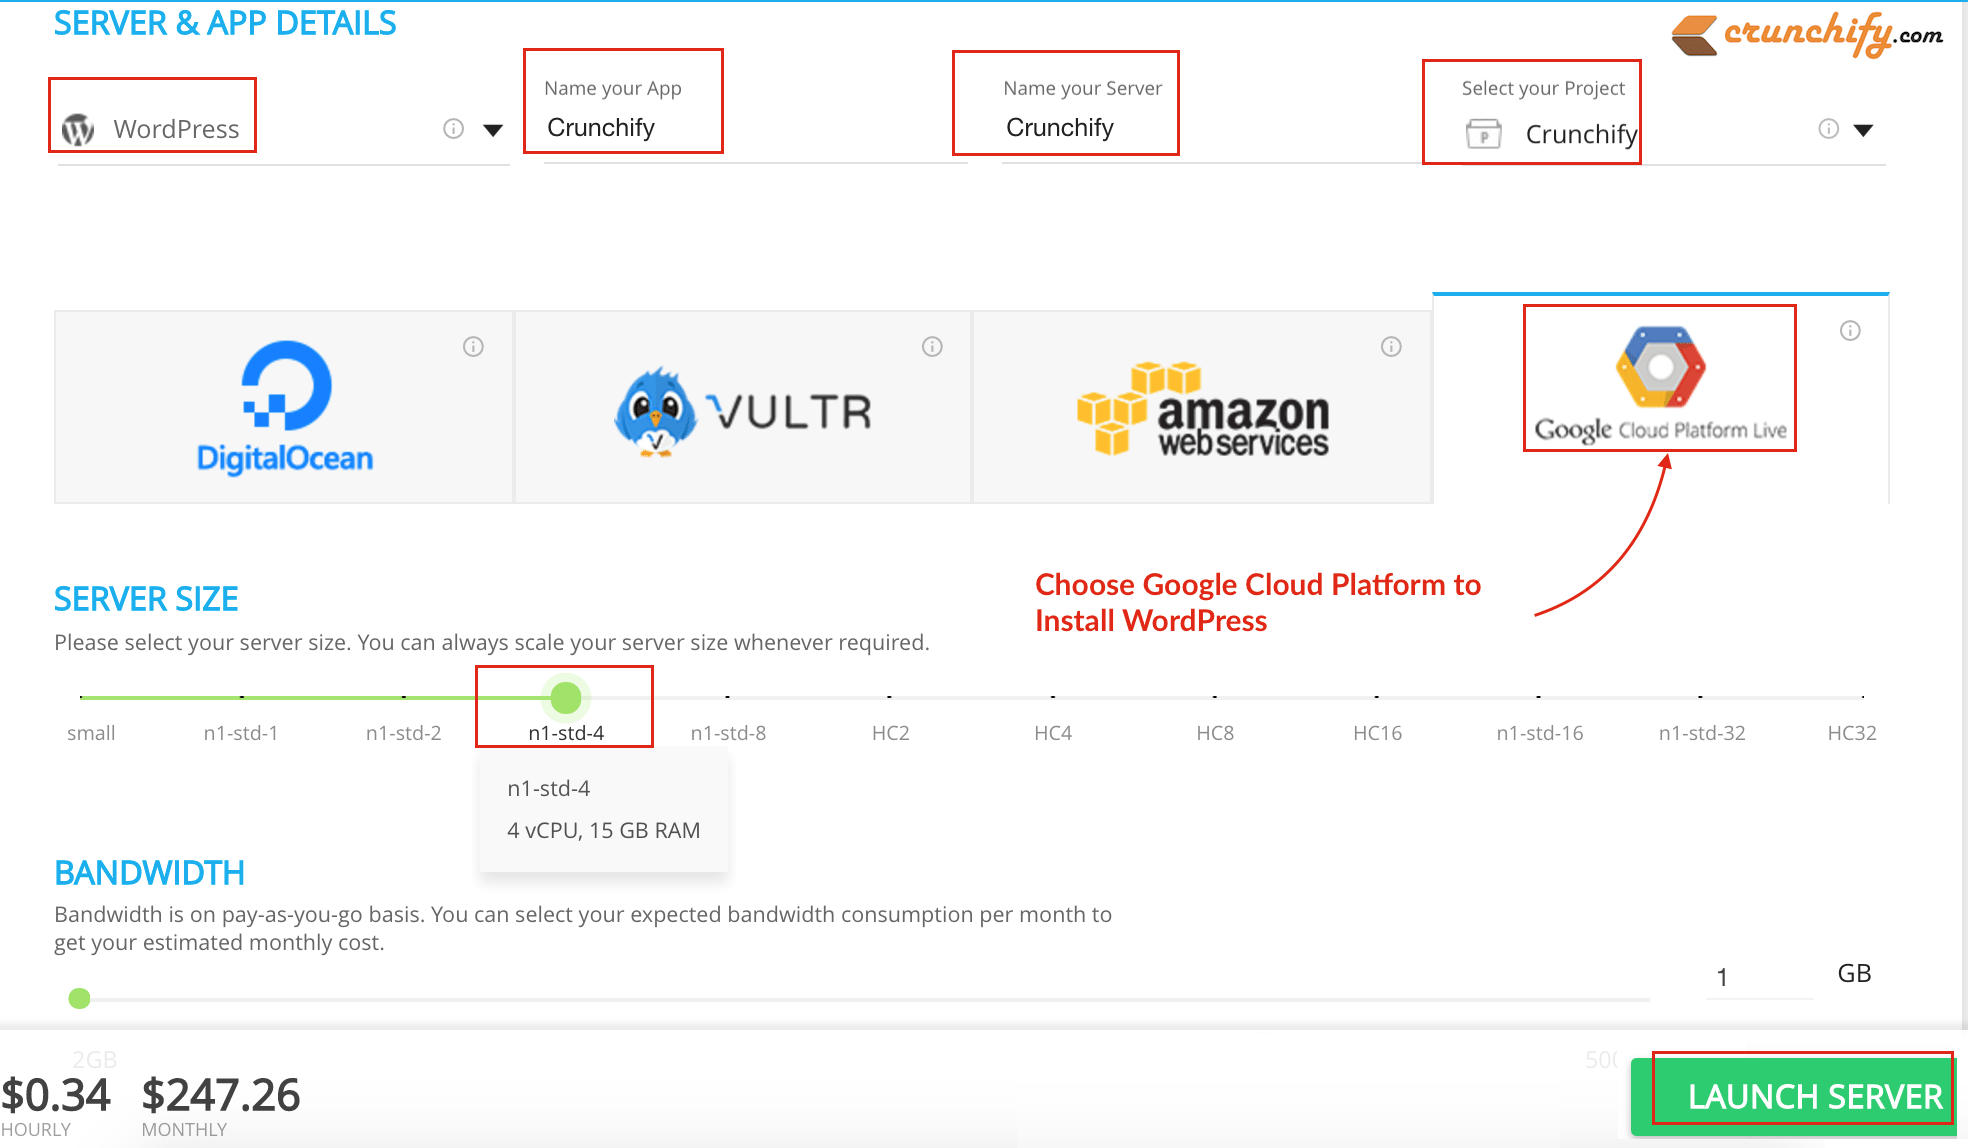
I would suggest to always start with a small server size and flex up with admin console if required with ease at later stage.
Step-4 Launching Server
- Once you click on Launch Server, it may take upto
~5 minutesto setup your server and once done you will be able to see all the server details on your console screen. - Make sure to verify all information
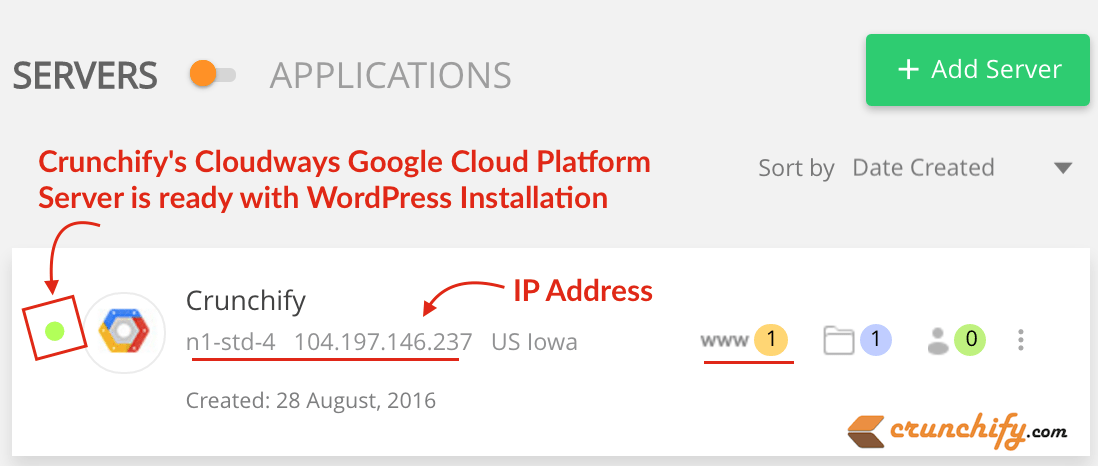
Step-5 Server Setting Option
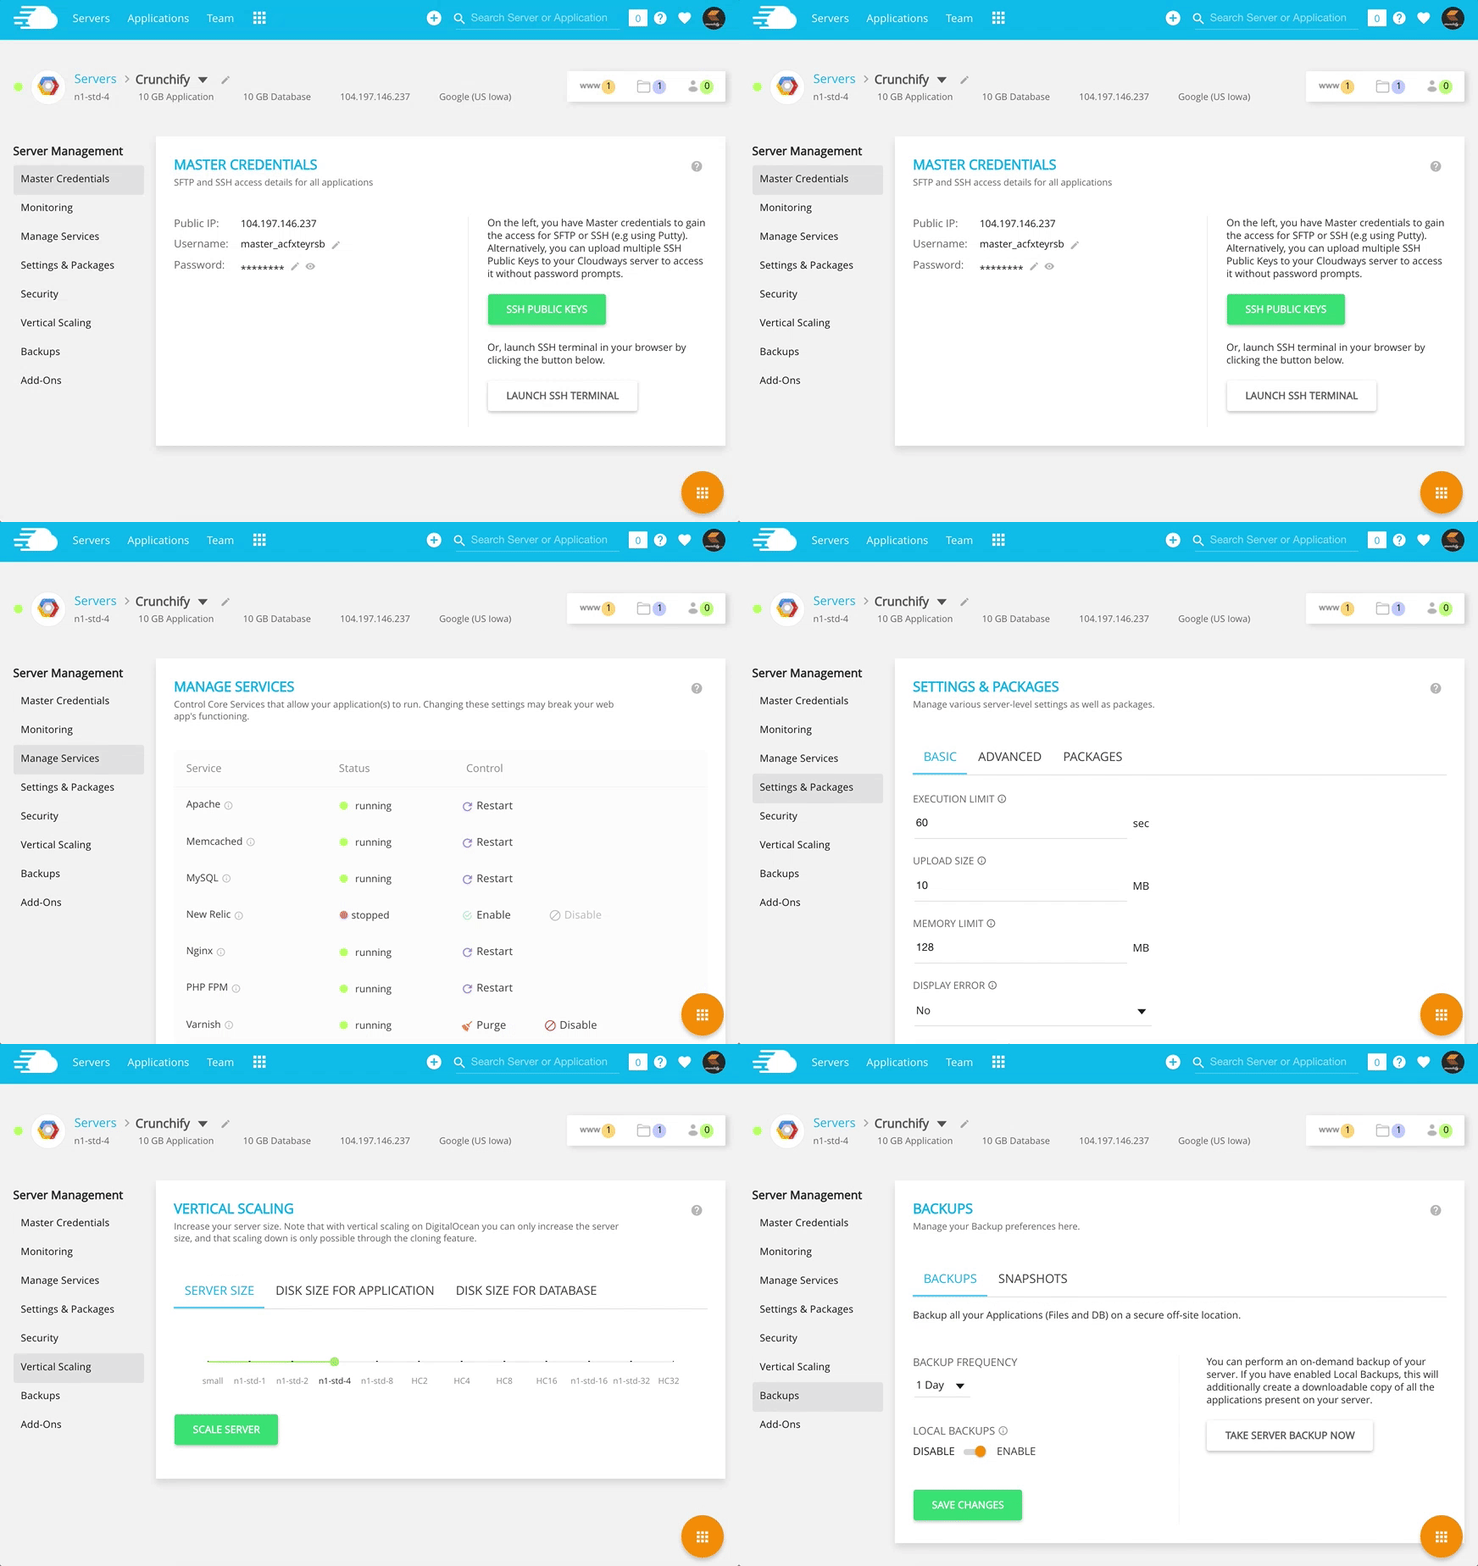
Now, click on Crunchify link next to Google Compute Engine (GCE) Icon and you will be redirected to Server Settings.
Let’s take a look at all options below:
- Master Credentials
- Monitoring
- Manage Services
- Settings and Packages (Make sure to change below settings)
- Upload size: 20 MB
- Memory Limit: 1024 MB
- PHP Timezone: based on your location
- Security
- Vertical Scaling (from admin console you could add more powers at runtime without downtime)
- Backups
- Make sure to enable daily backup. It’s a free option provided as part of your package.
Step-6 Application Service Options
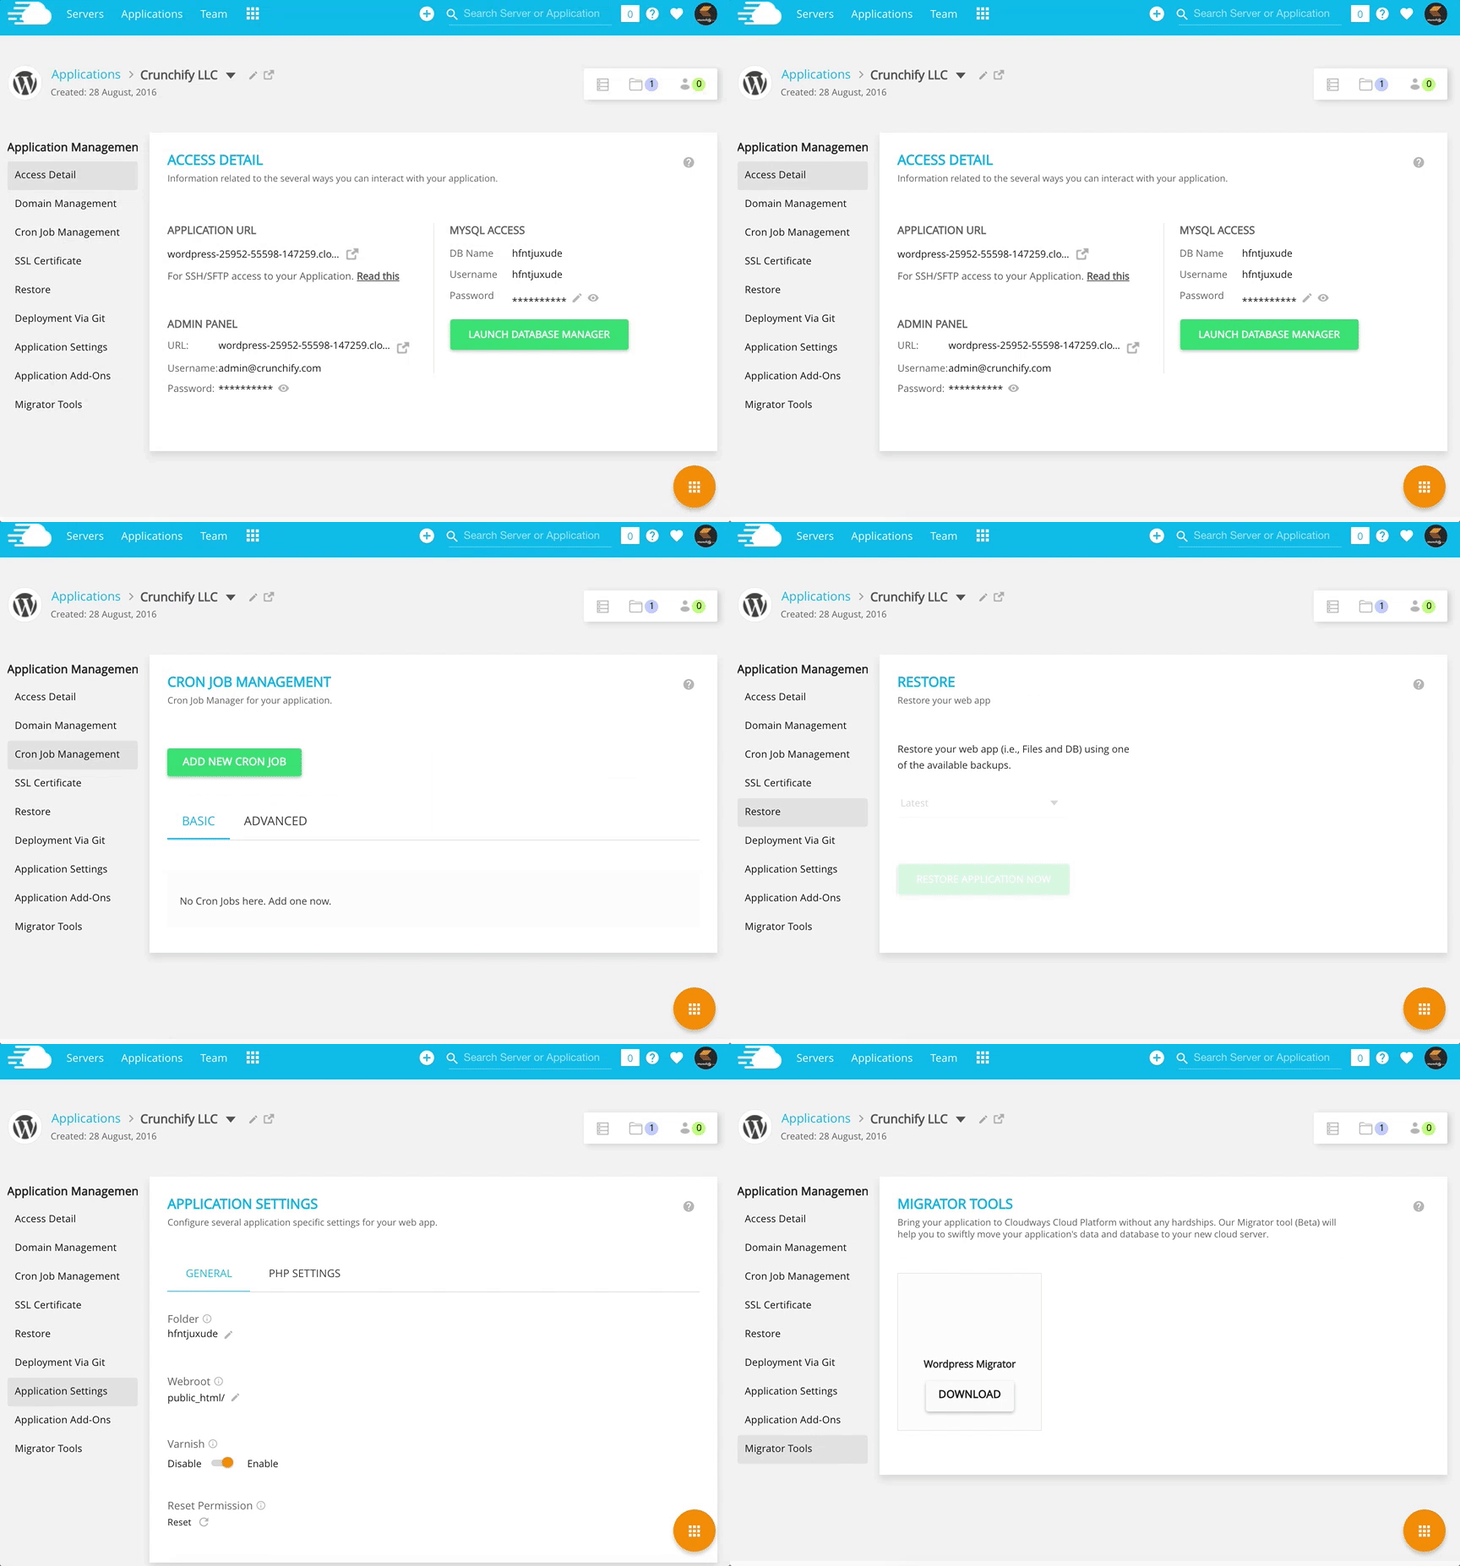
Now, simply select Application at the top of the screen and navigate to Application Setting page. Cloudways has all kind of options for your application.
- Access Details – Provides access details for the recently launched WordPress application.
- Domain Management – Allows you to add a primary domain for your web application and add other multiple sub-domains.
- Add your primary domain
- Cron Job Management
- SSL Certificate
- Cloudways uses Let’s Encrypt SSL certificate
- Provide your email ID and Domain Name click on Install certificate
- Restore – allows you to restore your website to an earlier time at any instance
- Deployment Via Git – deploy changes on your website via Git
- Application Settings – configure General and PHP settings in accordance to your preference
- Application Add-Ons – three Application add-ons for your web application; Migration, Upgrade and Load Test
- Migration Tools – Let the user migrate their WordPress website to Cloudways Hosting Platform
Step-7 Login to WordPress
Now, as you have setup your Server and Application, the next step is to login to your WordPress site.
Under Access Detail tab you will see your Username and Password for your WordPress admin console. You can login using the provided credentials.
Once you have logged on, you are all set.
Managed Backups, Cloning and Realtime Monitoring are the highly used inbuilt features at Cloudways which are quite handy for you to use.
Step-8 Setup Domain Name
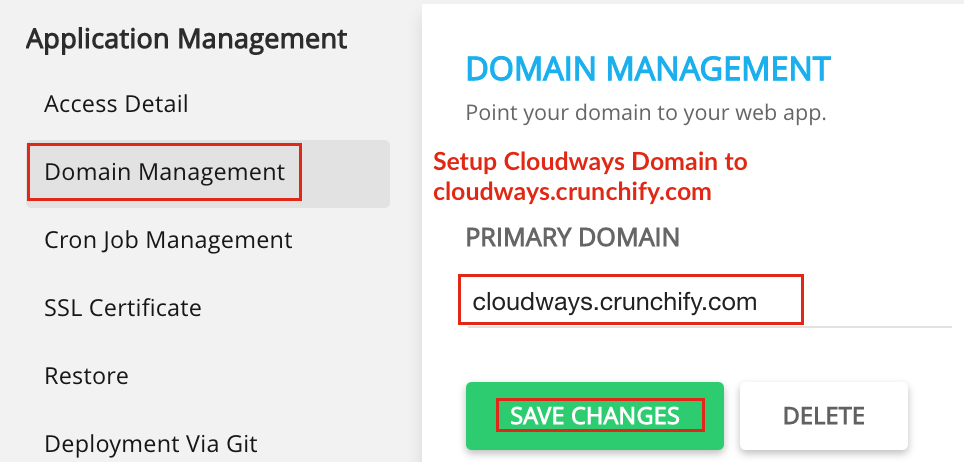
- Go to Domain Management Tab.
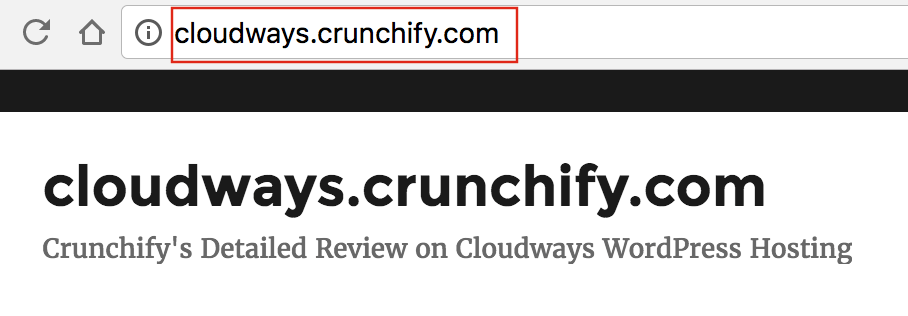
- Provide your Domain. In my testing – I have choose subdomain.
cloudways.crunchify.com
In order to work it correctly, make sure you point your domain or subdomain A record points to your Cloudways Server IP address.

Next, go to Domain Management Tab and add your domain or subdomain and click on Save Changes. Aside from A record, you should also need to add CNAME record of staging URL on domain registrar. Please follow tutorial for more details.
Now go to browser and hit URL: http://cloudways.crunchify.com and you will eventually land on your site loading correctly.
Step-8 Migration Tips
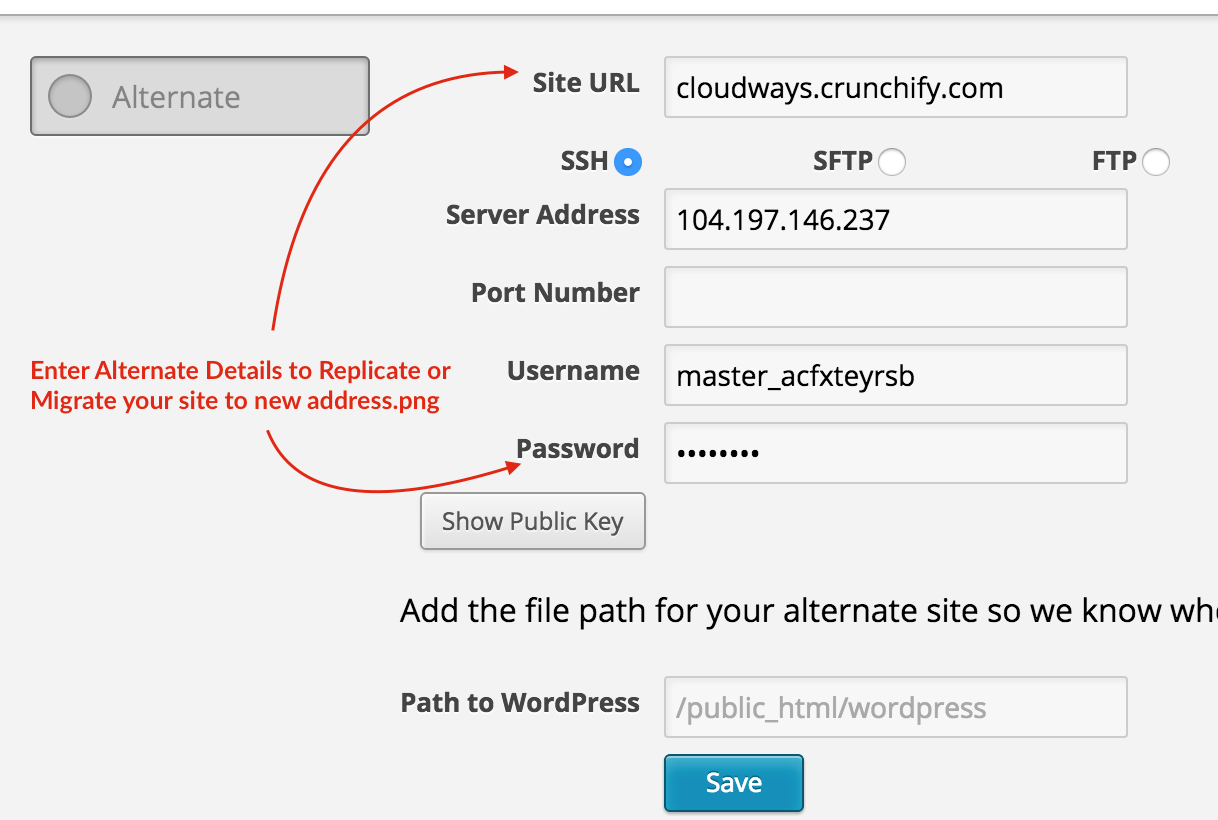
There are multiple ways through which you can migrate your site to Cloudways. If you are using VaultPress then it’s super easy. Just provide alternate URL and userID, Password and you are all set with single click migration.
Follow these steps if you are using VaultPress:
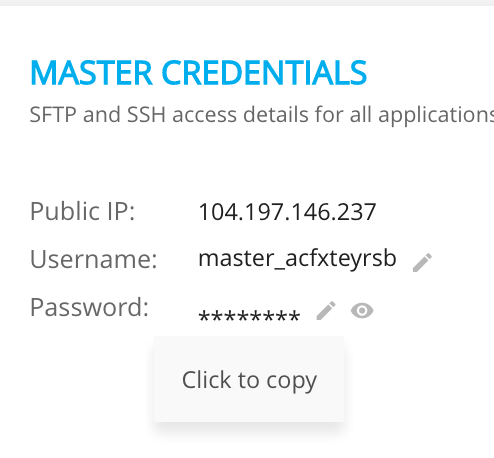
- Go to Cloudways master credential tab and get your IP, SFTP username and password
- Enter all details under alternate tab in VaultPress.
If you don't have VaultPress backup service then follow these detailed WordPress Migration Steps.
Cloudways also comes with Migration Wizard for you to migrate your WordPress site if you like to use that.
How is the performance?
It’s awesome. Check it out the page load time. Here, we have displayed the result with Basic WordPress setup having WP Super Cache enabled.

I’m also using Linode and DigitalOcean for some other products like Crunchify Forums. If you could compare the administrative options with them, Cloudways seems like a much more mature and stable option.
Final Thoughts
It’s definitely a different solution than traditional hosting, as Cloudways is like a middle tier which helps you setup everything automatically in a cloud environment with simple admin options. In my experience, so far I didn’t face even a single issue. To be honest, it’s little bit expensive but I believe that’s absolutely OK with all the options it provides. Free SSL Let’s encrypt certificate is a bonus. If in the future I have an option to move to cloud hosting then Cloudways would be the first one.
Let me know what you think about Cloudways.
