
After changing Crunchify theme couple of months ago, we have performed numerous GenesisWP theme enhancements using some custom code in functions.php file or with few custom widgets.
In this post I’m going to show you how we used Widget Options WordPress Plugin to show different Sidebar Widget based on different Categories.
As an example:
- Show only
widget Aif my WordPress post belongs to Category B and C. - Show only
widget Dif WordPress post belongs to Category E and F.
Let’s take a look at live example first:
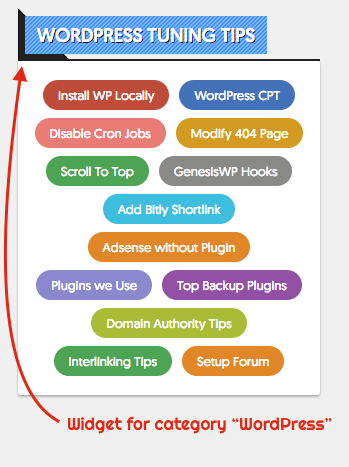
Head over to this post: WordPress Plugins We Use on Crunchify. You will see WordPress Tuning Tips Widget at the bottom of primary sidebar.
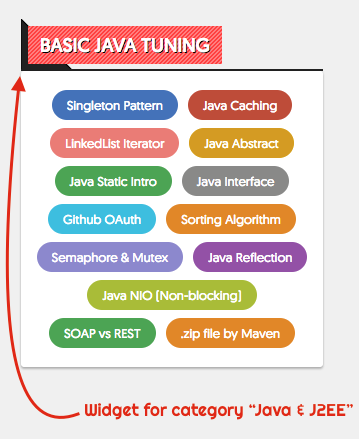
Head over to this post: Top 10 Java Interview Questions. You will see Basic Java Tuning Widget at the bottom of primary sidebar.
Let’s get into details on how to setup Widget Options Plugin right way?
Step-1
Download and install Widget Options Plugin.
Link: https://wordpress.org/plugins/widget-options/
Step-2
- Go to
Settings. - Click on
Widget Options. - Disable all other Option other than
Pages VisibilityandDisplay Logic.
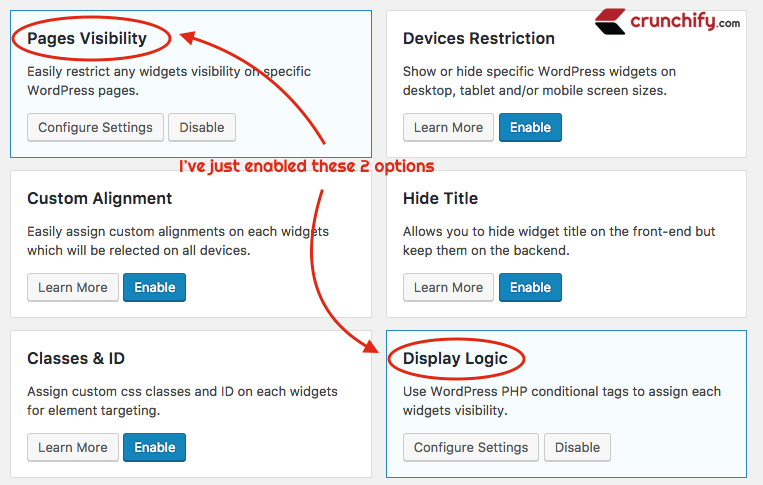
It’s upto you which option you want to enable but for us on Crunchify, we don’t need any other options.
Step-3
- Go to
Appearance. - Click on
Widgets. - You will see new options now available for you to use for each individual widgets.
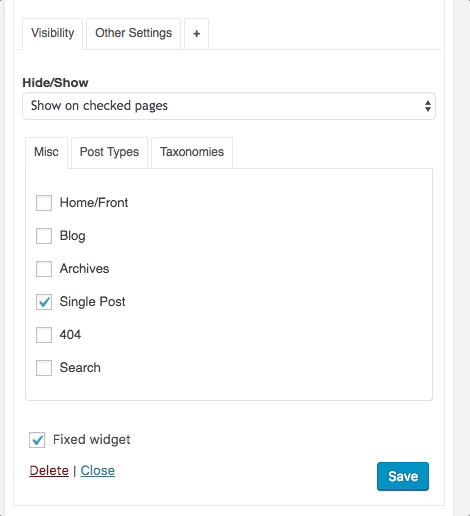
As you see in above GIF, I’ve enabled all below options. This setting is for WordPress Tuning Tips Widget.
- Hide/Show: make sure you select Show on checked pages option
- Misc: Select only Single Post
- Post Types: no changes
- Taxonomies: Select only categories on which you want your widget to appear
Just clear your site cache. That’s it. Now your specific widget will appear as you configured in above steps.