HTTP over SSL is one of the criteria for Google to put your search result page at the top of the result. I gave it a try and enabled HTTPS (SSL) on https://crunchify.com.
In this tutorial we will go over all detailed steps on how to enable SSL (HTTPS) on your WordPress Blog. If you have below questions then you are at right place:
- How to Add SSL and HTTPS in WordPress
- How to Use SSL and HTTPS with WordPress
- Using an SSL with Your WordPress Admin Control Panel
- How to configure WordPress Security to use my own private SSL Certificate?
- The easiest way to add SSL to your WordPress Site
- how to setup ssl certificate on apache
Here are major steps:
- Buy SSL Certificate (
Step 1below) - Generate Certificate and Install it into your cPanel (
Step 2 to 12below) - Enable SSL (
Step 13 to 15below)
Let’s get started:
Step-1
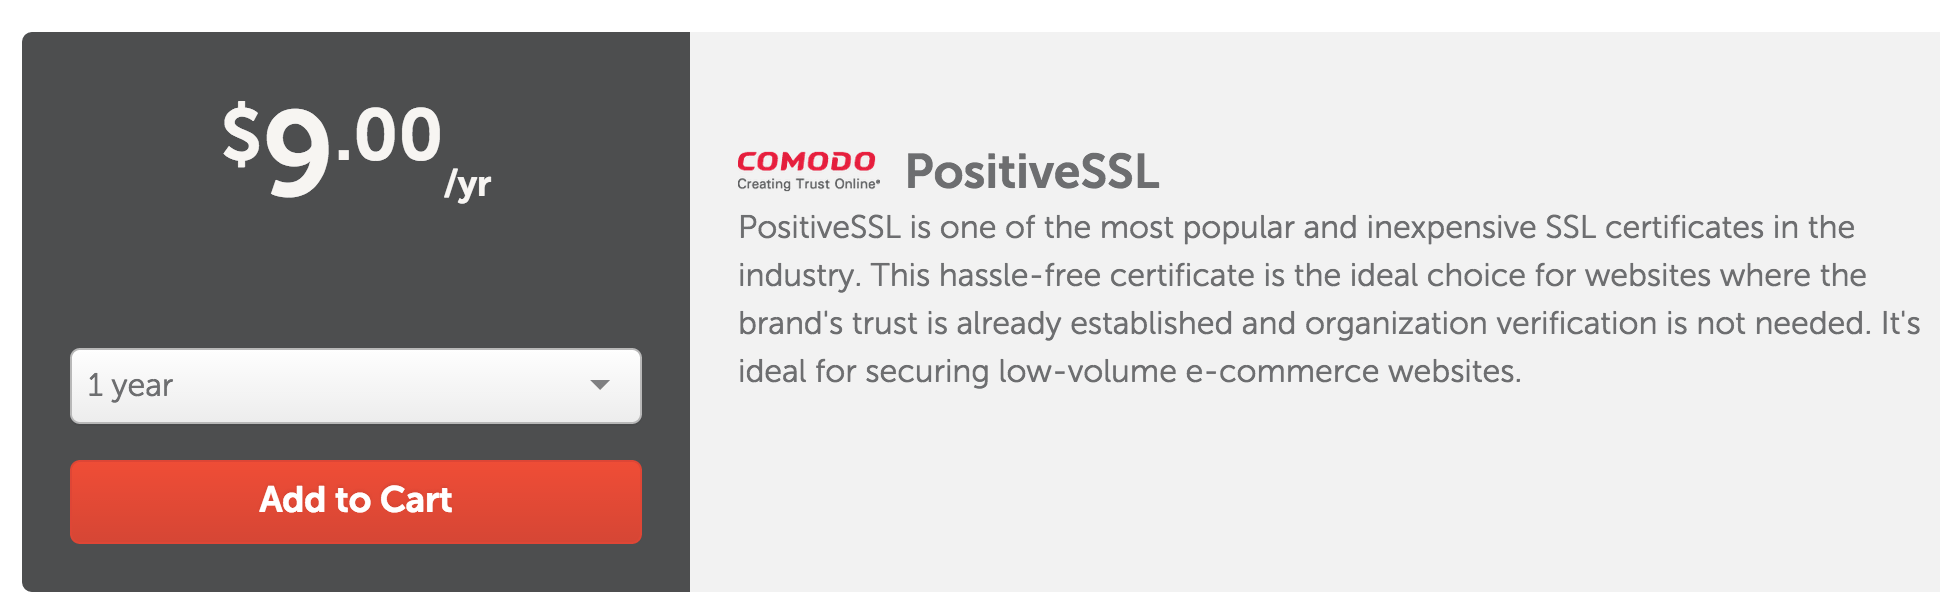
Purchase SSL Certificate. At NameCheap you can get Comodo PositiveSSL Certificate for only $9.00/year. Between I just got it for $1.99 for 1st year. Try to chat with live person and he/she will help you get cert for just $1.99.
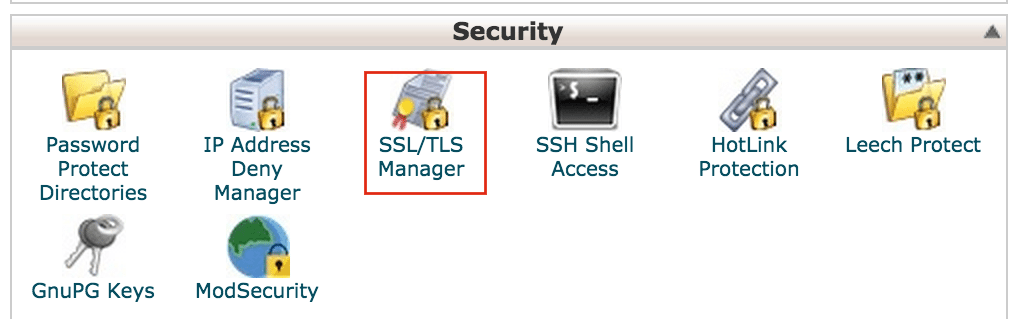
Step-2
Login to cPanel. Click on SSL/TLS Manager.
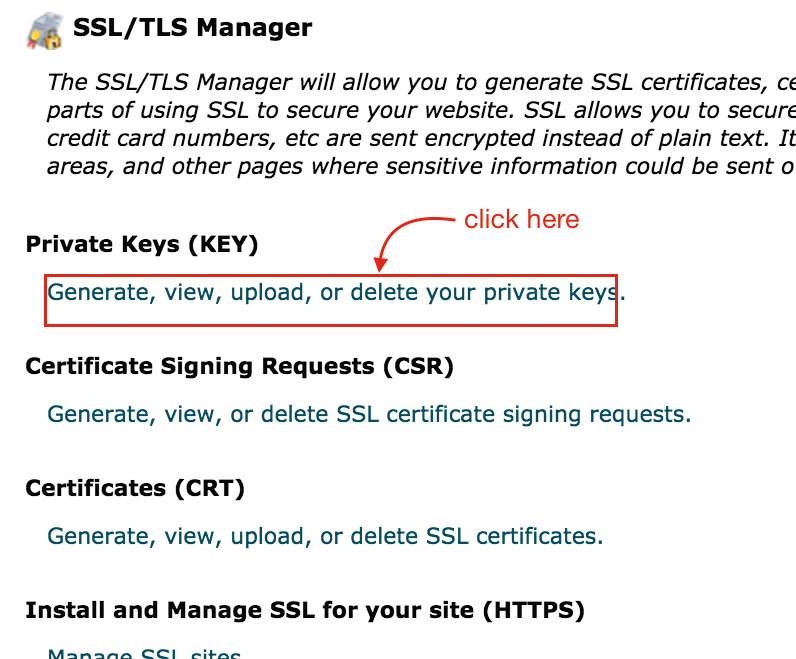
Step-3
Click on Generate, view, upload, or delete your private keys
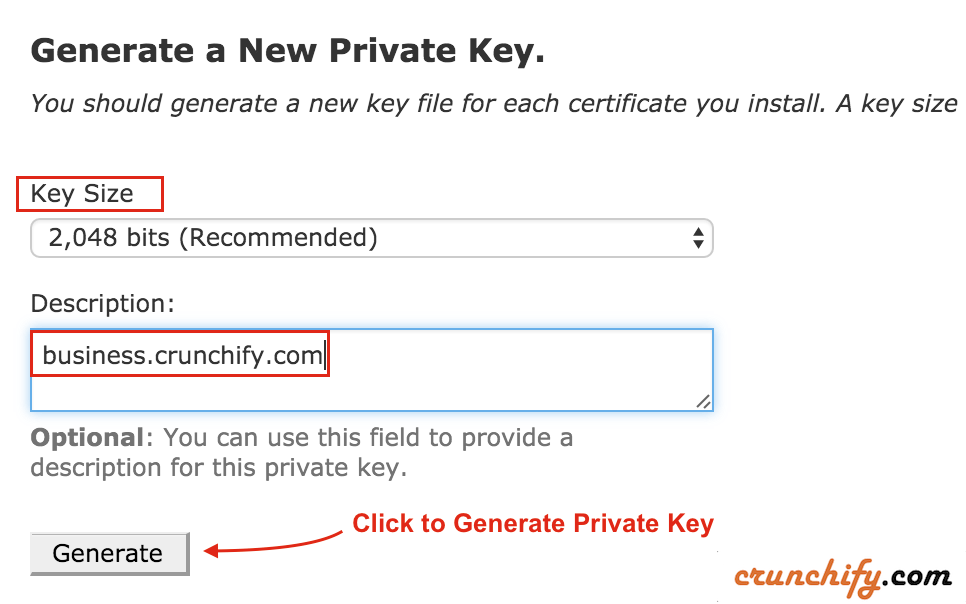
Step-4
Select Key Size and Provide Description and click Generate new Private Key.
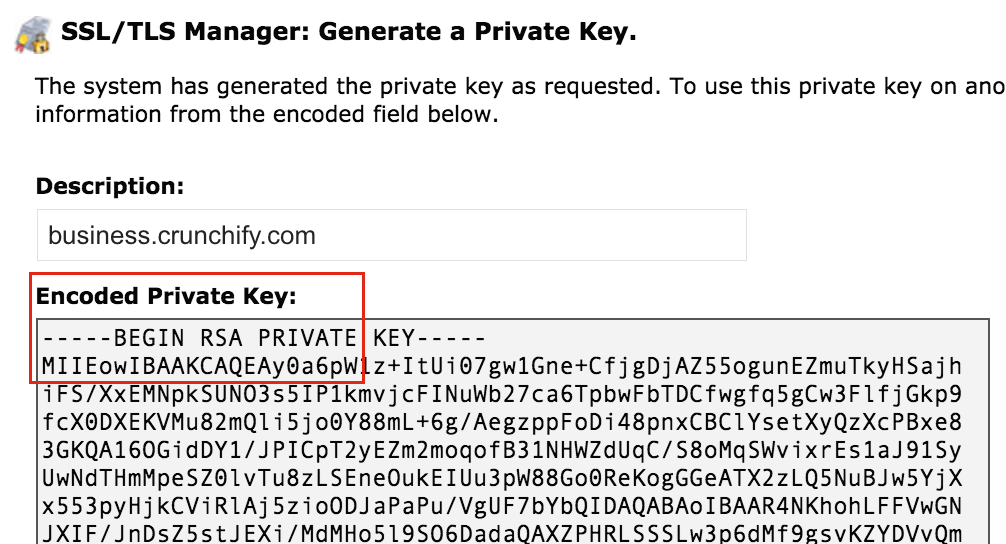
Step-5
You should be able to see generated Private Key.
Step-6
- Now go back to cPanel
- Click on
SSL/TLS Managerand click onGenerate a New Certificate Signing Request. - Provide all mentioned details below and click on
Generate.

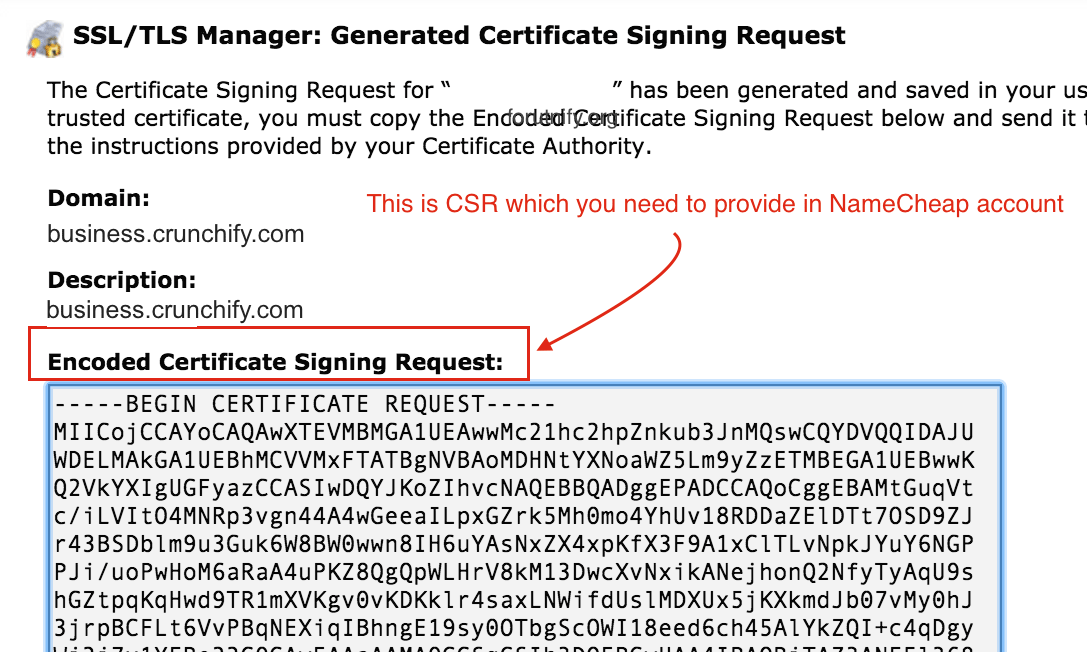
Step-7
- You should be able to see your
CSR. - Copy that. You need to provide it to your NameCheap account.
Step-8
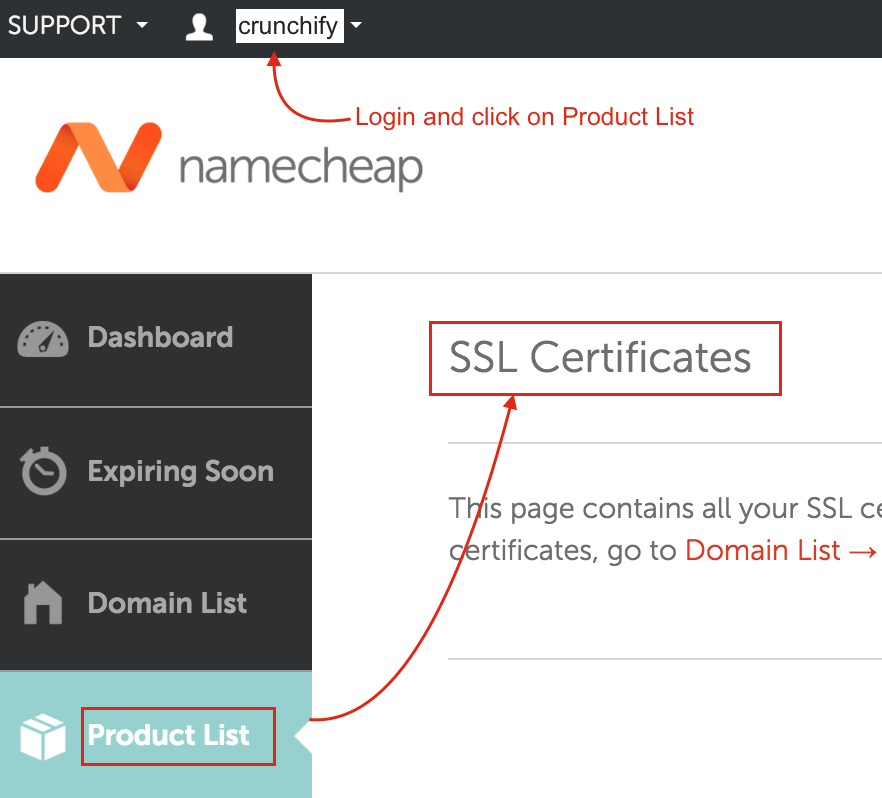
- Login to NameCheap Account
- Click on your
username - Click on
Product List - You should see your
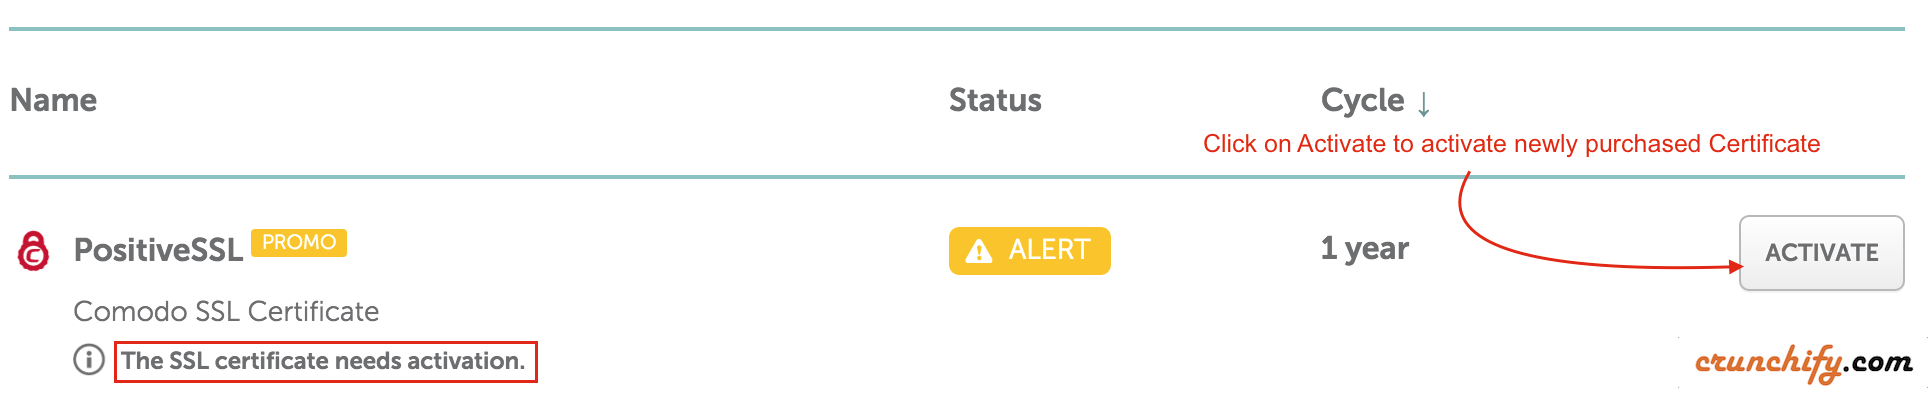
SSL Certificatesright side panel
Activate SSL cert by clicking Activate Button.
Step-9
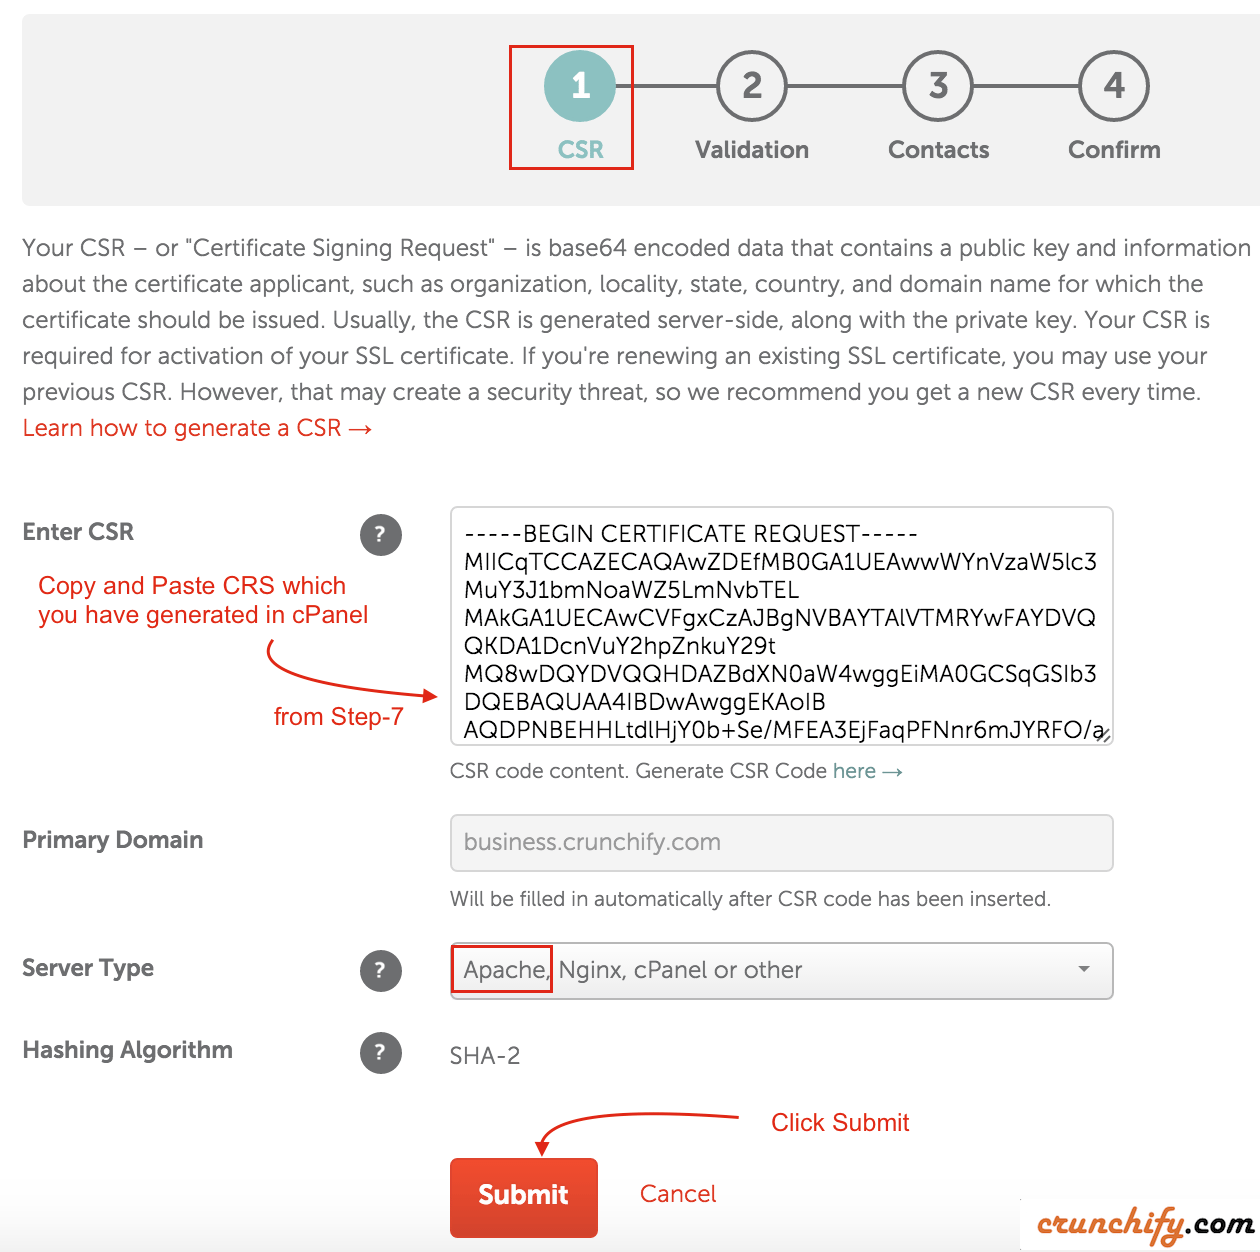
- Paste CSR which you got in
Step-7 - Select
Apache,Nginx,cPanel or Otheroption forServer Type - Click
Submit
Step-10
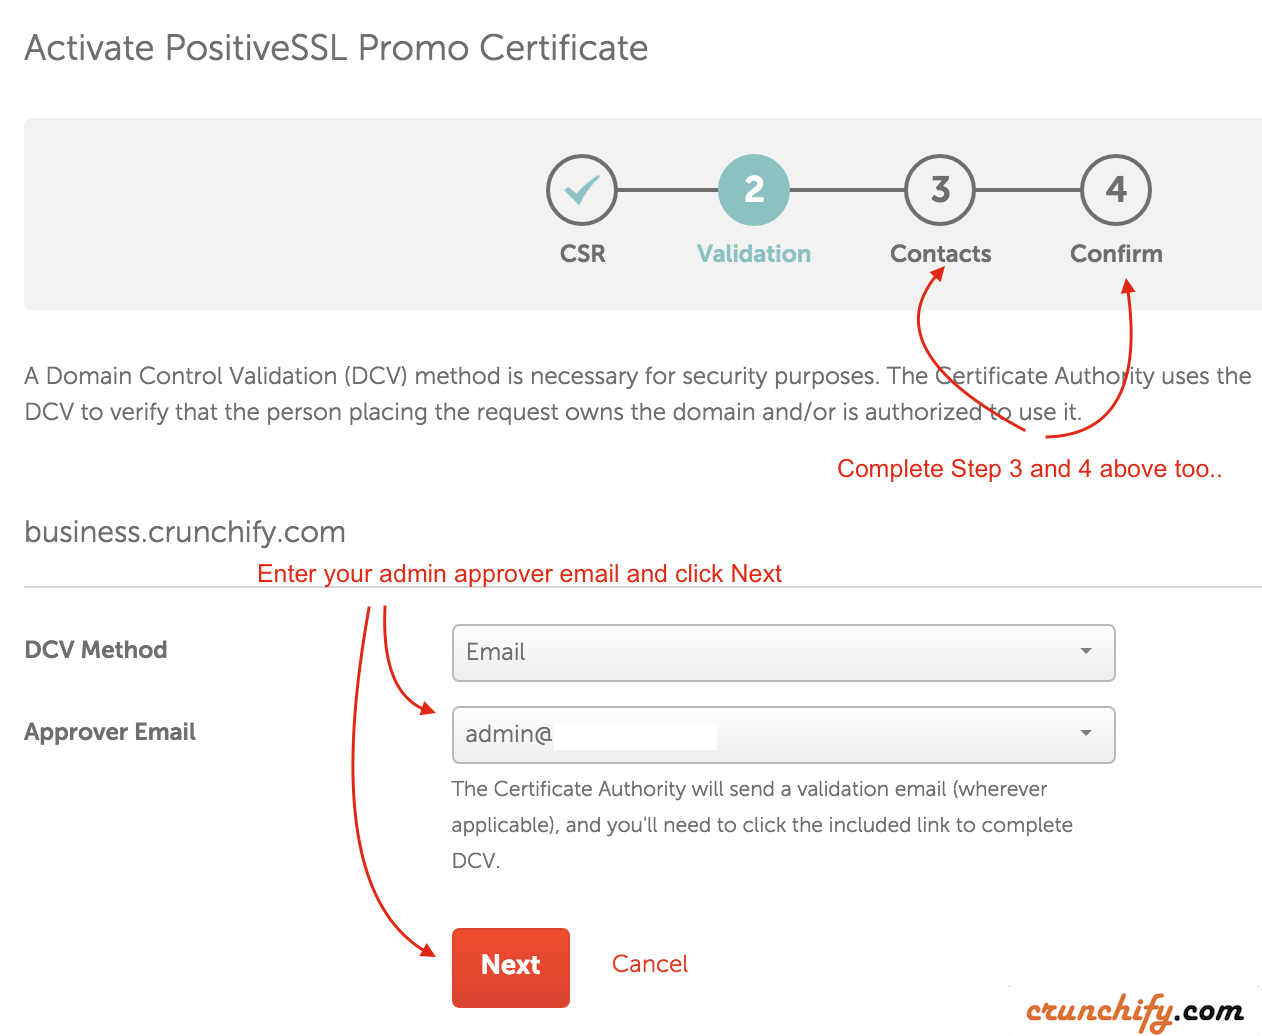
- Select your
admin emailon which you will get approval email - Click
Next - On Next screen provide company name and click
submit - Complete
Step 3andStep 4.
Step-11
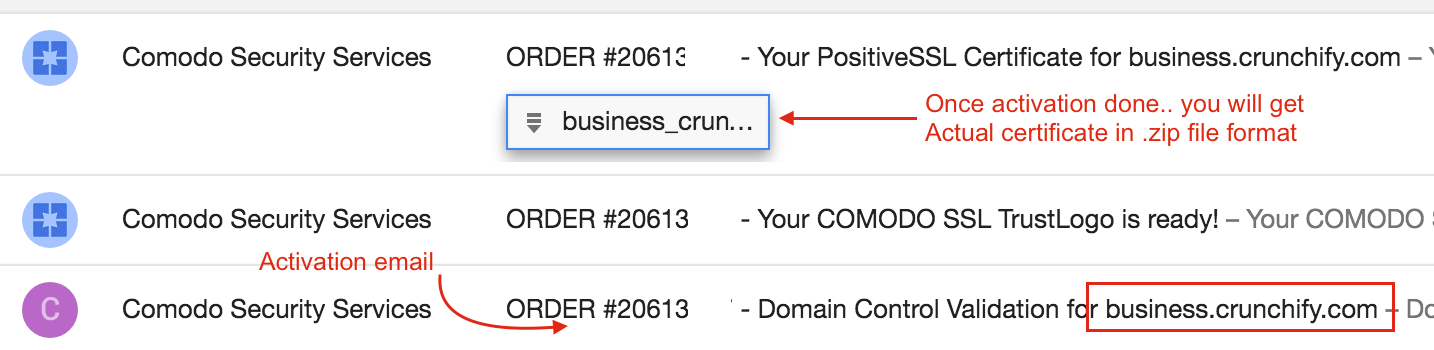
- You will receive
1st emailfor Validation: Follow approval steps and approve your SSL certificate request mentioned in email. - Once approved – you will receive
2nd and 3rd emailwith your Certificate in that (.zip file).
Step-12
- Download .zip file. Extract it and Copy certificate.
- Go to
cPanel - SSL/TLS Manager
- Click on
3rd linkforCertificates (CRT) - Upload Or Paste a New Certificate
- Click on Save Certificate
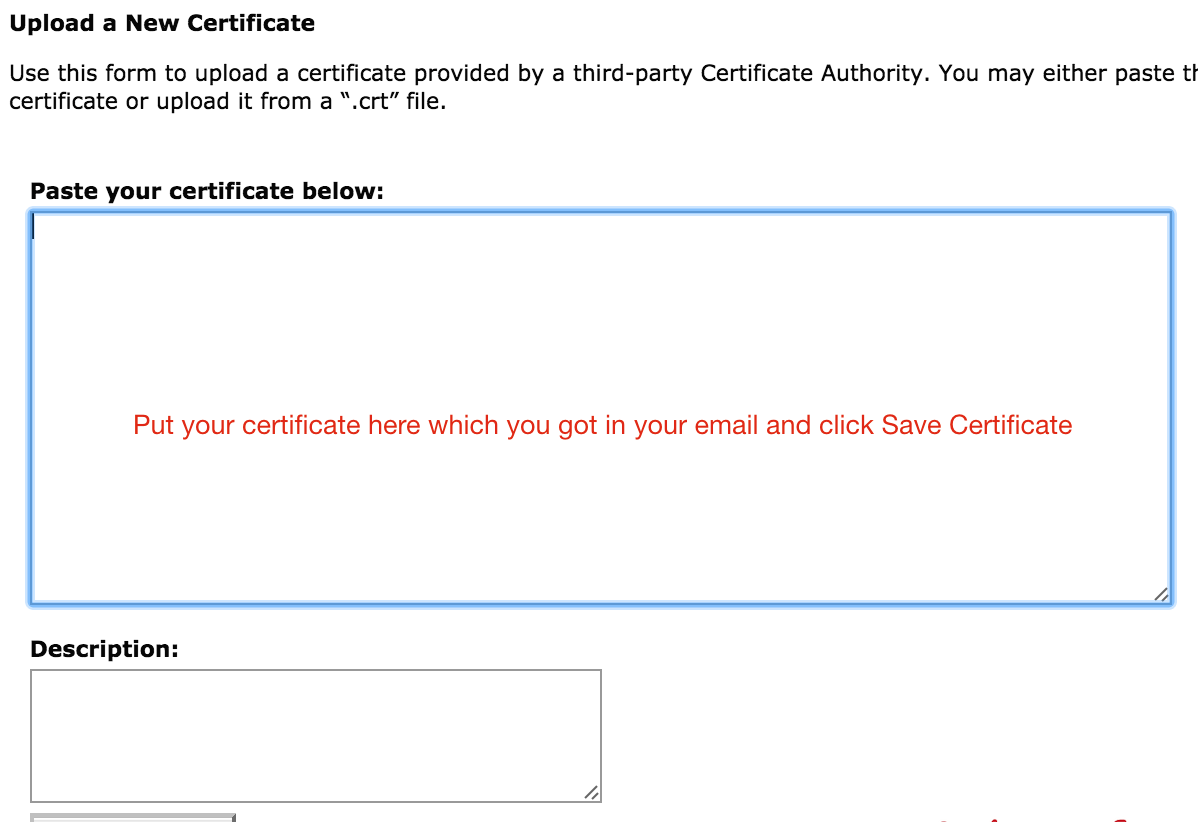
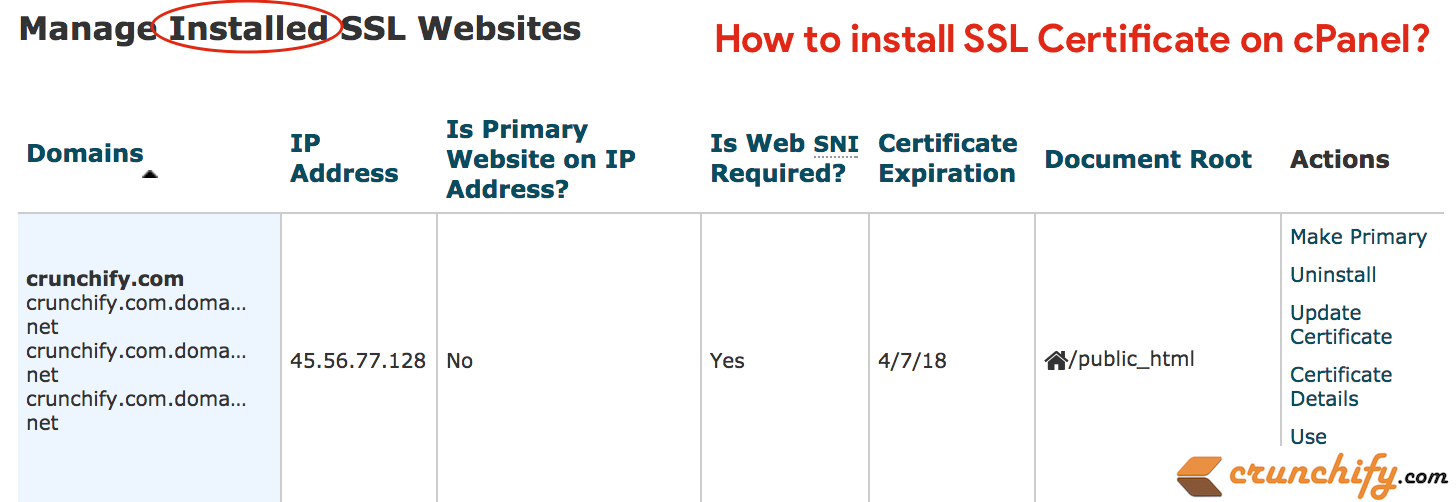
Once done you will see it uploaded successfully on Server. Checkout screenshot.
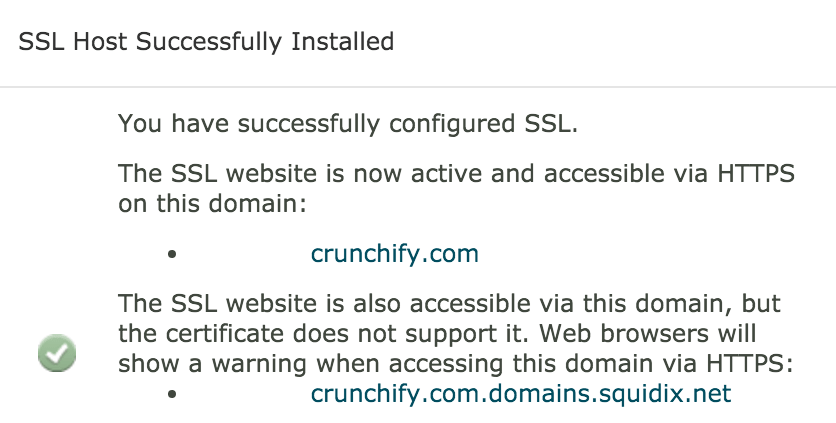
Step-13
- Now Next Step is to
Install it.
Just click on Install link which you see in above image.
Step-14
Finally you should see success message.
Step-15
Now go to your admin panel
- Click on Settings
- Go to General Setting
- Change URL from http to https for both
WordPress AddressandSite Address
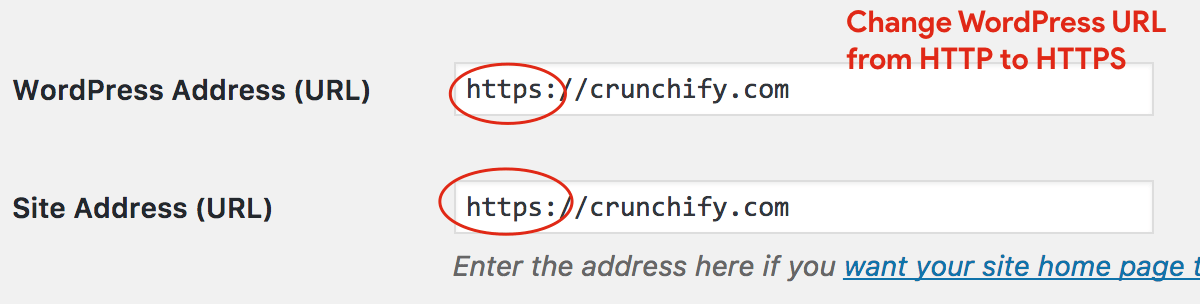
And you are all set. Try visiting your site over https and you should see green padlock in browser.