WordPress Menu: An Essential Element of Your Website
A menu is a crucial element of any website. It serves as a navigation tool that helps visitors access different sections of your site easily. In WordPress, the menu is created and managed through the WordPress menu system. In this post, we’ll cover everything you need to know about WordPress menus, including how to create, customize, and manage them.
Creating a WordPress Menu
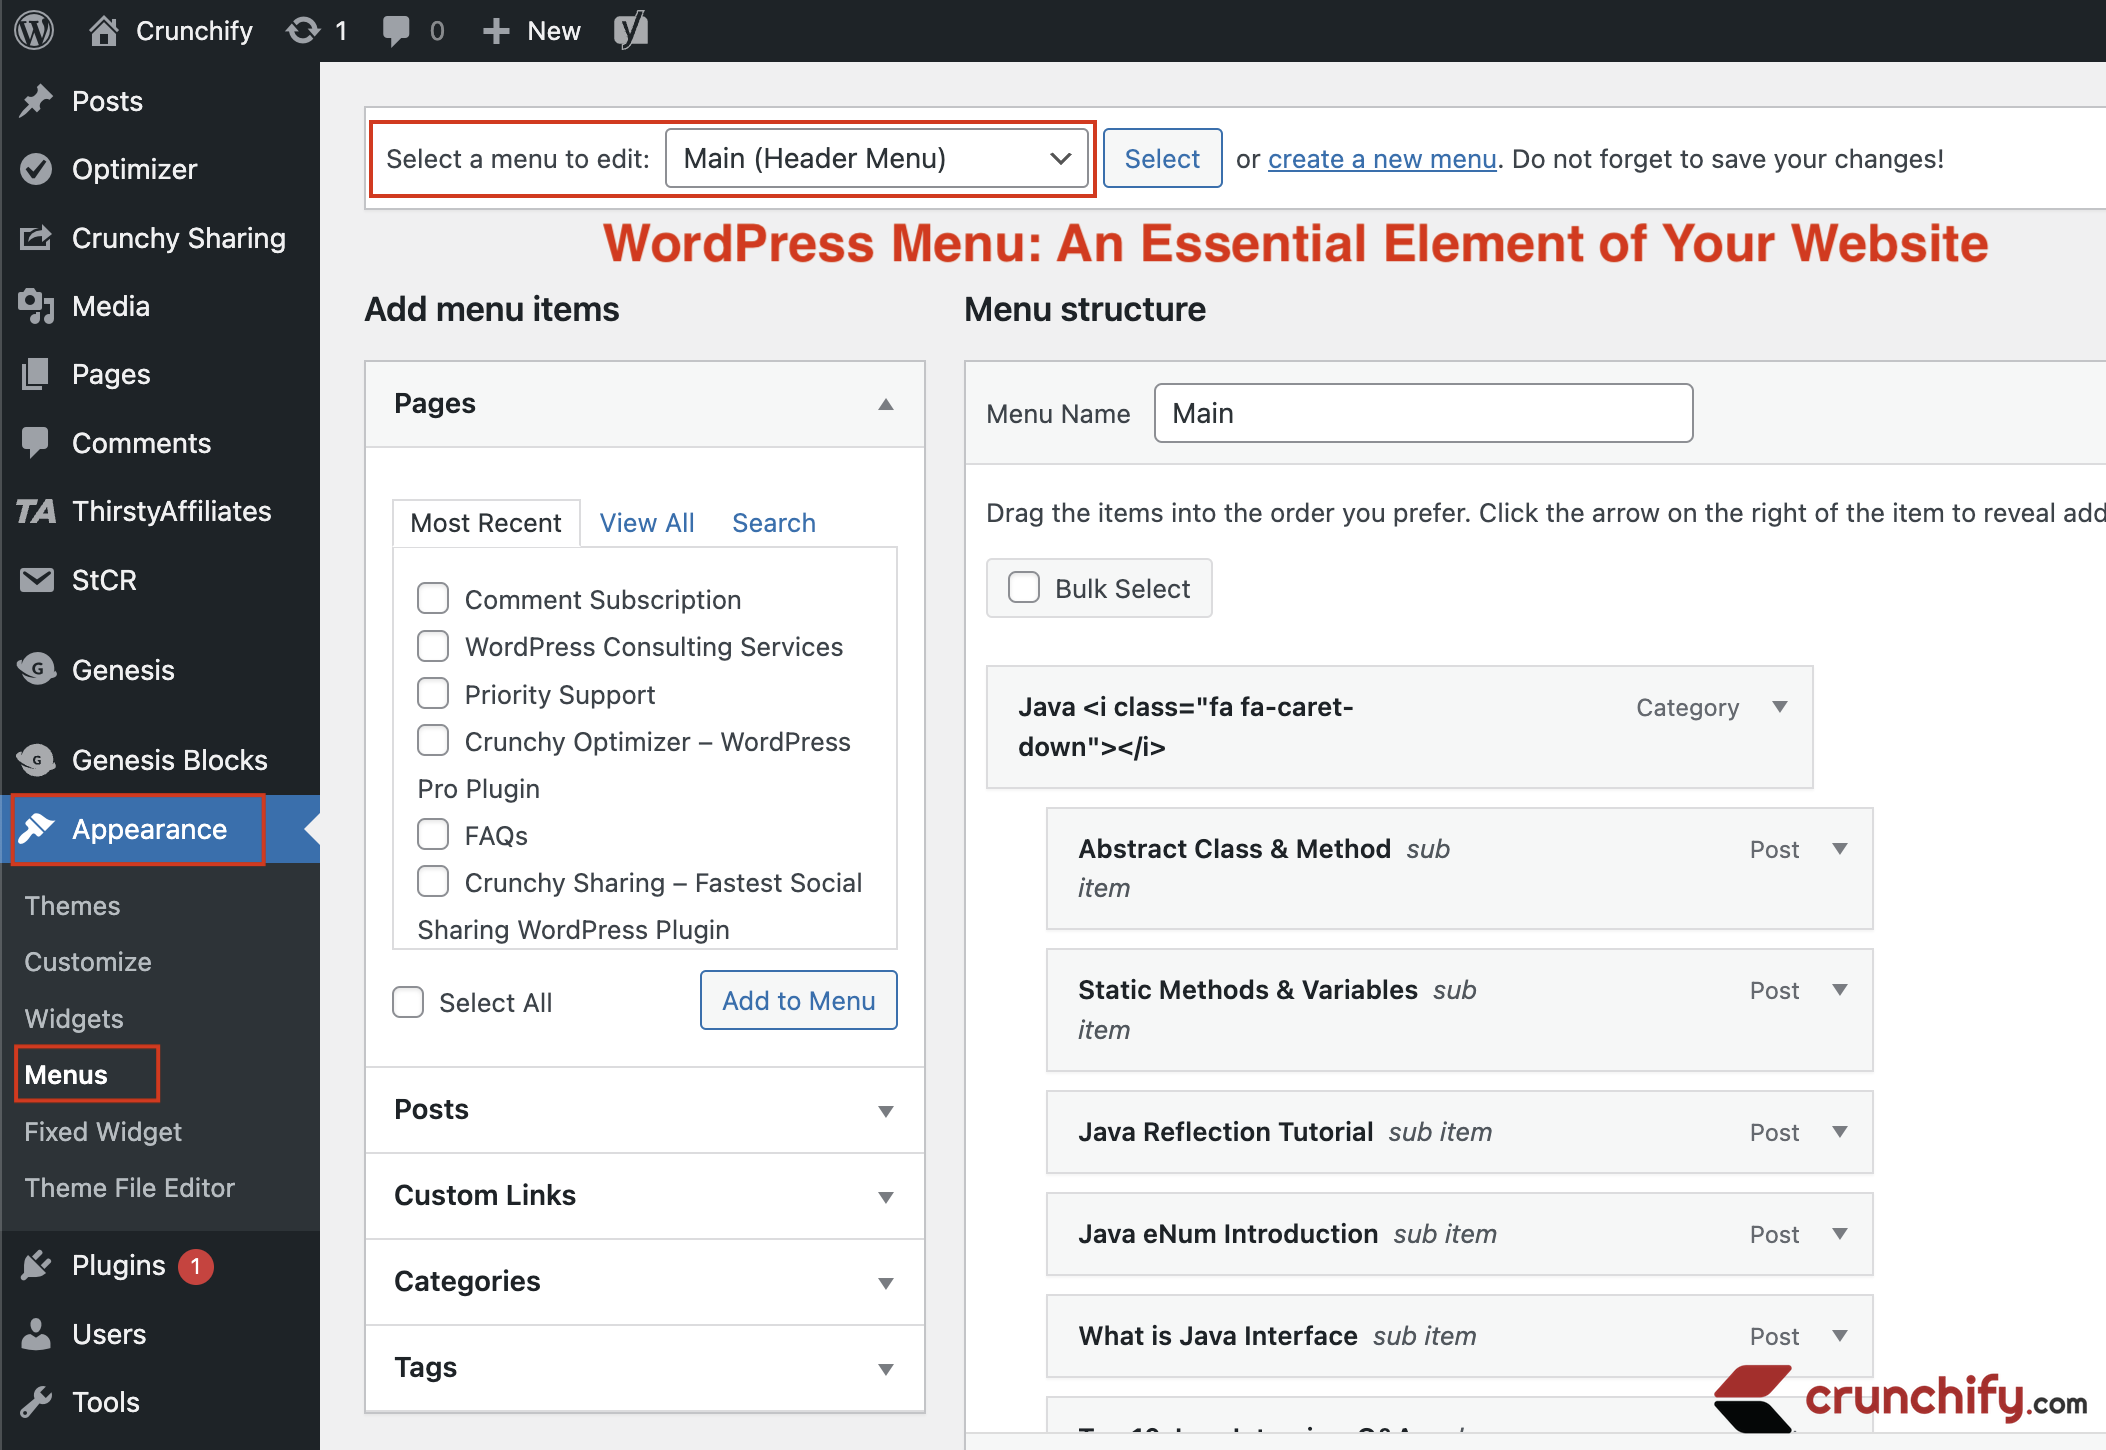
To create a new menu in WordPress, go to the “Appearance” section in the WordPress Dashboard and click on “Menus.” You will then be taken to the “Menus” screen, where you can create a new menu by clicking on the “Create a new menu” button. You can also choose to edit an existing menu by clicking on it.
Adding Menu Items
Once you have created your menu, you can add items to it by selecting from the available pages, categories, custom links, and other content types. To add an item, simply select it from the left column and click on the “Add to Menu” button. You can also rearrange the order of your menu items by dragging and dropping them into the desired position.
Customizing the Menu
Once you have added items to your menu, you can customize it to your liking. For example, you can add custom links, give your menu items custom labels, and even add sub-menus to your menu. To do this, simply click on the menu item you want to customize and make the necessary changes in the “Menu Settings” section.
Managing Your Menus
Once you have created and customized your menu, you can manage it by updating or removing items as needed. You can also change the menu location by selecting a different theme location from the “Menu Settings” section.
The WordPress menu system is an essential tool for creating and managing your website’s navigation.
Whether you’re a beginner or an experienced WordPress user, the WordPress menu system makes it easy to create, customize, and manage your site’s navigation.
So go ahead and start creating your own WordPress menu today!
