
Last week we have launched dedicated Crunchify Product site which is very handy for users to get an idea on what all services we are providing. It also includes some of our best Premium Plugins. Head over to it and check it out.
There are few major service categories:
- WordPress Site SEO review at very nominal charge
- Full WebSite Service Design
- WordPress Consultation and Optimization service
- Java Development Service
- WordPress Premium Services
As you must have seen on official Slack.com site, they are using Typed.js to animate their heading with Typewriter effect which I absolutely loved it.
After looking at that I’ve decided to add similar effect to my Services site too. This tutorial works if you have any of below questions too 🙂
- jQuery Animated Typing with
Typed.js - Create A
Typing EffectIn CSS - How to create a Typewriter / Typing Text effect in HTML using CSS
- How to implement Typed.js to your WordPress website
- How can I use this jQuery script, Typed.js?
Here are the steps if you want to add Typed.js Typewriter Animated effect to your WordPress site:
Step-1.
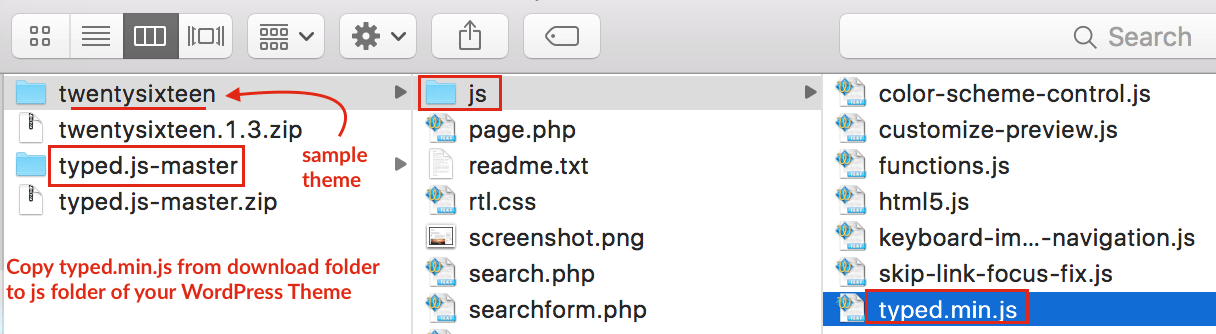
- We are going to use official
typed.min.jsJavaScript. - Download ZIP from official site: https://mattboldt.com/demos/typed-js/
- Extract it and put it under your theme’s
js folder.If your theme doesn’t have js folder then it’sgood idea to create oneand put file under it.
Step-2.
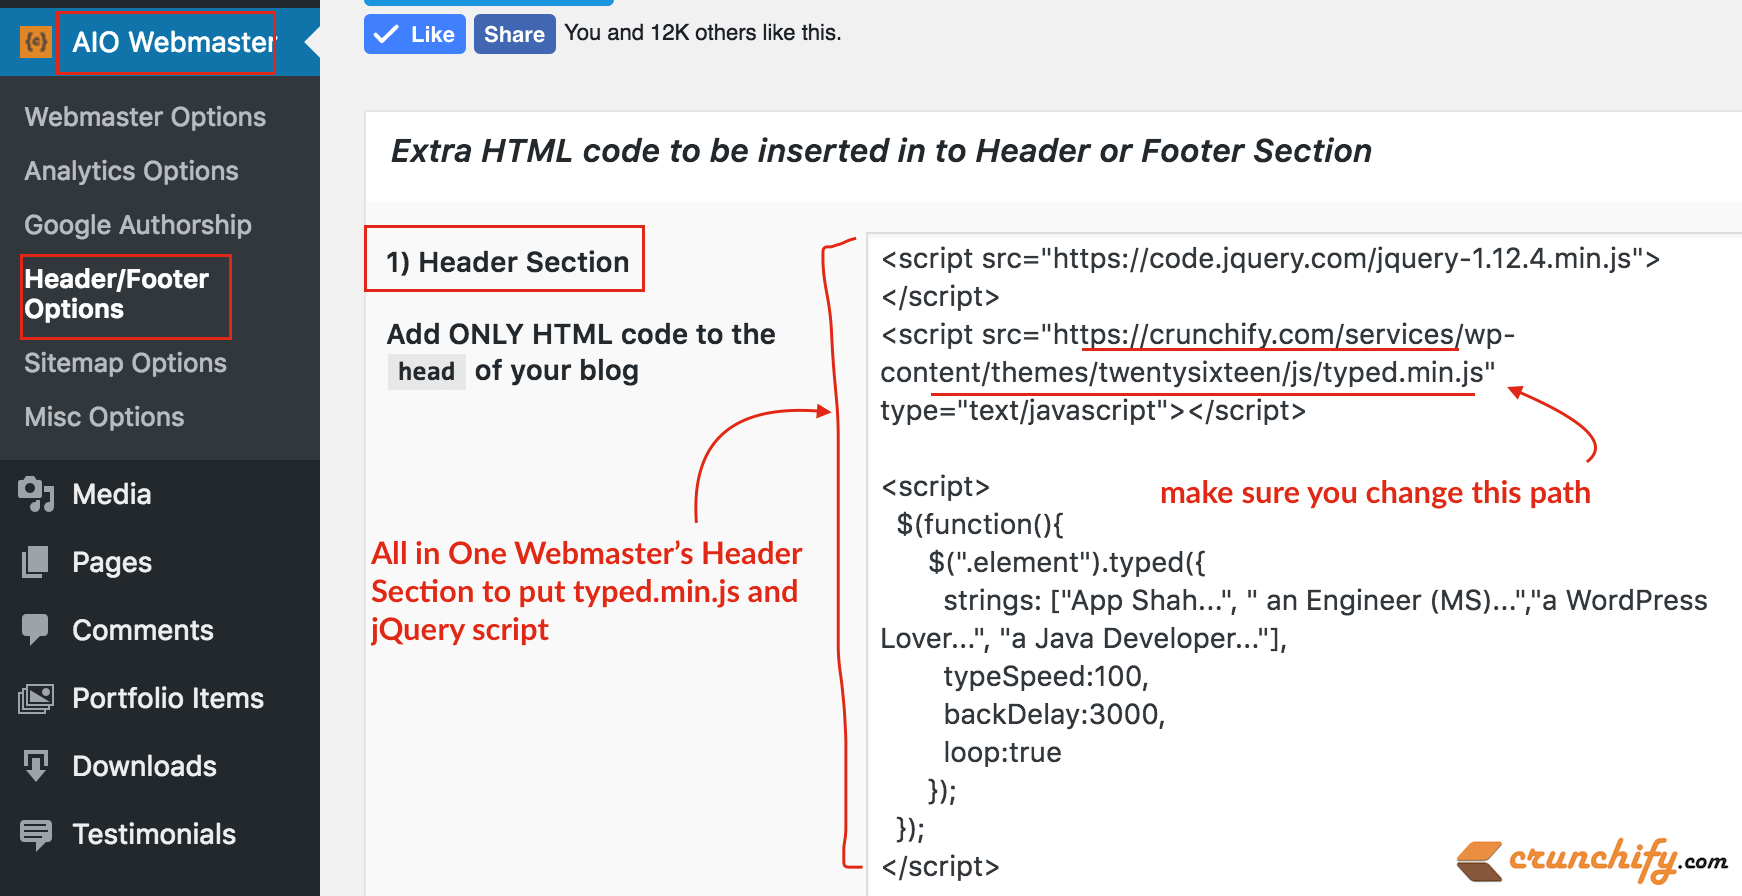
- We need to load jQuery and
typed.min.jsfile into your site’s header. - In order to achieve that I’m using Header section available in Crunchy Booster plugin.
- Just put below code to header section and plugin will add both scripts and jQuery function into your theme’s header automatically.
<script src="https://code.jquery.com/jquery-1.12.4.min.js"></script>
<script src="https://cdnjs.cloudflare.com/ajax/libs/typed.js/2.0.10/typed.min.js" type="text/javascript"></script>

<script>
  $(function(){
      $(".element").typed({
        strings: ["App Shah...", " an Engineer (MS)...","a WordPress Lover...", "a Java Developer..."],
        typeSpeed:100,
        backDelay:3000,
        loop:true
      });
  });
</script>
NOTE: Make sure to change typed.js path as per your environment.
Here we are using 3 parameters:
- TypeSpeed: Which is 100 ms
- backDelay: 3 seconds
- loop: true
Please modify these typed.js parameter if required as per your need.
Step-3.
Now as we added all required script to your site, next task is to add HTML tag where you want to show typing effect. There are multiple options:
You could add typed effect to
- Sidebar
- Footer
- Header
- Title
- and more…
For Sidebar, Footer and Header section, you just need to add below code to widget section or theme header or footer file:
I'm <span class="element"></span><span class="typed-cursor"></span>
NOTE:Title section part is kind of tricky and totally depends on your site theme. I would say, take a look at your theme’s template file and modify location where you want to put this typed effect.
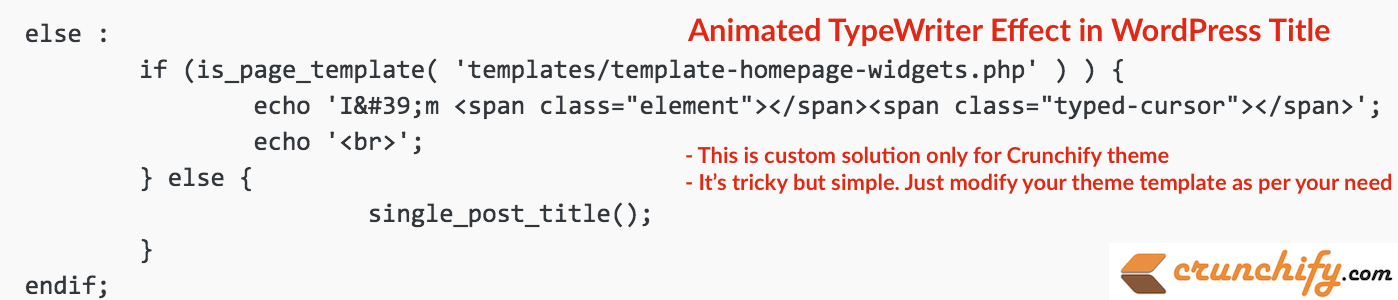
In my case, I’ve put animated effect only on Home page and removed Post Title too.
It seems, WordPress doesn’t allow any hook to add HTML tags into Title. So I raised a question in Crunchify Forum if anybody know how to tweak it. Is there any way to add HTML tag to WordPress Post Title? Let me know you answer to this question.
Also, if you need any custom solution then feel free to ask in above forum section and I’ll update you at earliest.
Is there any way to add HTML tag to Post Title?
Here is a little snippet of code that would allow you to add any HTML tag to your WordPress post titles as you see fit.
Useful for when you need to have a bolded word or line break at a specific place in the text.
Step 1.
Create your short code.
/**
 * Function to allow for HTML in widget titles
 * using a shortcode you can design yourself
 *
 * usage:
 * [br]
 * [span]something[/span]
 * [b]something[/b]
 * [strong]something[/strong]
 * [anchor url="http://domain.com/"]something[/anchor]
 *
 * Most of the widgets use a filter on widget title widget_title, but some custom widget might not apply or use this hook.
 * On those widgets, this method will not work.
 *
 * source: http://wordpress.stackexchange.com/a/136800/2015
 */
// Original snippet
add_filter('widget_title', 'do_shortcode');
add_filter('the_title', 'do_shortcode');

add_shortcode('br', 'so_shortcode_br');
function so_shortcode_br( $attr ){ return '
'; }

add_shortcode('span', 'so_shortcode_span');
function so_shortcode_span( $atts, $content ){
    $span = shortcode_atts( array(
        'color' => '',
    ), $atts );
    return ''. $content . '';
}

add_shortcode('strong', 'so_shortcode_strong');
function so_shortcode_strong( $atts, $content ){
	$a = shortcode_atts( array(
        'class' => 'someclass',
    ), $atts );
	return ''. $content . '';
}

add_shortcode('b', 'so_shortcode_b');
function so_shortcode_b( $atts, $content ){
    $b = shortcode_atts( array(
        'color' => '',
    ), $atts );
    return ''. $content . '';

}
Step 2.
Filter the HTML tag back out so that it doesn’t show up in your url’s ortags or any other place for that matter.
//wp_title clean-up
function render_wp_title($title){
	echo preg_replace("~(?:\[/?)[^/\]]+/?\]~s", ' ', $title);
}
add_filter( 'wp_title', 'render_wp_title', 98 );
Step 3.
Add your titles … something like, “Uuuu, look at me, I’m a [ b ] cool [ /b ] title”