
Last week on Crunchify we moved all contact forms to Google Forms. There is no more hassle to optimize/tune Wufoo or Contact Form 7 or other WP Forms.
So far the response is amazing. I loved the new look and custom styles on all Google forms.
NOTE:Google form is completely free. I strongly believe that, there isno need to pay for monthly service feefor other WordPress forms.
In this post we will go over why we moved to Google Forms and all benefits it provides. We are using Google Forms on below 3 pages since last 2 years without any issue 🙂
Why to pay for monthly/yearly service fee?
There are quite a few and wonderful WordPress Contact forms available out there. Some of the best are Gravity forms, Ninja forms, WP Forms, etc.
All of these forms come with free version with limited functionality. But the problems with them is, if you need more service/add-ons, then you have to pay for roughly $99/month or so. Price varies as per your selection.
If you need all of the functionality of those forms and if you have budget to pay for yearly fee then those are the best choice for you. On Crunchify, right now we don’t have such need to integrate Paypal, or other services and that’s one of the reason we’ve decided to go away from those paid plugins/services.
I’m not against those services but I kind of don’t like yearly fee option. If required, I might go for one time payment option 🙂
Why Google Forms?
As you kind of got an idea why we choose Google Form, there are few more points I would like to share with you.
Below are the key features of Google Forms:
- You could manage your complete event registrations
- whip up a quick poll
- Collect email addresses for a newsletter
- Create a pop quiz
- You could add so many different styles to your form
- Multiple choice options
- Dropdown Options
- Text, URL, email verification
- Add images and YouTube videos
- Responses to your contact form are neatly and automatically collected in Forms with real time response info and charts
- You could redirect your responses to your excel sheet for summarization
- And so more..
Let’s get started:
Step-1.
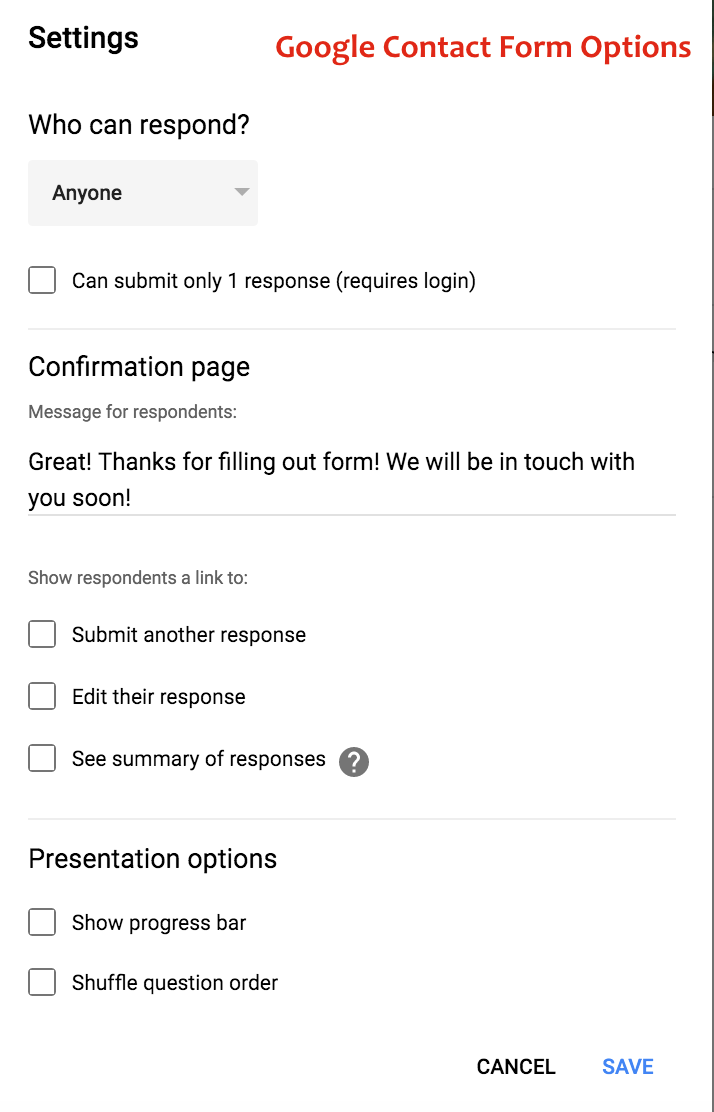
- Create your first Google Form.
List all Questionslike Name, Email, Message, etc as per your need.- Click on
Gear iconand provide your default Google From Options.
Step-2.
- Click on Color Palette
- Choose one theme from number of different Themes for your Google Contact Forms

Here is our Crunchify Contact form: https://crunchify.com/contact/
Step-3.
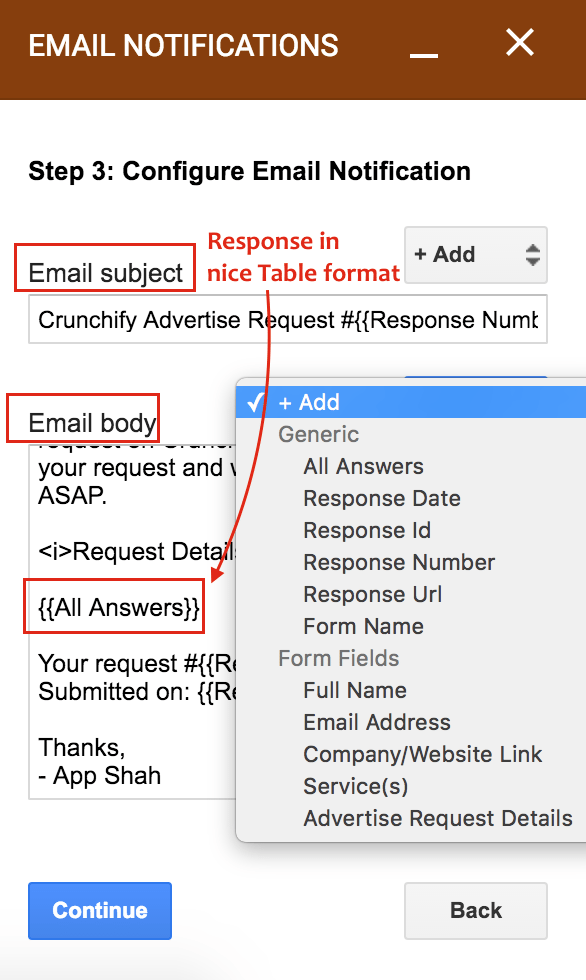
By default Google Form doesn’t include all field data into email notification. I’m using Email Notification for forms add-on which allows your send-out an email on form submission with bunch of other options as you see in below image.
Step-4.
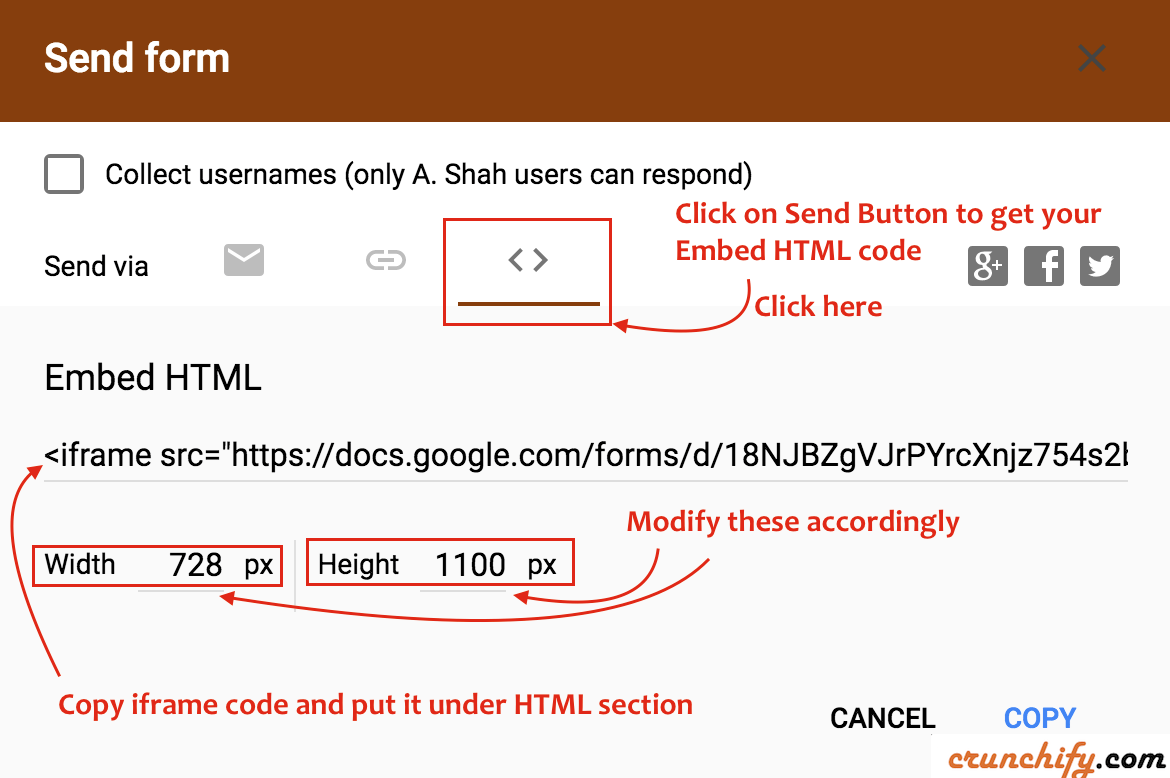
- Click on Big
SEND Buttonon top-right corner of the page. - Click on
Embed HTMLicon and copy youriFrame code. - Make sure to update
Height and Widthof your form - Go to your WordPress Edit Post/Page screen and copy code into
HTML section. - And you should see nice Contact Form.
Step-5. How to verify?
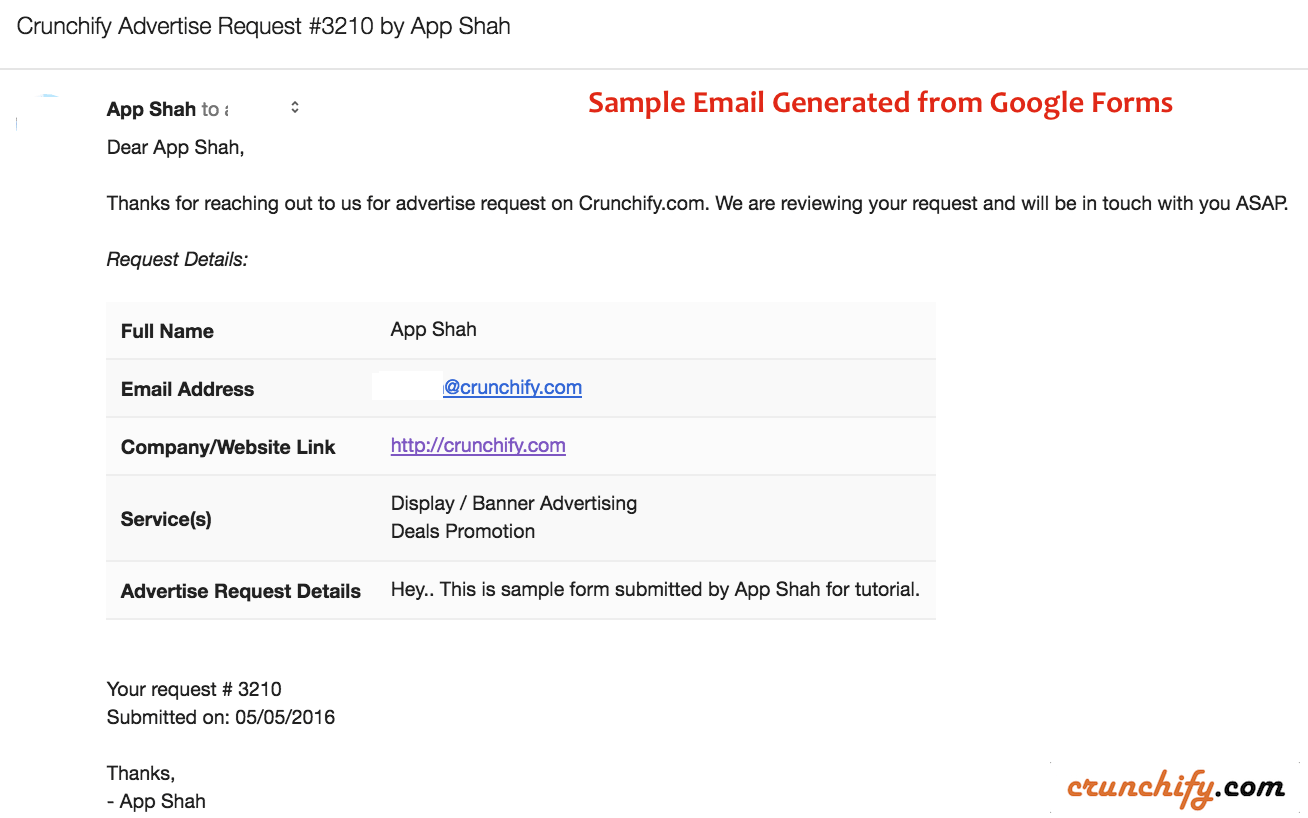
Fill out the form and submit to see detailed email with all field included into your email. Here is a sample Email..
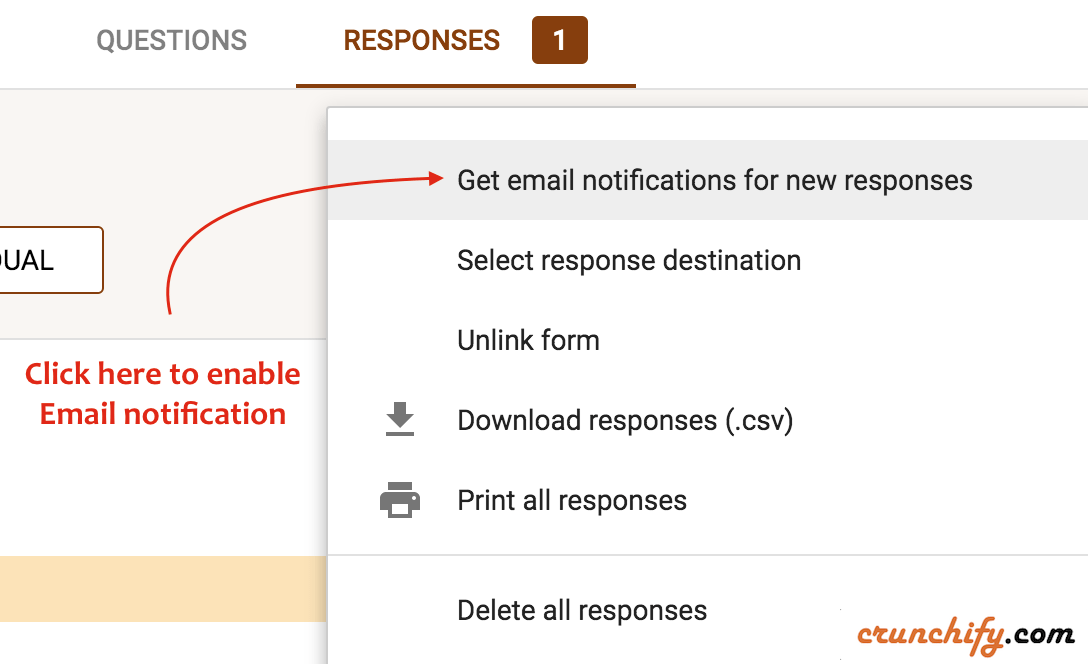
Extra Tips: Enable Email Notifications inside Google Docs Forms without Add-on
There is a catch though: It will simply send an email without all fields. So if you need all fields then just add free add-on as mentioned above.
If you have any more suggestions on Google Forms setup then let me know. I would love to implement your feedback on Crunchify’s Google Form.
