How To Increase Your Website Speed With CDN77?
It’s been almost 6 years I started blogging on Crunchify.com. My journey starts long back in 2008 where I started exploring WordPress Plugins and started my interest in quality blogging.
What is Niche Blogging?
There are so many, I would say Millions of blogs out there but blogging about something you love and quality contents which helps others are the key to success. That’s call Niche Blogging.
Only quality contents may not be adequate but also the infrastructure on which your site runs. There are so many considerations you should do in order for you to run your own site.
Here are the key considerations you should do in order to become successful blogger:
- Post quality content
- Best Hosting Provider
- Optimized Theme Framework
- Bare minimum plugins
- Sharp eye to detect/debug unnecessary scripts loading on your site
- Must use Content Delivery Network (CDN)
- WordPress Optimization Process
- Be consistent on your goal
As you may have noticed, Crunchify’s all pages loads in less than half a seconds as we have applied all above tips.
In this tutorial we will go over point 6 – CDN’s benefits and why CDN77 is one of the best Content Delivery Provider out there.
Why CDN77?
I came across CDN77 last month and started exploring since then. Here are the key benefits of CDN77.
- Their pricing policy is very transparent
- Total 32
PoPs regions - HTTP/2 support
- Full 24/7 customer support and detailed report panel
CDN77 is one of the biggest competition of MaxCDN.
Let’s get started on CDN77 setup
Step-1 – @CDN77 Side
- Go to https://www.cdn77.com.
- Click on
Sign Upbutton on top right. - Sign Up for
14 days freetrial. There is no Credit Card Required.
Step-2
- After Signup -> add your site
- Provide
Label: Crunchify - Choose
My Originoption - Provide your
domain URL: https://crunchify.com
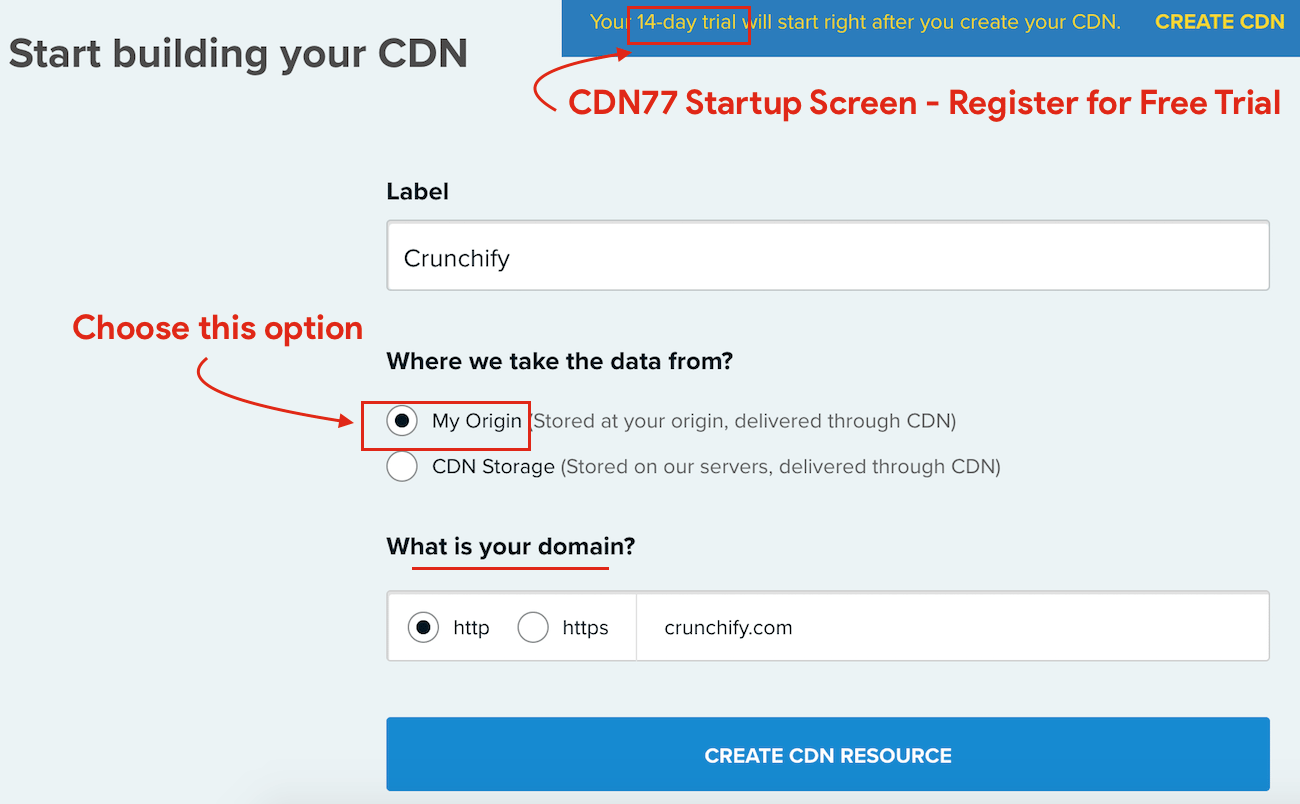
99% of the cases, you don't need CDN Storage. It will basically stores your WordPress site content on to their server.
Step-3
Next step is to Setup CDN for your site. First option is to change URL without CNAME setup.
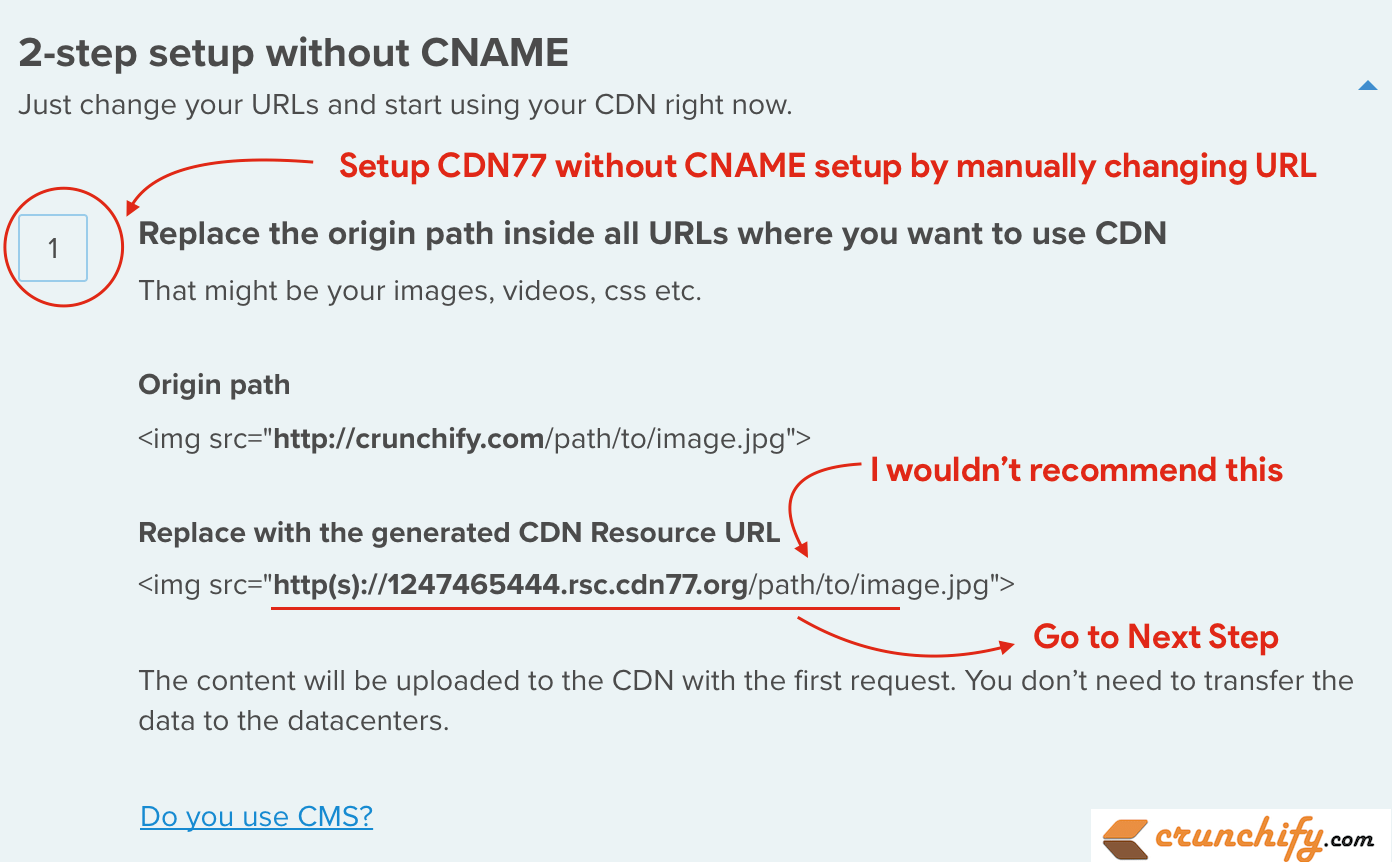
I would suggest not to use this option. Please go to next option.
Step-4
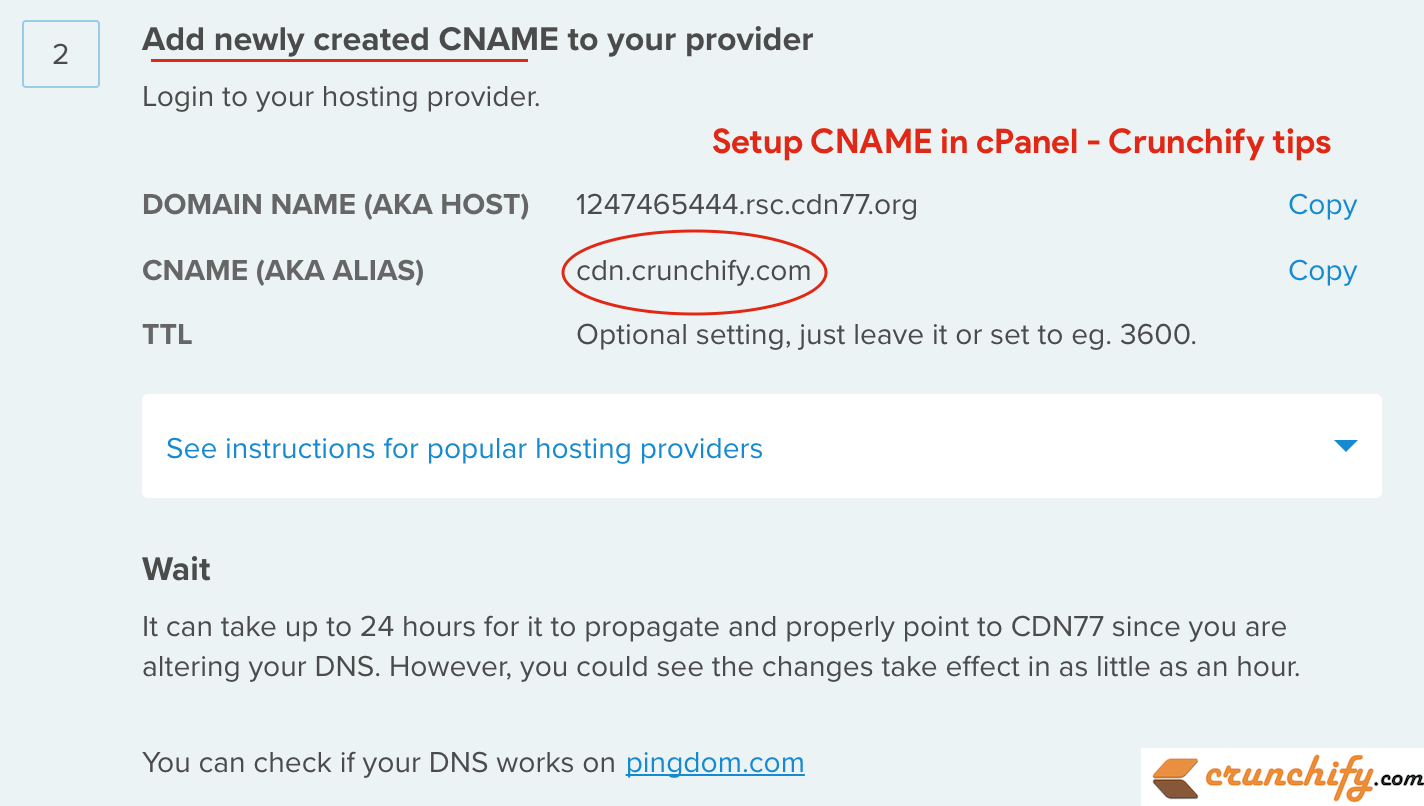
- Here you need to setup your CNAME first. You just need one CNAME. Provide it as cdn.crunchify.com.

Click on Go back to Integration link.
You will be able to see below settings now. Make sure your CNAME (AKA ALIAS) is correct.
Step-5 @cPanel side
- Now you need to login to your cPanel
- Go to Domains section
- Click on
Advanced Zone Editorbutton - Choose
domaincrunchify.com - Add
CNAMEwith value cdn.crunchify.com - Provide
VALUE: 1247465444.rsc.cdn77.org - Click on
Add Record
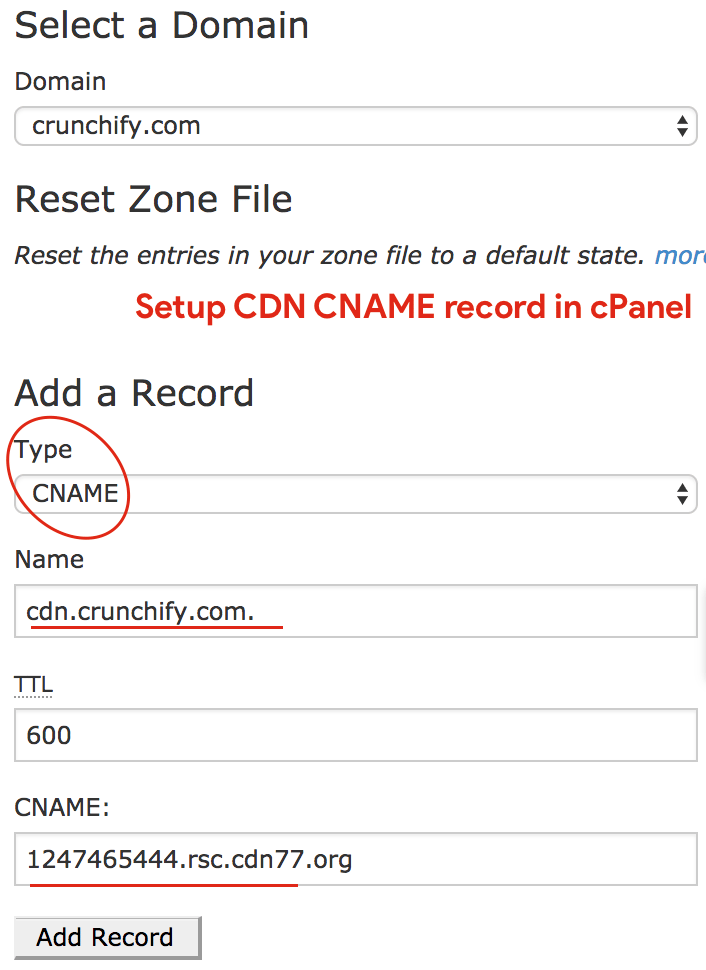
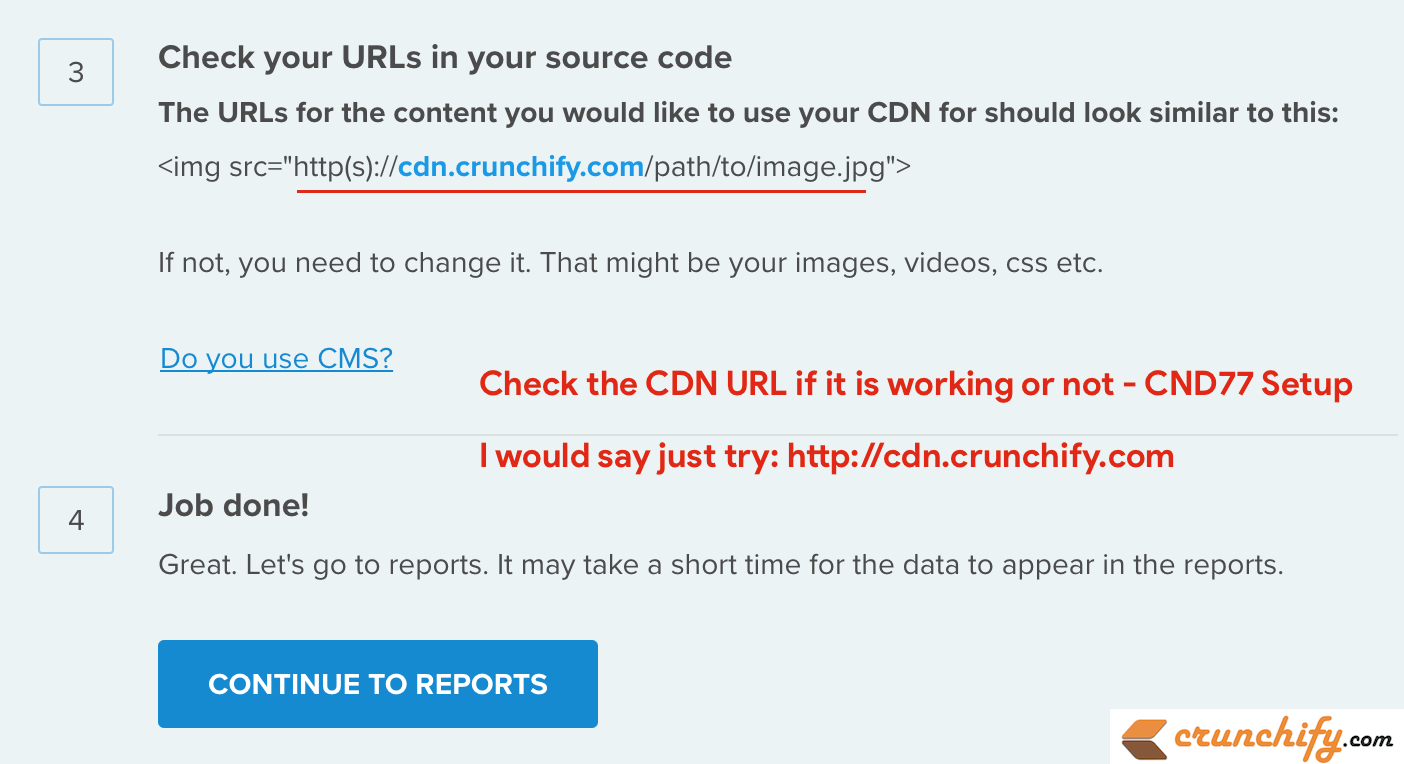
You need to wait for ~12 hours to have this into effect. After that, you could try this step 3:
Basically check, your CDN URL and that should work too:
- https://crunchify.com
- https://cdn.crunchify.com
Step-6 @WordPress Admin Panel side
- Go to WordPress admin panel
- I’m using WP Super Cache Plugin which allows me to setup my CDN url
- Go to WP Super Cache ->
CDN tab - Click on Enable CDN support
- Provide your CDN URL
- Click on
Save Changes - Clean you
site cache

How to verify?
- Open Chrome Browser
- Go to your site
- Right click anywhere and select
Inspect - You should see all of you Image, Theme and other resources loading from your CDN

And you are all set. Have a fun and happy blogging 🙂
