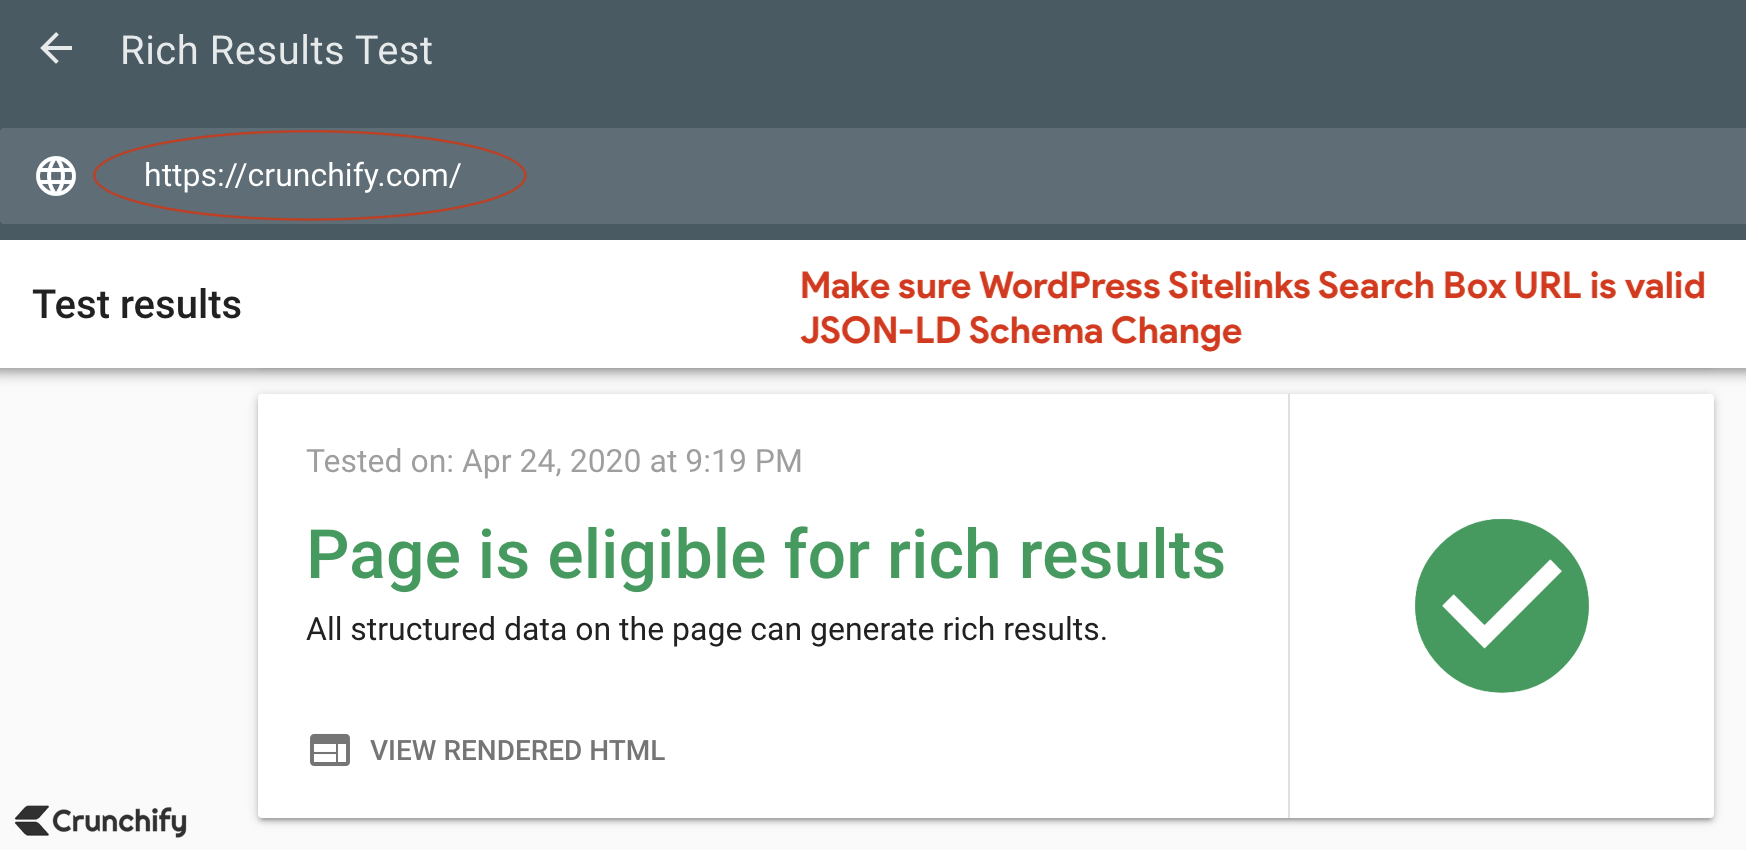
Google by default supports Sitelinks search box. But we need to make sure that it’s setup correct way on WordPress site.
What is Sitelinks search box?
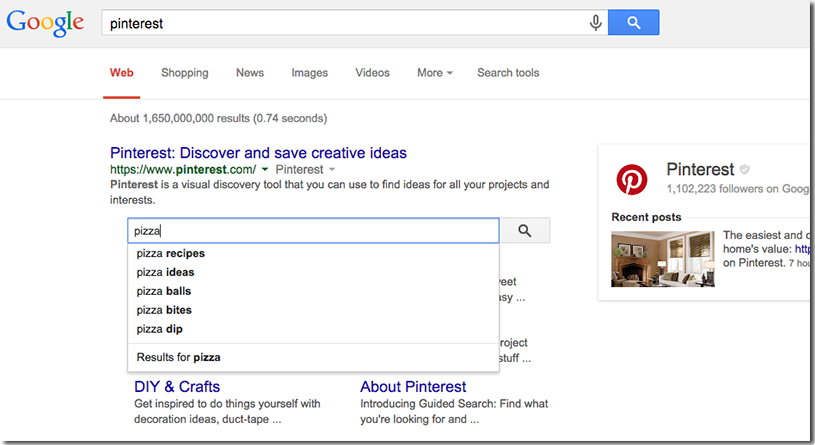
As you see below, Sitelink search box is a search box which helps users to search any term very quick way.
They don’t have to go to your site to search. Result appears on Google Search Result Page (SERP) itself.
It gives user a real-time search suggestions.

Today on Crunchify, while looking at some of other issues, we found that our Sitelinks search box was broken.
It tooks some time but we fixed Sitelinks Search Box URL on Crunchify. I would like to share same tips with all Crunchify readers.
Step-1. Install SEO WordPress plugin
Make sure you have installed Yoast SEO WordPress plugin. All in One SEO Pack also support JSON-LD and Sitelinks Search box support by default.
We are using the same since last few years and so far it’s good. By default Yoast SEO plugin adds JSON-LD schema markup on each of your page. Just activate plugin and you are set expect your custom search page.
What is JSON-LD?
JSON-LD stands for
JavaScript Object Notation for Linked Data, which consists of multi-dimensional arrays).
Here is a JSON-lD example from Crunchify home page:
{
	"@context": "https://schema.org",
	"@graph": [{
		"@type": "WebSite",
		"@id": "https://crunchify.com/#website",
		"url": "https://crunchify.com/",
		"name": "Crunchify",
		"inLanguage": "en-US",
		"description": "Largest free Technical and Blogging resource site for Beginner. We help clients transform their great ideas into reality!",
		"potentialAction": [{
			"@type": "SearchAction",
			"target": "https://crunchify.com/search/?q={search_term_string}",
			"query-input": "required name=search_term_string"
		}]
	}, {
		"@type": "CollectionPage",
		"@id": "https://crunchify.com/#webpage",
		"url": "https://crunchify.com/",
		"name": "Crunchify \u2022 Largest free Technical and Blogging resource site for Beginner. We help clients transform their great ideas into reality!",
		"isPartOf": {
			"@id": "https://crunchify.com/#website"
		},
		"inLanguage": "en-US",
		"description": "Largest free Technical, Blogging resource site for Beginners. We help clients transform their great ideas into reality!"
	}]
}
Here is an example of JSON-LD on sample blog post:
{
	"@context": "https://schema.org",
	"@graph": [{
		"@type": "WebSite",
		"@id": "https://crunchify.com/#website",
		"url": "https://crunchify.com/",
		"name": "Crunchify",
		"inLanguage": "en-US",
		"description": "Largest free Technical and Blogging resource site for Beginner. We help clients transform their great ideas into reality!",
		"potentialAction": [{
			"@type": "SearchAction",
			"target": "https://crunchify.com/search/?q={search_term_string}",
			"query-input": "required name=search_term_string"
		}]
	}, {
		"@type": "ImageObject",
		"@id": "https://crunchify.com/step-by-step-guide-to-enable-https-or-ssl-correct-way-on-apache-tomcat-server-port-8443/#primaryimage",
		"inLanguage": "en-US",
		"url": "https://crunchify.com/wp-content/uploads/2020/04/Apache-tomcat-running-on-port-8443-over-HTTPS.png",
		"width": 1261,
		"height": 451,
		"caption": "Apache tomcat running on port 8443 over HTTPS"
	}, {
		"@type": "WebPage",
		"@id": "https://crunchify.com/step-by-step-guide-to-enable-https-or-ssl-correct-way-on-apache-tomcat-server-port-8443/#webpage",
		"url": "https://crunchify.com/step-by-step-guide-to-enable-https-or-ssl-correct-way-on-apache-tomcat-server-port-8443/",
		"name": "Step by Step guide to Enable HTTPS or SSL correct way on Apache Tomcat Server - Port 8443 \u2022 Crunchify",
		"isPartOf": {
			"@id": "https://crunchify.com/#website"
		},
		"inLanguage": "en-US",
		"primaryImageOfPage": {
			"@id": "https://crunchify.com/step-by-step-guide-to-enable-https-or-ssl-correct-way-on-apache-tomcat-server-port-8443/#primaryimage"
		},
		"datePublished": "2020-04-24T06:08:30+00:00",
		"dateModified": "2020-04-24T17:44:01+00:00",
		"author": {
			"@id": "https://crunchify.com/#/schema/person/b40f3806c0a1ef3372253a9198e0562f"
		},
		"description": "It's been almost 12 years I started using Apache Tomcat. I believe when I did my 1st under grade project, it was on Tomcat version 1.x. Now it's already",
		"potentialAction": [{
			"@type": "ReadAction",
			"target": ["https://crunchify.com/step-by-step-guide-to-enable-https-or-ssl-correct-way-on-apache-tomcat-server-port-8443/"]
		}]
	}, {
		"@type": ["Person"],
		"@id": "https://crunchify.com/#/schema/person/b40f3806c0a1ef3372253a9198e0562f",
		"name": "App Shah",
		"image": {
			"@type": "ImageObject",
			"@id": "https://crunchify.com/#authorlogo",
			"inLanguage": "en-US",
			"url": "https://secure.gravatar.com/avatar/d8c1b220ca438566d5e5d0e70be7ef5e?s=96&d=mm&r=g",
			"caption": "App Shah"
		},
		"description": "I'm an Engineer by profession, Blogger by passion & Founder of Crunchify, LLC, the largest free blogging & technical resource site for beginners. Love SEO, SaaS, #webperf, WordPress, Java. With over <a href=\"https://crunchify.com/advertise/\" target=\"_blank\" rel=\"noopener noreferrer\">16 millions+</a> pageviews/month, Crunchify has changed the life of over thousands of individual around the globe teaching Java & Web Tech for FREE. Get latest update on <a target=\"_blank\" href=\"https://www.facebook.com/Crunchify\" class=\"crunchify-social-icon-facebook\" rel=\"noopener noreferrer\"><i class=\"fab fa-facebook\" style=\"margin: 0px 5px\"></i></a> and <a target=\"_blank\" href=\"https://twitter.com/Crunchify\" class=\"crunchify-social-icon-twitter\" rel=\"noopener noreferrer\"><i class=\"fab fa-twitter\" style=\"margin: 0px 0px 0px 5px;\"></i></a>.\r\n\r\n<div style=\"clear:both\"></div>",
		"sameAs": ["https://facebook.com/Crunchify", "https://twitter.com/Crunchify"]
	}]
}
Step-2. Validate Sitelinks search URL
Make sure you have correct Sitelinks search URL specified. Line 10 to 14 are highlighted in above code. Please double check.
By default Yoast SEO adds below URL.
"target": "https://crunchify.com/?s={search_term_string}"
Note:If you haven’t setup Google Custom search then you are fine. You don’t have to modify anything. But I would suggest to go with Google Custom Search result setup based on last 6 years of experience 🙂 . User experience and search result quality is much better than default Google Search.
Step-3. Change target search URL
On Crunchify, we are using Google Custom Search setup. And hence default target URL won’t work for us.
Our custom search URL is:
https://crunchify.com/search/?q=java
How to change URL in Yoast SEO’s schema markup?
Add below code snippet to your theme’s functions.php file and save changes.
// Yoast - change ld+json search url
function crunchify_change_json_ld_search_url() {
	return trailingslashit( home_url() ) . 'search/?q={search_term_string}';
}
add_filter( 'wpseo_json_ld_search_url', 'crunchify_change_json_ld_search_url' );
This code snippet will replace and update correct Search URL for you:
Here is an updated URL:
"target": "https://crunchify.com/search/?q={search_term_string}"
Step-4. Wait for few weeks
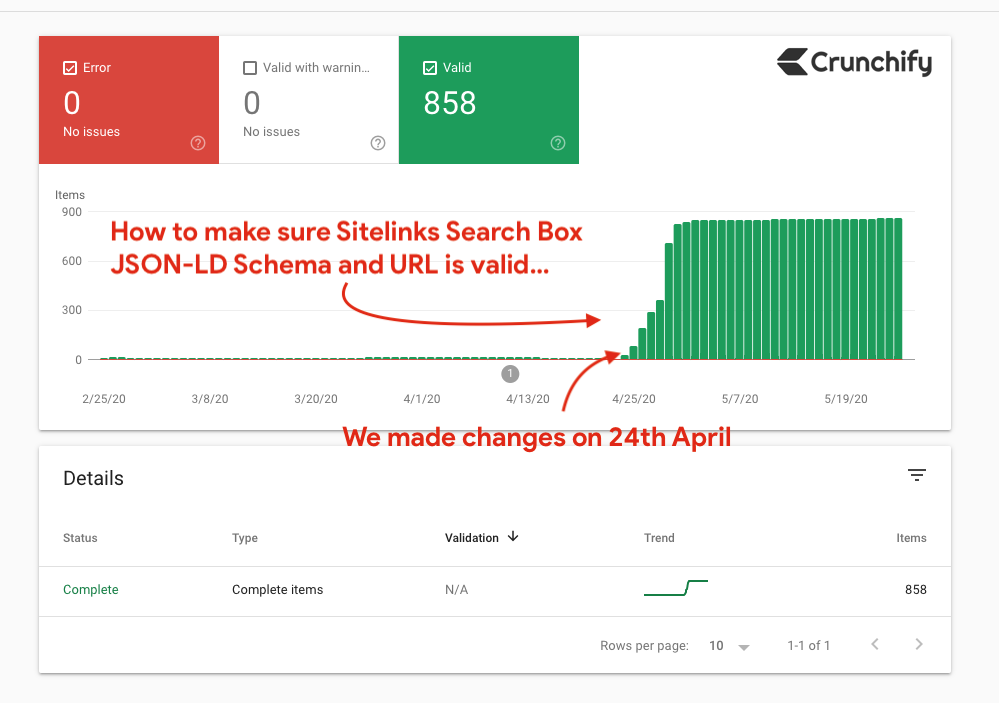
Now it’s time to wait for few weeks and check again result in Google Search Result Page. Checkout live result. We made changes on 24th April, 2020 and Google started recognizing URL change immediately after that.
Here is a URL: https://search.google.com/search-console/sitelinks-searchbox. Select a property and you should see result.

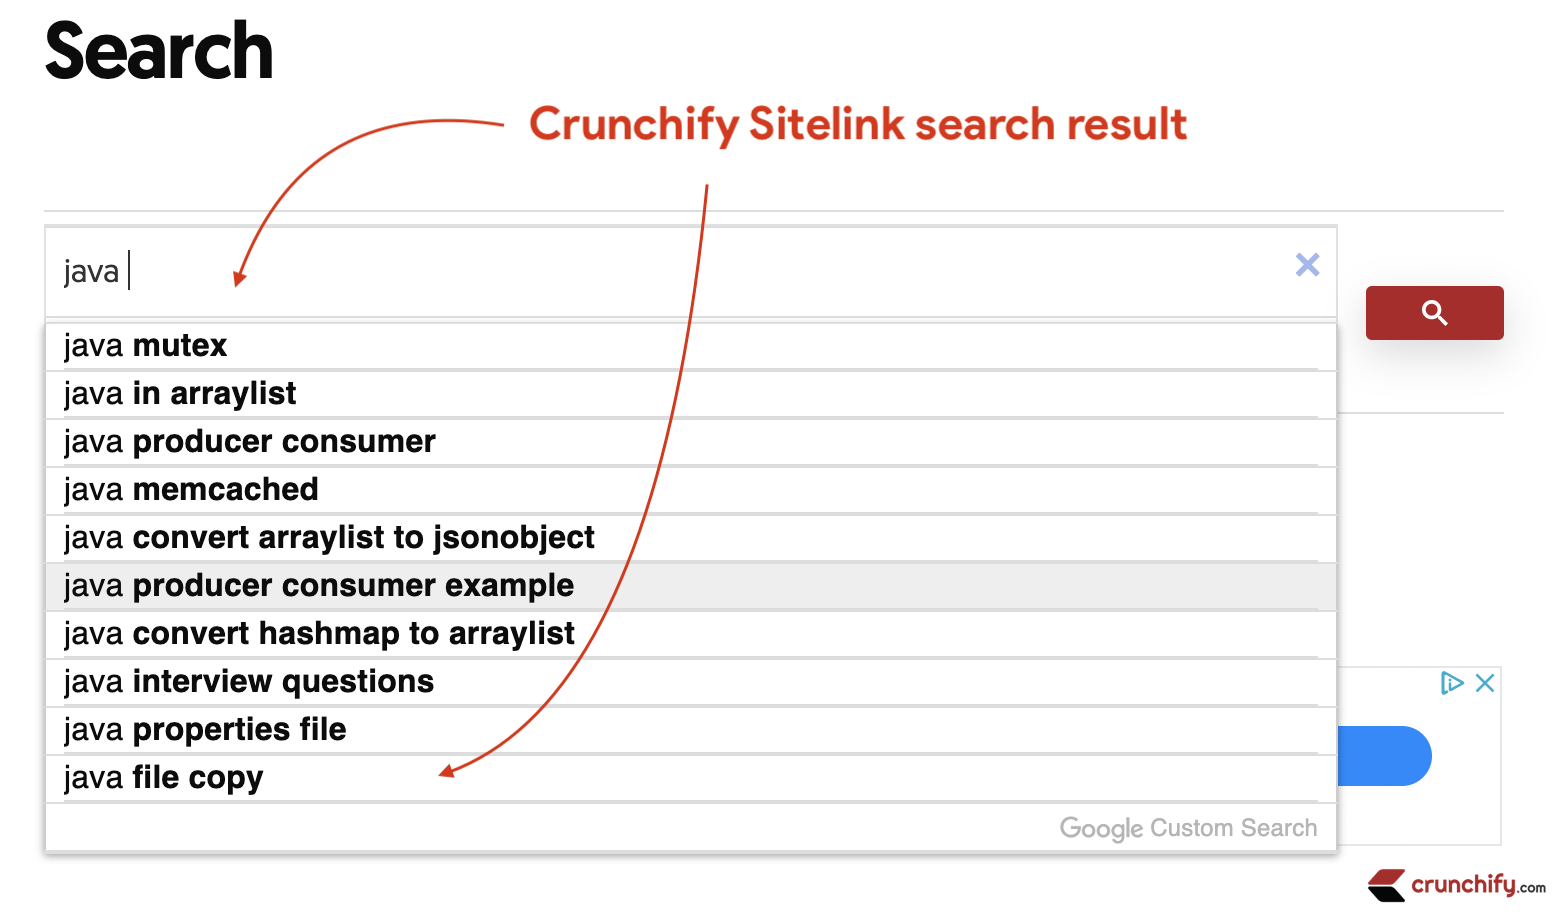
Here is an example of Crunchify Sitelink search result.

Here are more details:
Hope this tutorial will help you fix any issue you may have for JSON-LD Google Site links search box schema markup. Happy blogging.
