As you may have noticed, we have hundreds of articles on Crunchify on Site performance and tips on loading page within few seconds and ideally in less than a second 🙂
There are quite a few variables out there for increasing site speed and one of the key variable to achieve faster site loading performance is a Hosting Provider. In my personal opinion, and over last 8 years of blogging journey, I came across only couple of high performance WordPress hosting providers and WP Engine is one of them.
WP Engine coupon link: Crunchify and WP Engine have teamed up to give you a special offer. Use
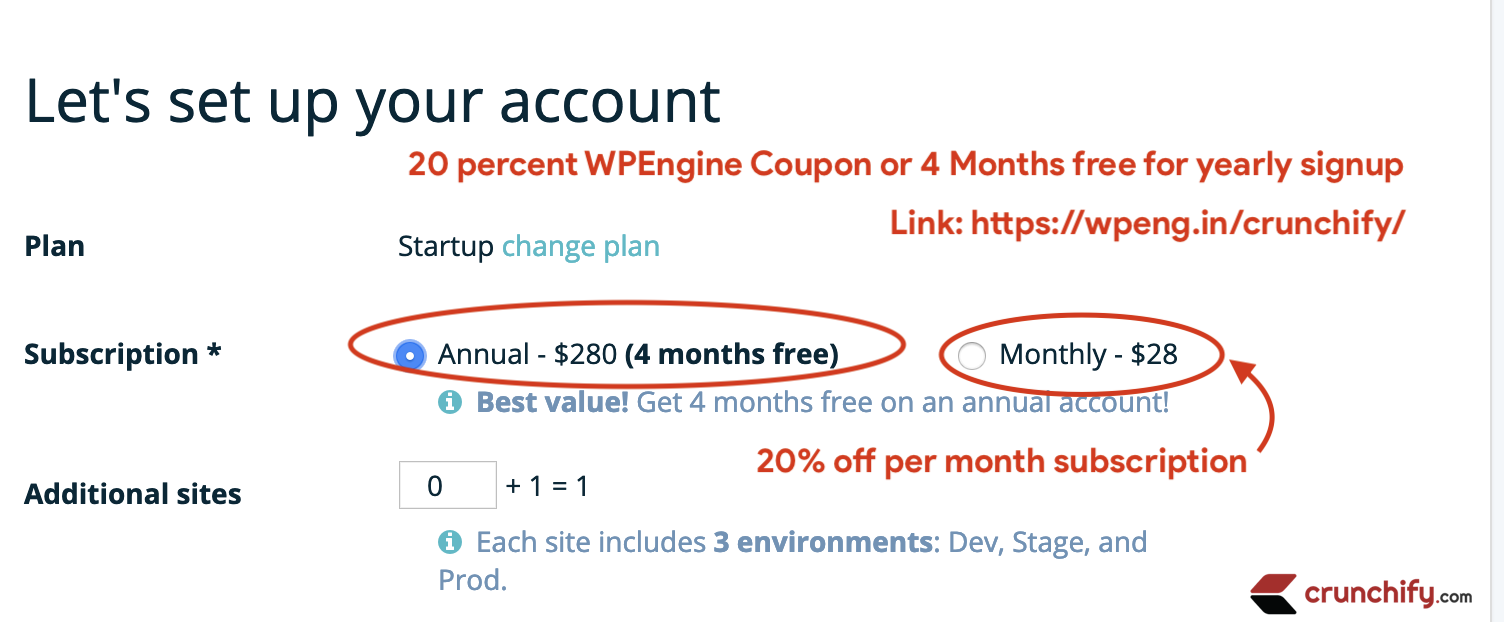
20% OFFor4 Months Freepart of that link. No Coupon code required.Direct offer link.
WP Engine is a pioneer and proven Web hosting for so long, in fact it’s recommended by WordPress developers.
In this tutorial, we will go over 2 things:
- Key benefits of using WP Engine
- Steps on how to register for WP Engine with all details
1. Key benefits of using WP Engine
For any WordPress hosting provider, I would look for below top 5 things:
Point-1) Availability
Availability is my number one goal. Your site should be up 99.999% of the time. WP Engine provides full Active-active configuration with multi-zone redundancy for strongest uptime protection and failover.
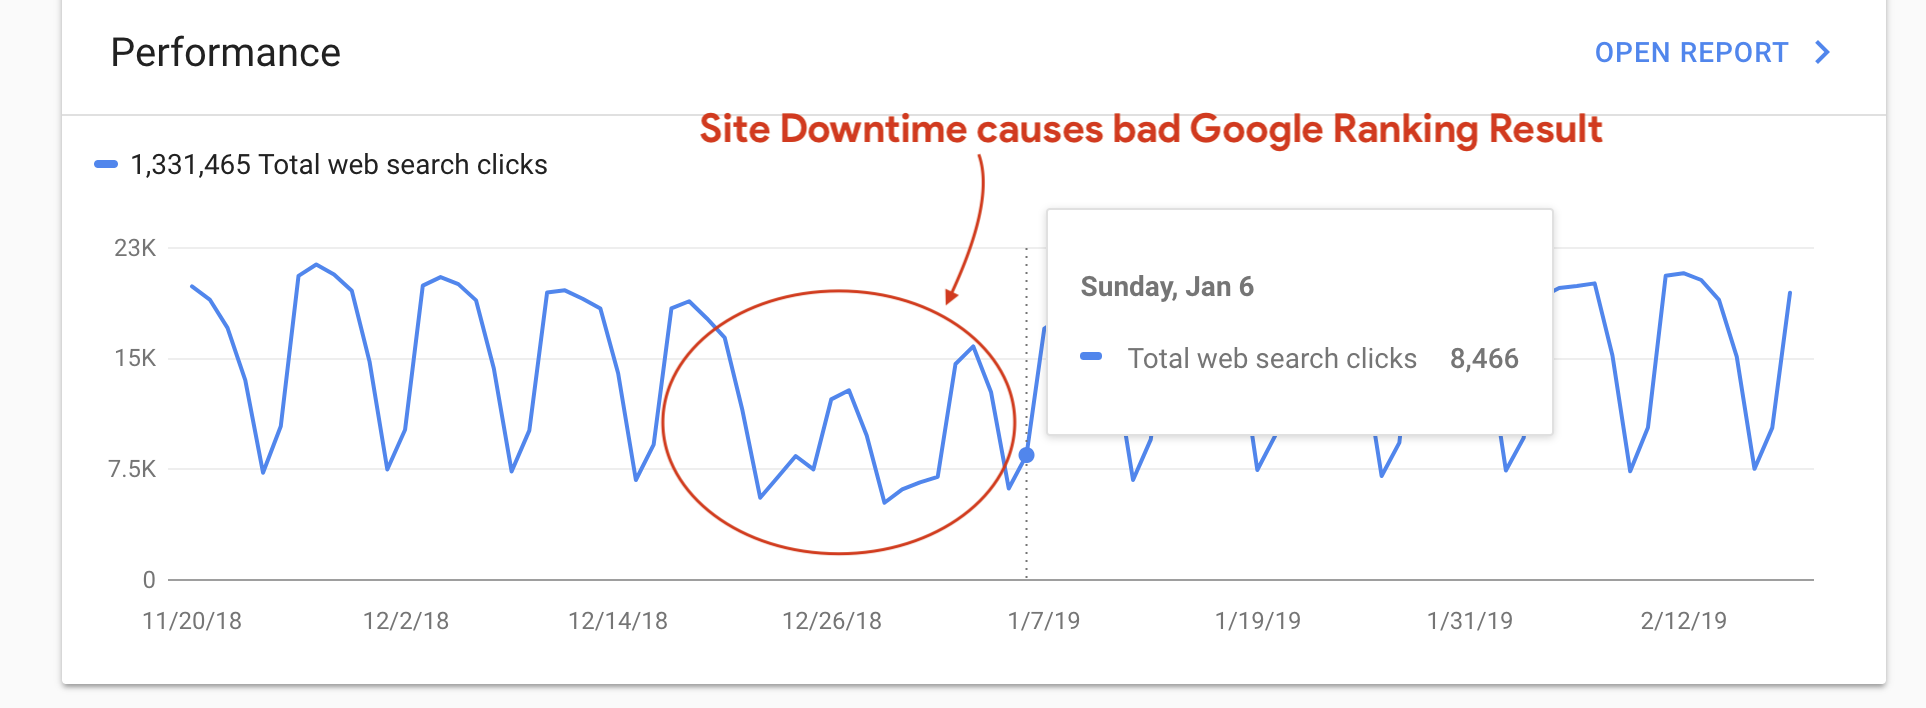
Even couple of times a year downtime is not good for you and for users’ experience. Infect, Google doesn’t like downtime at all. In case of maintenance, if you are not throwing HTTP 503 error then Google will drop your site in Search Result.
With only 11 minutes downtime, one of my client got dropped from Search Result page for long time.
You don’t want to see this type of fluctuation for your site.
Point-2) Security
This is my second highest priority. Sometime back I’ve published detailed articles on how to secure your WordPress site with list of 10 points. Please go take a look that article if you haven’t tried that.
But what if your Hosting provider provides most of that support by default at their Infrastructure side? Well, WP Engine provides ground breaking security on threat detection and blocking and so much more. They do have 24×7 dedicated security team with lots of inhouse monitoring tools.
Point-3) Award Winning Support with an NPS of 82 in 2017
Piece of mind 🙂 Whenever you have a question or an issue, you are just a click away.
I personally like this feature than calling support rep on phone. I’ve quite a few accounts for my clients on WP Engine and I’m totally satisfied with the customer support.
Point-4) Staging environment support
WP Engine provides single click Staging site creation support. I personally like staging site for all my new changes. Once I verify and fully test my staging changes, I push it to Live site with single click.
Point-5) Latest technology stacks including CDN and SSL Support
To be honest, I still use MaxCDN Enterprise account on Crunchify even though my hosting provider provides the same for free. WP Engine is one of the company that provides free CDN. I would fully suggest you to utilize it for faster load times for customers around the world.
I hope by now you got clear benefits of using WP Engine for your WordPress need.
2. Steps on how to register for WP Engine with all details
Below are the steps to sign up for WP Engine including 20% off or 4 months free if you signup for a year, for all Crunchify users.
Step-1
Go to WP Engine. At the top section of the page, you will see 20% off coupon code.
Step-2
Scroll down to page and click on HOST MY SITE button.
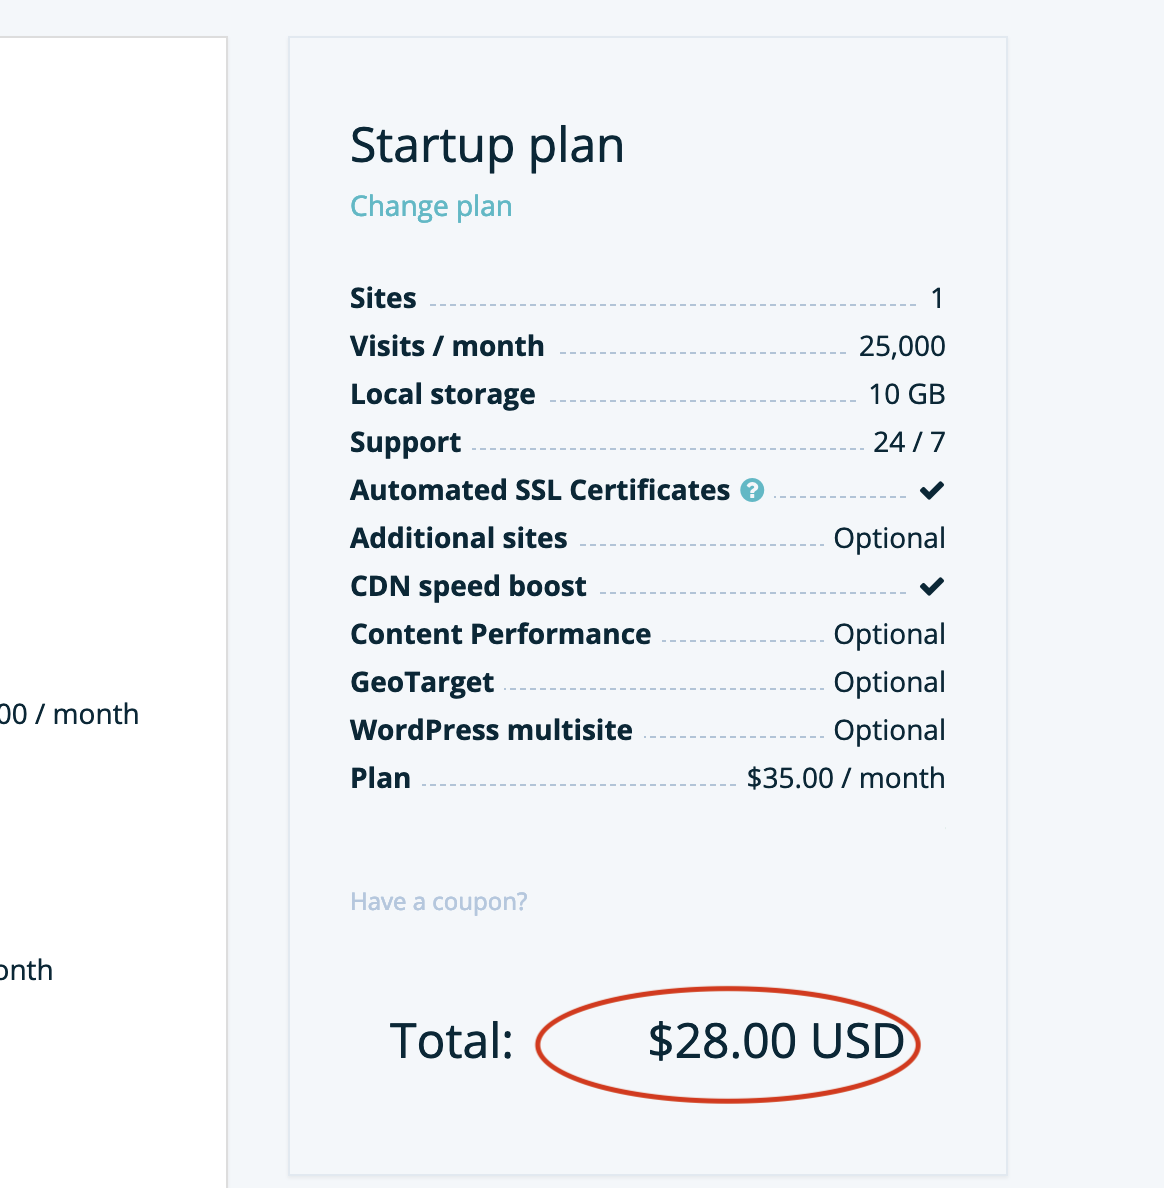
As you see in above image, it’s just $28/month instead of $35 for Startup plan. That’s 20% off. You will be prompted with signup page.
If you sign up for a year then you will get additional 4 months of free hosting.
Step-3
Next thing is to migrate your site or create new site.
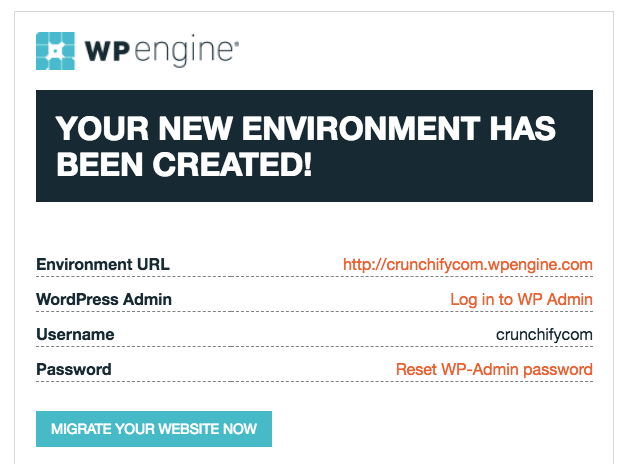
Once you add your site you will see some message like this:
Your environment is currently being built and will be available shortly. An email will be sent to you when it is ready.
Just wait for few minutes and your site should be ready. If you need help migrating your site to WP Engine then follow this tutorial. You will receive an email with all instruction on how to get started with your new site.
Step-4
WP Engine provides bunch of options to configure your site. Here are few of them:
- Overview
- provides all details about Visitors, Bandwidth, Storage, PHP version, IP Address and so much more.
- Domains
- Option to add all of your domains
- CDN
- Redirect rules
- You don’t have to pay for extra plugin for redirection. URL end point redirection is readily available from WP Engine admin console only.
- Backup points
- Paying extra for backup. No more. You are covered with automated backup and restore points.
- Access logs
- Error logs
- SFTP users
- Full FileZilla support for copying file manually
- Git push
- SSL
- Single click SSL Installation utility for you.
- Advanced
- Utilities
- Site migration
- Kind of new to infra setup? Well, simple plugin is available for you to migrate your site
Links to:
- phpMyAdmin
- Direct link to your MySQL DB tables
- WordPress Admin
- Your site’s wp-admin URL
Step-5
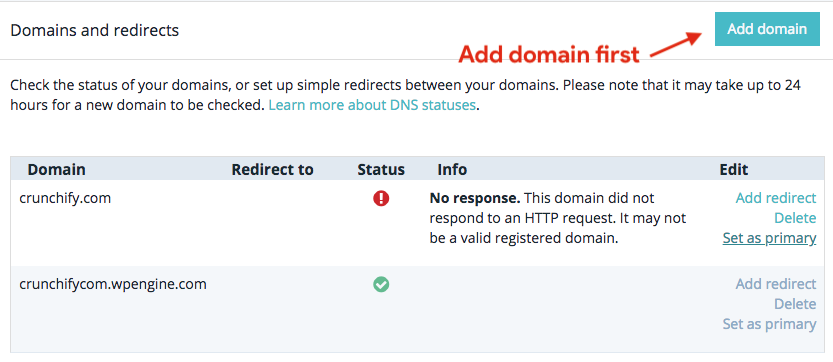
Let’s click on Domains: Add your domain. Sample: crunchify.com.
Please don’t click on Set as primary for now. You need to make sure you have your site completely moved over to WP Engine.
I personally use VaultPress as my backup solution. VaultPress has single click migration option by providing new WP Engine IP. Once your site is migrated successfully then try setting up Set as primary option for your domain.
Step-6
Next thing is to change your DNS server. We uses Google Domain as our domain registrar. I would go over and change A record pointing to my new WP Engine IP.
Now just wait for few hours and your site should be able to load from WP Engine infrastructure.
Conclusion
We highly recommend WP Engine to all of Crunchify readers. With all top notch functionality and performance you are in good hand. If you have any feedback about WP Engine then don’t forget to provide your feedback in comment section.


