Java development team has changed their release cycle after Java8 significantly and now they are releasing new version every few months.
I personally like the faster Java release cycle and love upgrading it to latest all the time. There are so many new changes come to latest Java and today we will go over steps on how to upgrade your Java version from older version to Java 17.
Once you upgrade Java version to 17, we will also go over steps on what all changes you need to do in your IntelliJ IDEA’s Project settings and point it to Java 17.
Let’s get started.
Step-1. Download latest Java version.
- In my case it’s Java 17.0.1.
- If you are on MacOS then download .dmg file.
- In my case:
jdk-17_macos-x64_bin.dmg
- In my case:
- Click on .dmg file and install Java 17.0.1 on your Macbook.

Step-2 . Verify Java version on your MacOS
- Open MacOS terminal window
- Type below command to verify Java version
bash-3.2$ java -version

java version "17.0.1" 2021-10-19 LTS
Java(TM) SE Runtime Environment (build 17.0.1+12-LTS-39)
Java HotSpot(TM) 64-Bit Server VM (build 17.0.1+12-LTS-39, mixed mode, sharing)
Alias to current java version is /usr/bin/java
bash-3.2$ which java
/usr/bin/java
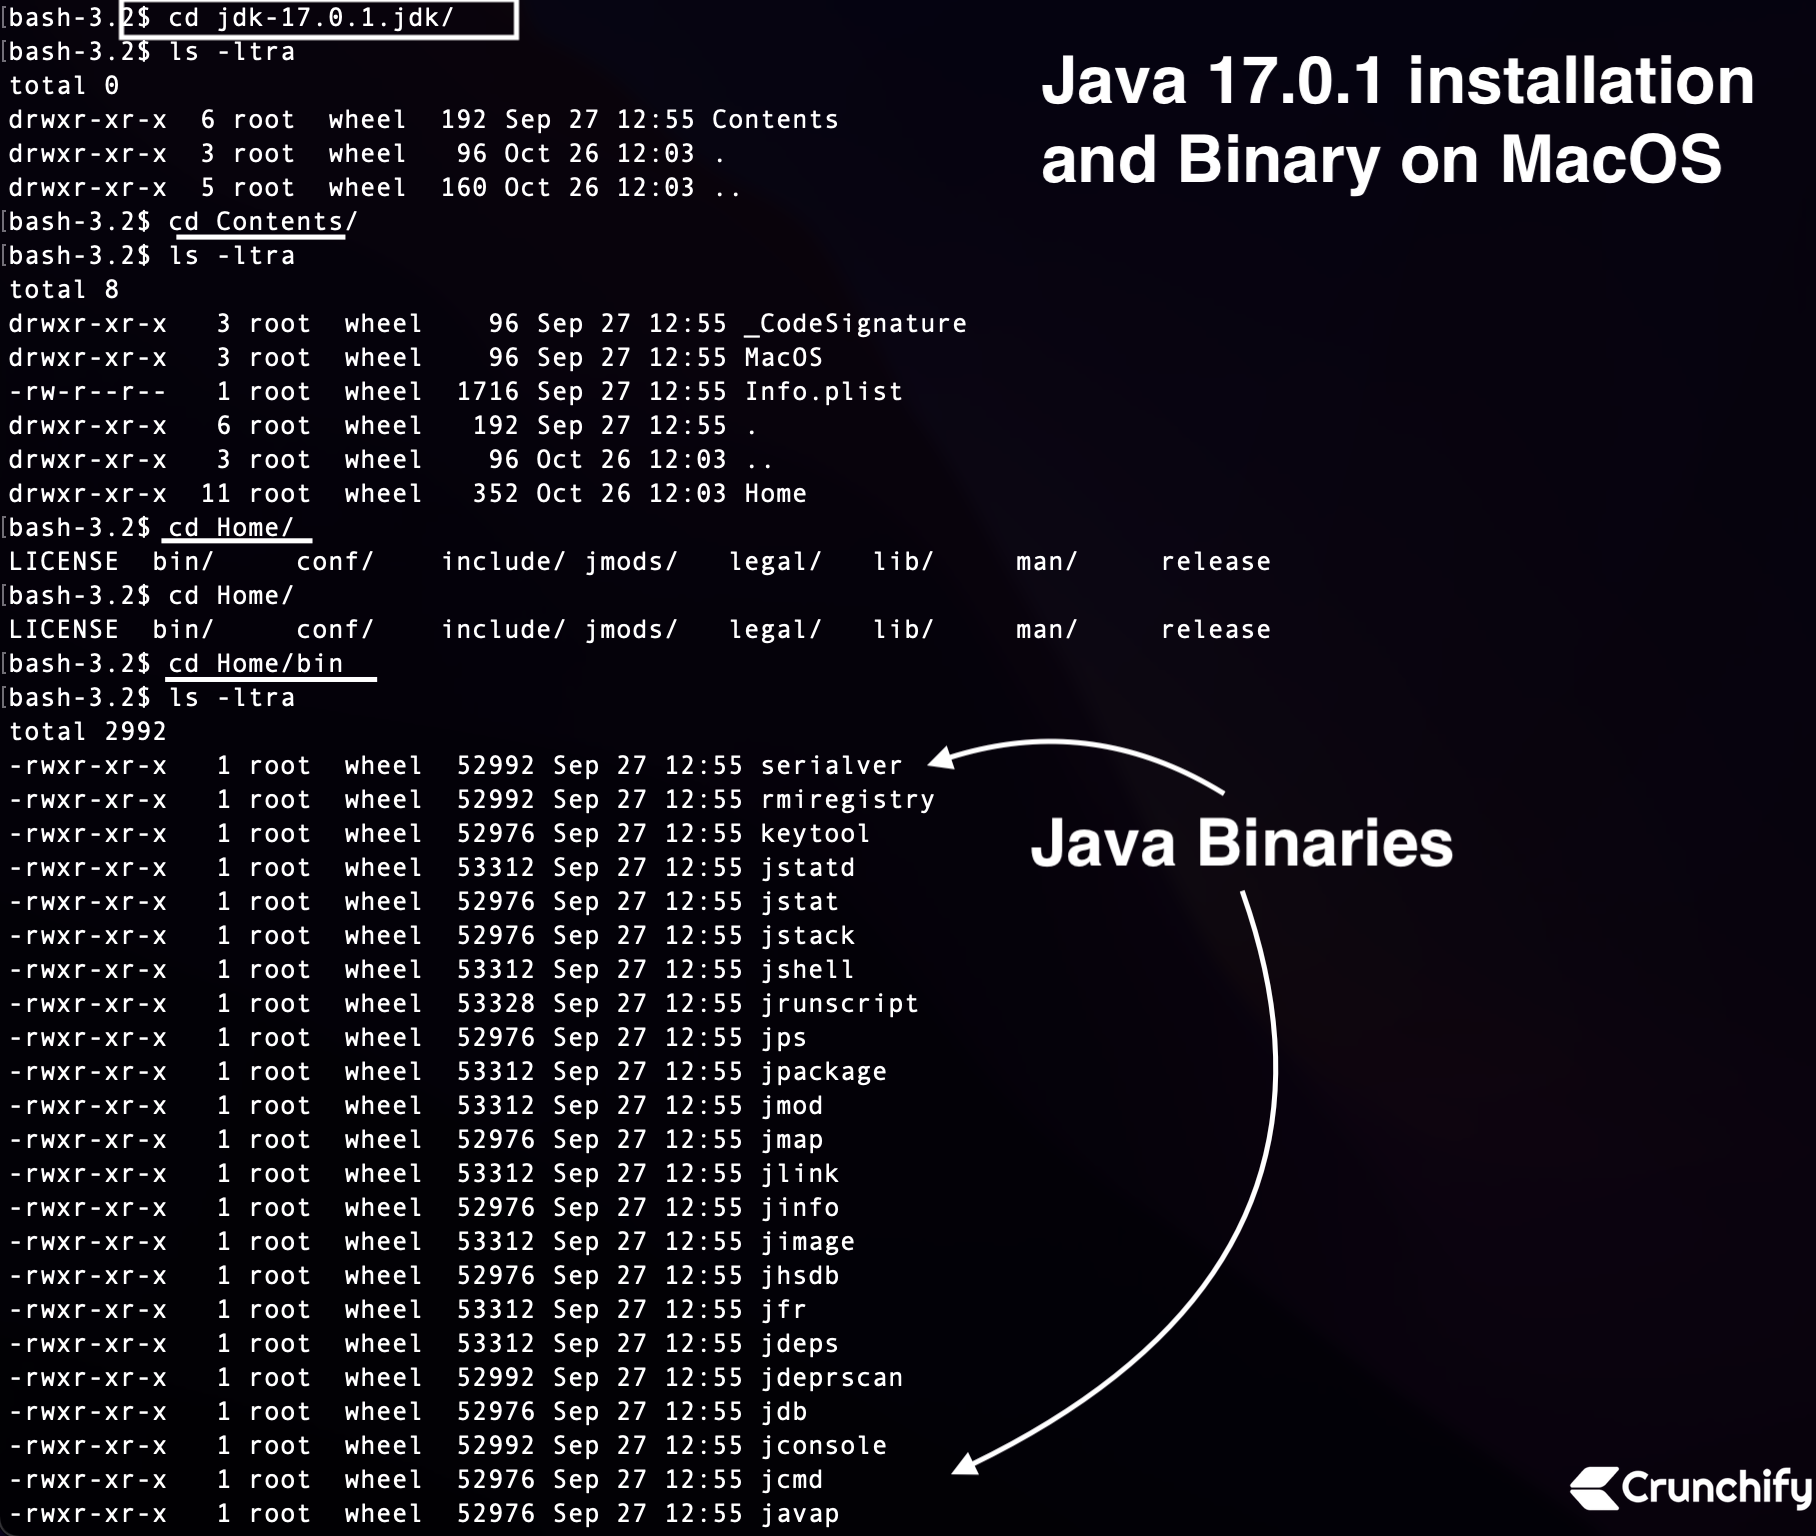
Step-3. Where is actual Java binaries?

On MacOS, Java is installed at this location:
/Library/Java/JavaVirtualMachines/

Step-4. Modify Java version in IntelliJ IDEA for your Project/Module
- Go to IntelliJ IDEA menu
- Click on Preferences…
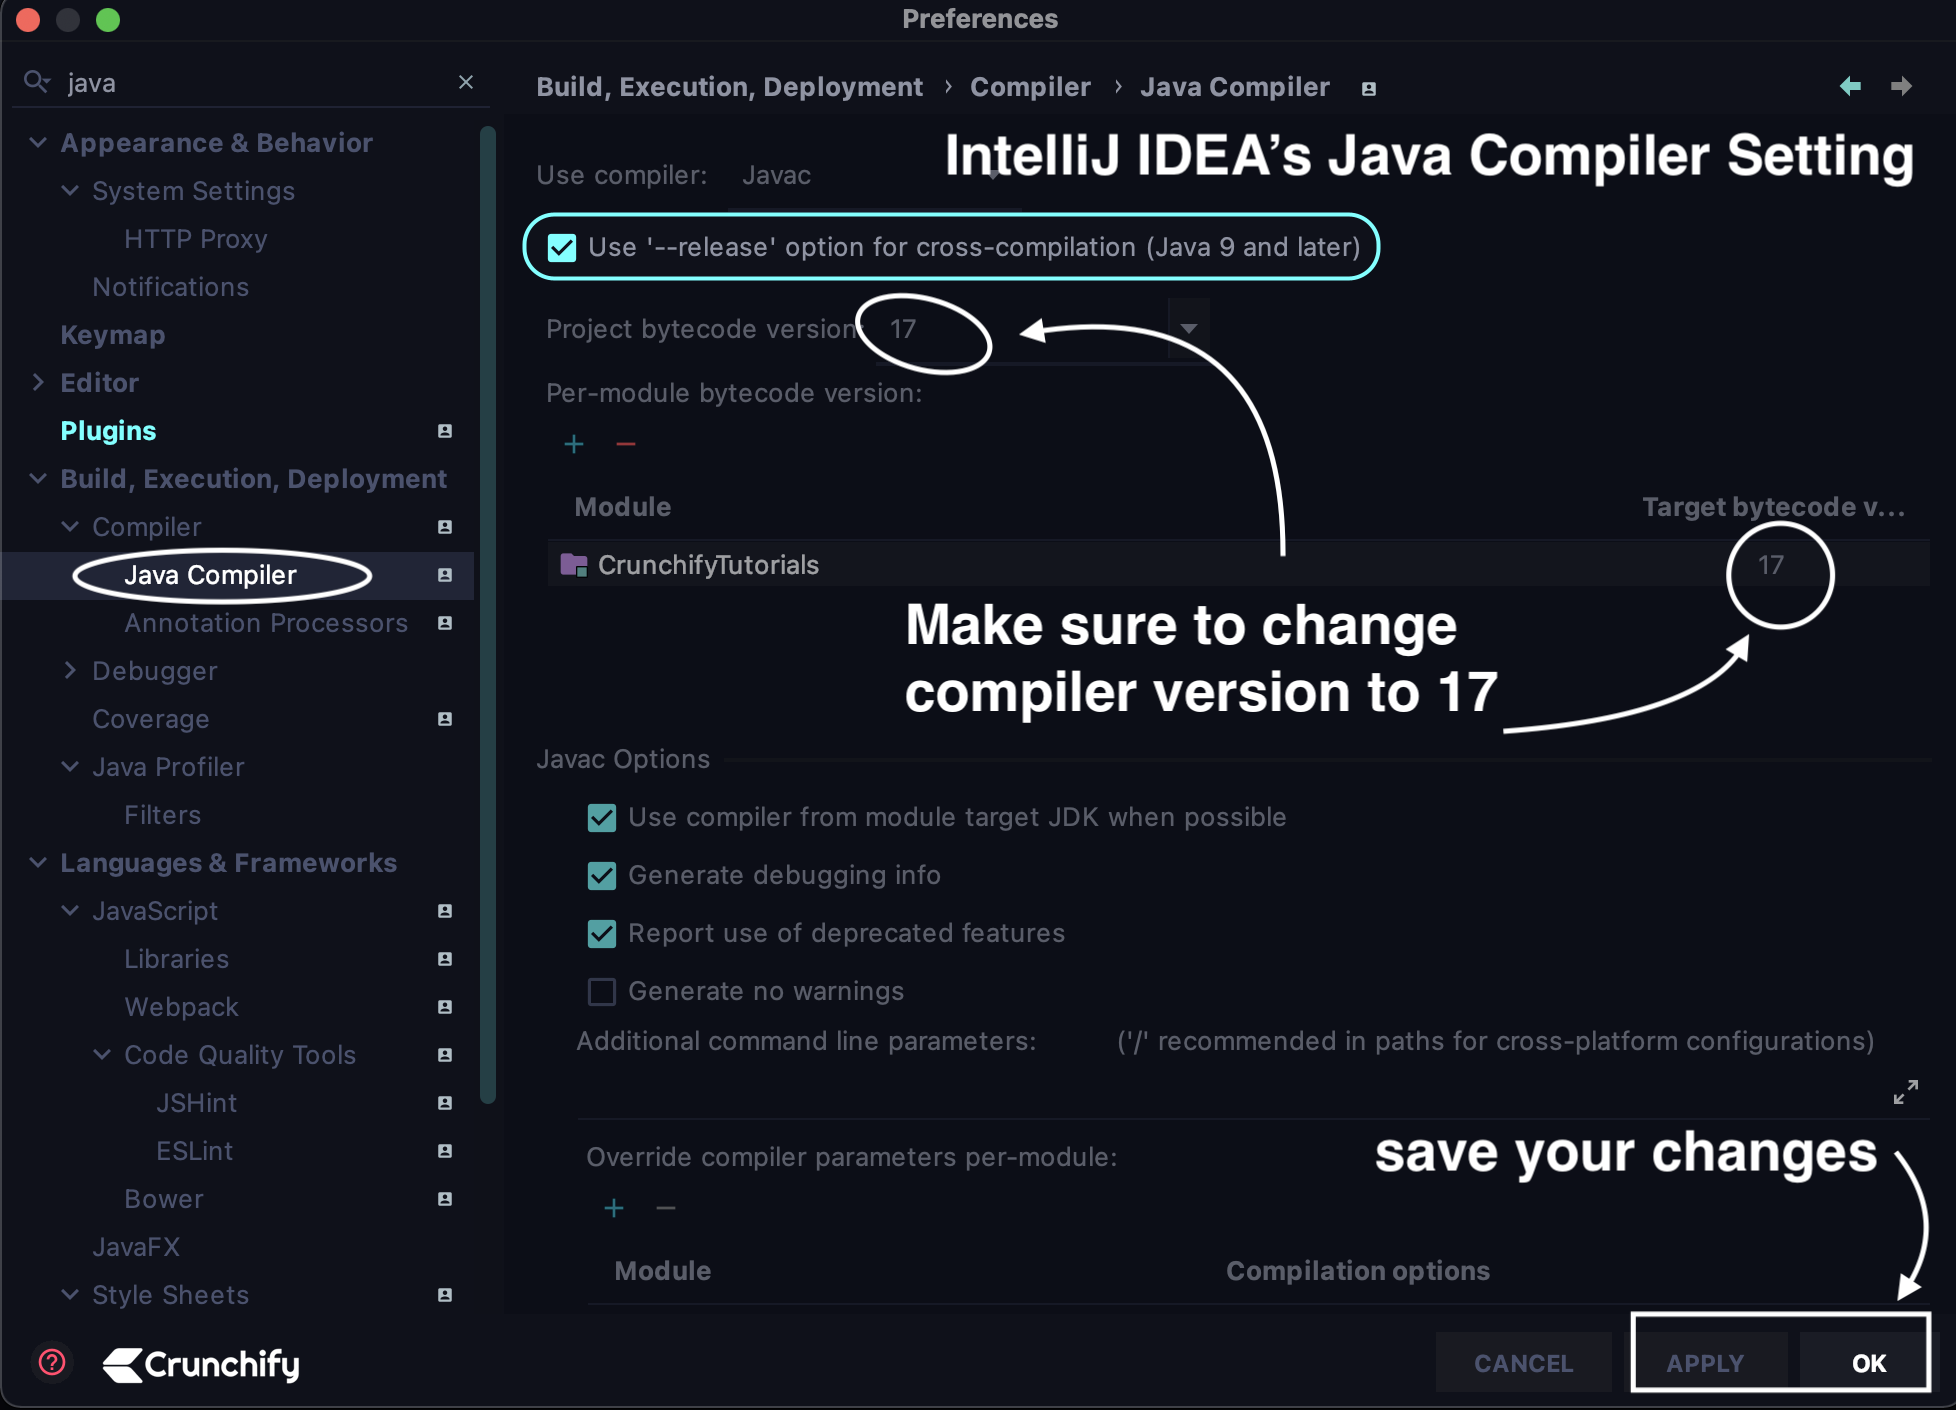
- Search for keyword java
- Click on Java Compiler
- Set Project bytecode version to 17
- Set Target bytecode version to 17
- Click on Apply and OK

Next:
- Right click on project
- Click on Open Module Settings
- Click on Modules
- Click on Dependencies tab
- Set Module SDK to openjdk-17

Next:
- Right click on project
- Click on Open Module Settings
- Click on Project
- Click on Project SDK
- Click on Edit and make sure to set value to openjdk-17

Next:
- Right click on project
- Click on Open Module Settings
- Click on SDKs
- Make sure to keep on latest SDK
- If you see more SDK’s then you could also remove it as I did that for my case

And you are all set from Setup point of view.
Step-5. How to check if everything is ok about Java 17 setting?
- Right click on project
- Click on
Build Module CrunchifyTutorial- Here CrunchifyTutorial is my Project Name
- You will see Build Output result.
- 10/26/21, 1:08 PM – Build completed successfully in 3 sec, 450 ms

Here is detailed Message from IntelliJ Console
Executing pre-compile tasks...
Loading Ant configuration...
Running Ant tasks...
Running 'before' tasks
Checking sources
Copying resources... [CrunchifyTutorials]
Parsing java... [CrunchifyTutorials]
Writing classes... [CrunchifyTutorials]
Checking dependencies... [CrunchifyTutorials]
Dependency analysis found 0 affected files
Updating dependency information... [CrunchifyTutorials]
Adding @NotNull assertions... [CrunchifyTutorials]
Adding pattern assertions... [CrunchifyTutorials]
Adding the Threading Model assertions… [CrunchifyTutorials]
Running 'after' tasks
javac 17.0.1 was used to compile java sources
Finished, saving caches...
Executing post-compile tasks...
Loading Ant configuration...
Running Ant tasks...
Synchronizing output directories...
10/26/21, 1:08 PM - Build completed successfully in 3 sec, 450 ms
And you are all set. Let me know if you face any issue setting up new Java version.
