
To show hidden files in Finder on a Mac, you can use the following steps:
- Open Finder.
- Press the
Command + Shift + .key combination. - This will toggle the visibility of hidden files in Finder.
- The files will now be visible in Finder, and you can access them as you would any other file.
Alternatively, you can use the Terminal application to show hidden files by using the command “defaults write com.apple.finder AppleShowAllFiles YES” and “killall Finder” in the terminal.
How to Show Hidden Files on a Mac? How to Access Your Mac’s Hidden Files?
By default, Mac OS X keeps all files and folders starting with . (dot) hidden.
Here is a sample. How to access the hidden files on your Mac computer.
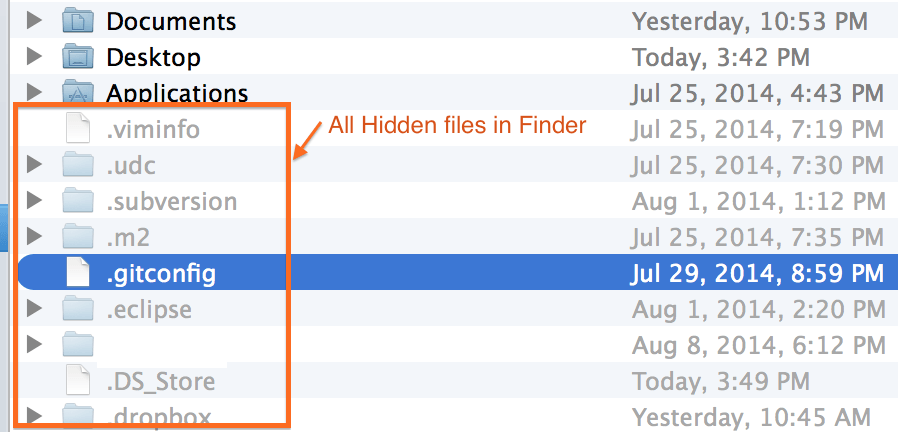
If you have used Maven in past then you might have some info about .m2 folder. As we know Maven Downloads all .jar files from repository to local machine in a default directory name .m2 and location of this directory in Windows machine (Inside Users Folder) Or in Home directory in case of Mac machine. I wanted to change few .jar files and it took some time for me to figure out how to see these hidden files.
Another must read:
If you want to Show all hidden files then use this command:
bash-3.2$ defaults write com.apple.finder AppleShowAllFiles TRUE
bash-3.2$ killall Finder

OR

bash-3.2$ defaults write com.apple.finder AppleShowAllFiles YES
bash-3.2$ killall Finder
Same way if you want to Hide all hidden files then use this command:
bash-3.2$ defaults write com.apple.finder AppleShowAllFiles FALSE
bash-3.2$ killall Finder

OR

bash-3.2$ defaults write com.apple.finder AppleShowAllFiles NO
bash-3.2$ killall Finder
Bonus Tips:
How to simplify this process by adding an Alias in .bash_profile file?
- Open Terminal
- Type below command to
openfile .bash_profile in VI editor. If you don’t have file already exist then just create a new one 🙂
bash-3.2$ vi ~/.bash_profile
Enterbelow alias to file andsavefile
alias crunchifyShowFiles='defaults write com.apple.finder AppleShowAllFiles TRUE
killall Finder'

alias crunchifyHideFiles='defaults write com.apple.finder AppleShowAllFiles FALSE
killall Finder'

- In order to
load .bash_profileexecute below command.
bash-3.2$ source ~/.bash_profile
- And you should be all set.
Now just use crunchifyHideFiles and crunchifyShowFiles command directly in Mac OS X Terminal to Hide/Show hidden files in Finder Window.
bash-3.2$ crunchifyHideFiles

bash-3.2$ crunchifyShowFiles
Enjoy. Having trouble setting this up? Let me know if you have any question on How to see hidden files and folders in MacOS?