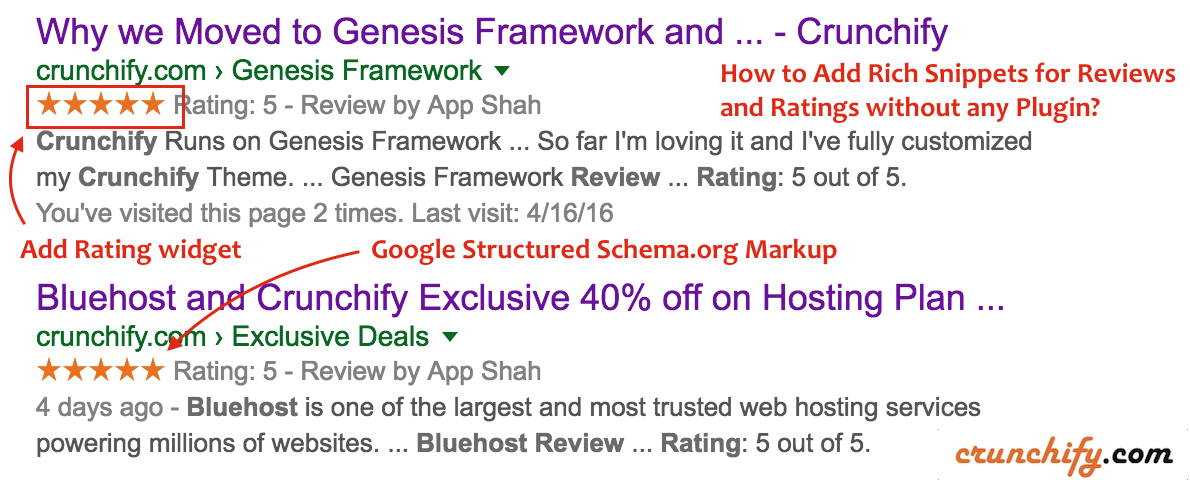
Have you ever wondered how and why Google is showing rating for some of the special review posts in Google Search Result Page (SERP)?
In this tutorial we are going to discuss how to add rich snippet for Review/Rating in form of schema.org so that, Google can understand details about your review and show it in search page.

Checkout live result: https://crunchify.com/crunchify-co-moved-to-genesis-framework-thesis-vs-genesis/. Rich Snippet link.
Before we start, let’s understand what is schema.org?
Schema is a type of microdata that makes it easier for Google or Bing search engines to parse and interpret the information on your blog pages more effectively. Idea is to help search engines understand all data in a structured format so that search engine also show those relevant result data back to end users based on search queries.
Let’s get started:
Point-1) How to add Structured data to your blog in the form of schema.org?
On Crunchify we are using Genesis Framework and it by default comes with all schema.org microdata format. It output microdata in your site’s code. I don’t have to add anything and that’s the beauty of Genesis Framework except Review metadata option which we are going to discuss below.
Point-2) How to verify your site’s structured data?
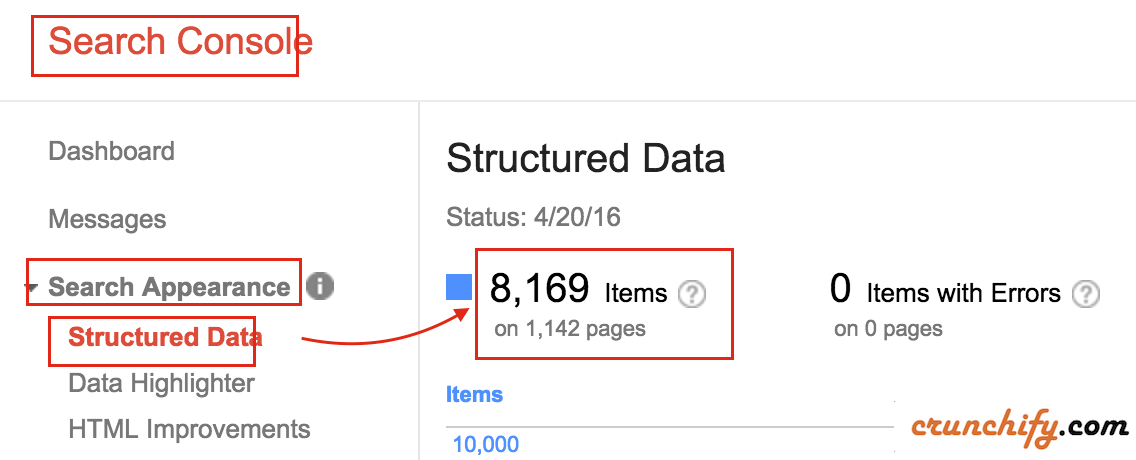
Google Search Console by default provides an option to see structured data. Take a look at below diagrams.


In order to see this data, you have to add your site/blog to Search Console. Once you verify identity of your site, you may be able to see data right away OR wait for a week to get this data generated automatically.
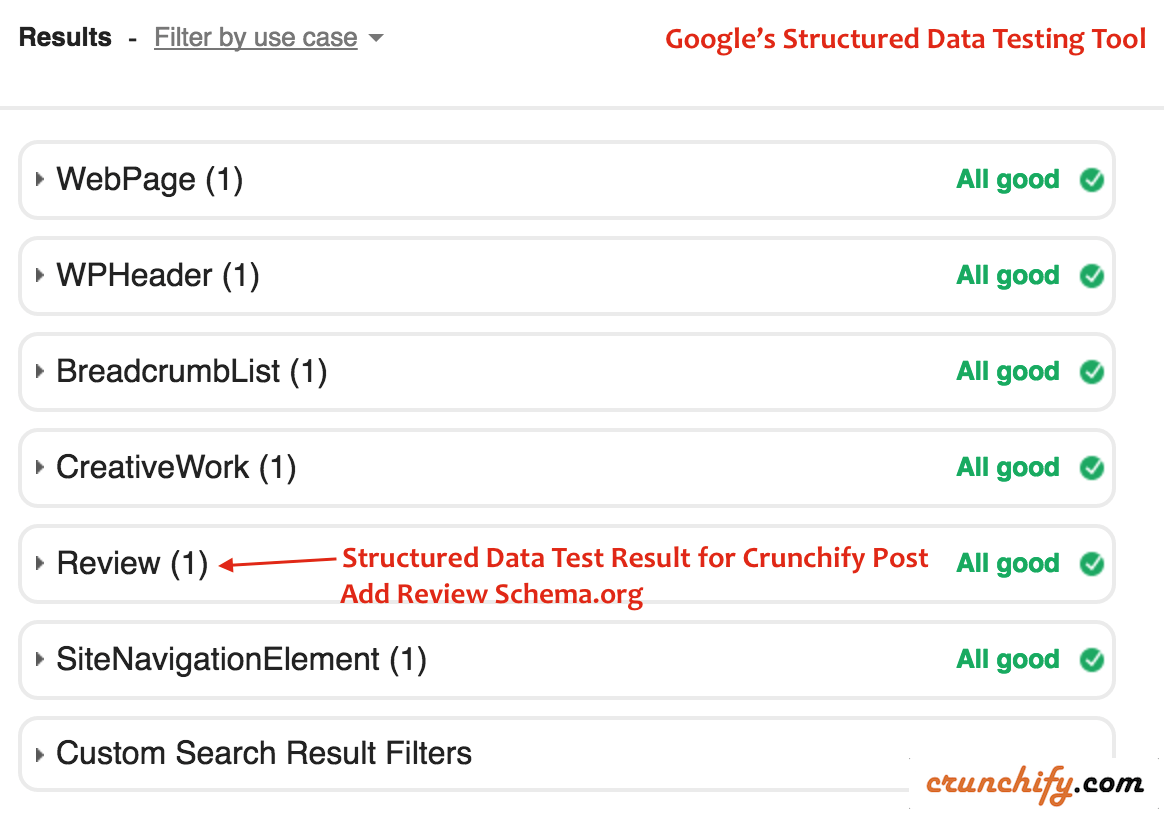
Point-3 How to verify if your structured data is valid or has any issue?
- In additional last column in above diagram
Items with Errors, Google also provides additional tool called Structured Data Testing Tool. - Just go there and click on
Fetch URL. - Provide URL and click on
FETCH & VALIDATE. - On right side – you should see schema.org validation result.
- In case of failure and bad
schema.org– you should see RED color message.


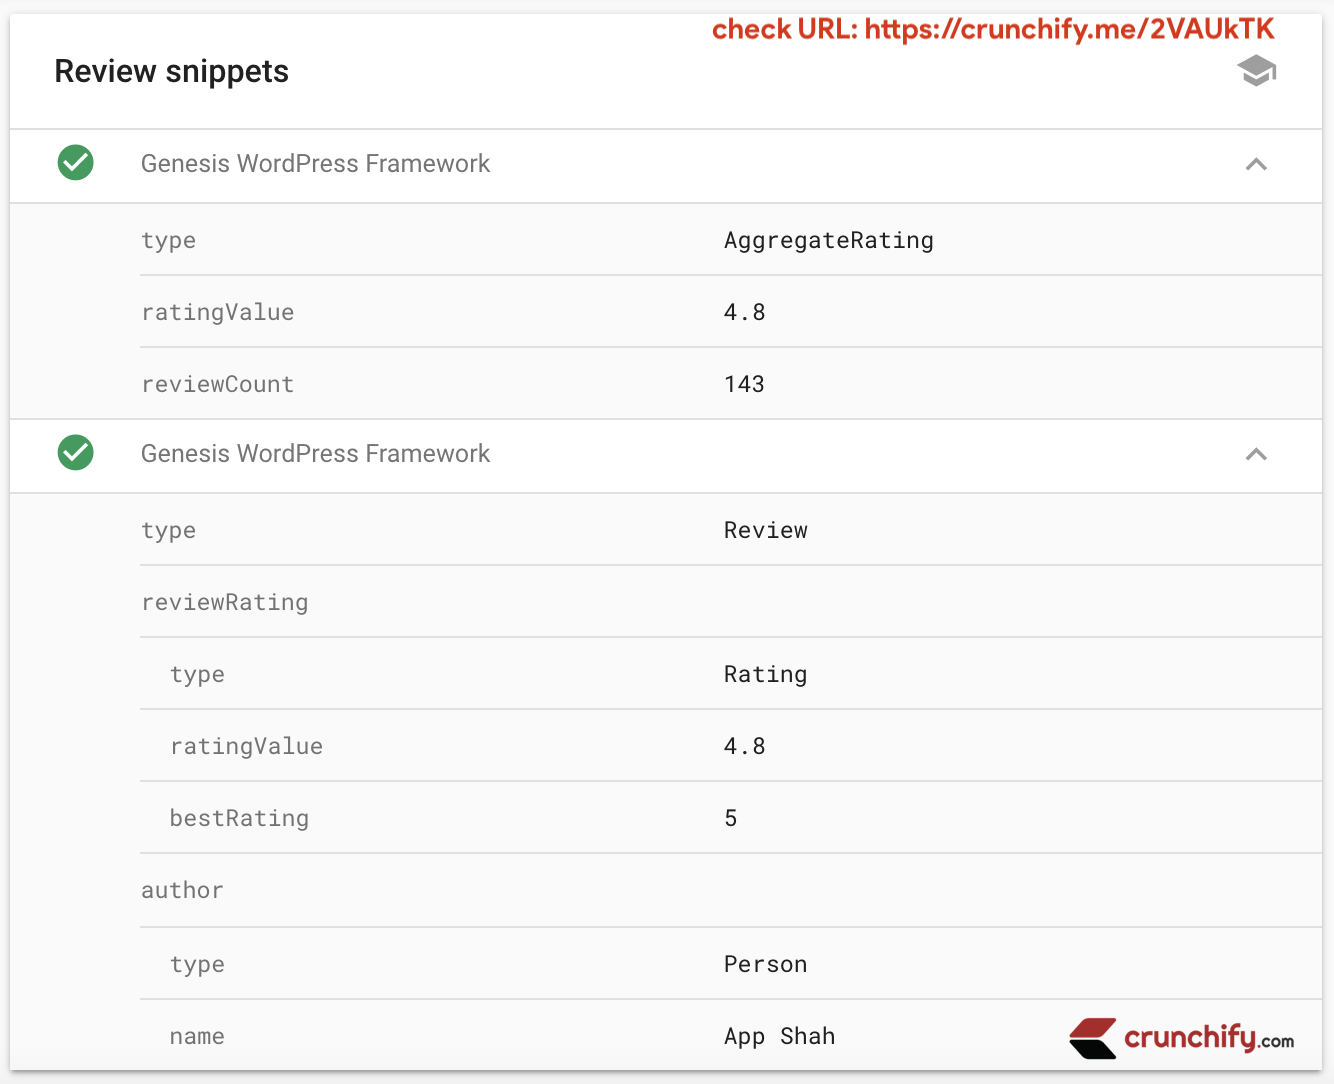
Expand above Review section and you should be able to see all detailed microdata for your review. You could check it out by yourself. Here is a URL.
This tutorial will work if you have any of below questions:
- Enabling Rich Snippets for Reviews and Ratings
- Structured Data for Review
- Structured Data for Rating
- Aggregate Rating Schema Generator
- Schema creator for ‘Review’ schema.org microdata
- rich snippet review generator
- google rich snippet for review
- rich snippets preview tool
- rich snippet for WordPress blog post
- recipe for rich snippets site

Step-4 Let’s add Review Schema.org snippet
Here is a HTML code which you need to put into your post edit panel under TEXT section.
<div class="crunchify-rating" itemscope itemtype="http://schema.org/Review">
    <span itemprop="itemReviewed" itemscope itemtype="http://schema.org/Thing" style="font-size: 14px;"><a itemprop="url" href="https://crunchify.com/refer/genesis" target="_blank"><span itemprop="name"><strong>Genesis WordPress Theme Framework Review</strong></span></a></span>
    <p></p>
    <strong>Description: </strong><span itemprop="description">One of the best WordPress Theme Framework which we use on Crunchify.com. Default comes with Google's rich schema.org snippet microdata.</span>
    <span itemprop="author" itemscope itemtype="http://schema.org/Person"><strong>Written by:</strong> <span itemprop="name">App Shah</span></span>
    <span itemprop="reviewRating" itemscope itemtype="http://schema.org/Rating"><strong>Rating:</strong> <span itemprop="ratingValue">5</span> out of <span itemprop="bestRating">5</span></span>
    <span itemprop="publisher" itemscope itemtype="http://schema.org/Organization">
        <meta itemprop="name" content="Crunchify, LLC."/>
    </span>
</div>
Modify values accordingly and above code will be converted in to nice widget with simple CSS tricks as you see it in below image.
URL with live review example: https://crunchify.com/crunchify-co-moved-to-genesis-framework-thesis-vs-genesis/

And that’s it. Once you add above code to your blog post, go back to Google Structured Data Validation tool again and check your post URL :). It may take up-to a week to get your post updated in to SERP based on crawl algorithm.
What CSS we are using on Crunchify?
On Crunchify, we are using below CSS. Just add below code to your theme’s style.css file, modify property as per your need and you are all good.
	.crunchify-rating {
		overflow: hidden;
		margin-bottom: 35px;
		border-radius: 3px;
		box-shadow: 0 0 2px 0 rgba(0,0,0,.12), 0 2px 2px 0 rgba(0,0,0,.24);
		font-size: 16px;
		color: #333;
		padding: 30px 60px 5px;
		background: #fff;
		border-left: 2px solid #157BDA;
	}
	.crunchify-rating:before {
		content: "Rating"!important;
		font-size: 16px;
		text-transform: uppercase;
		color: #fff;
		float: left;
		margin: 2px 15px 15px 0;
		background: #157BDA;
		padding: 0px 20px;
		border-radius: 30px;
	}
How can I add above CSS file to AMP enabled Page?
Just add above CSS content under <head> of your page under <style amp-custom> HTML tag.
  <head>
    ...
    <style amp-custom>
      /* any custom styles go here. */
	.crunchify-rating {
		overflow: hidden;
		margin-bottom: 35px;
		border-radius: 3px;
		box-shadow: 0 0 2px 0 rgba(0,0,0,.12), 0 2px 2px 0 rgba(0,0,0,.24);
		font-size: 16px;
		color: #333;
		padding: 30px 60px 5px;
		background: #fff;
		border-left: 2px solid #157BDA;
	}
	.crunchify-rating:before {
		content: "Rating"!important;
		font-size: 16px;
		text-transform: uppercase;
		color: #fff;
		float: left;
		margin: 2px 15px 15px 0;
		background: #157BDA;
		padding: 0px 20px;
		border-radius: 30px;
	}
    </style>
    ...
  </head>
Let me know if you have any more questions.
Don’t forget to get your Genesis Framework Copy.
Happy Blogging.
