Recently we got chance to play with KeyCDN and would like to bring up Key point and features about Nextgen Content Delivery Network for all Crunchify Readers.
On Crunchify we have been using Enterprise CDN License since 2012 and performance have been tremendous. There were hardly any downtime we noticed since switching to CDN.
In this tutorial we will go over KeyCDN pros and cons in details.
You must have put hundreds of hours creating your Niche blogging site and there are number of tasks everybody should perform in order to keep your site running at high performance.
Enabling CDN on your site is one of them.
This tutorial will also help you if you have below questions:
- MaxCDN and KeyCDN comparison
- Where can I find KeyCDN review 2016?
- How to setup KeyCDN with your WordPress site?
- What are the KeyCDN pros and cons
- Should I trust KeyCDN speed?
What is CDN and why do we need it?
CDN means Content Delivery Network. In order to understand it better, consider this scenario.
As you have a site hosted at Central America, all of your blog files resides with your hosting provider like Bluehost, Hostgator, etc in America only.
Now if you have a visitor in Australia, all of your site images, CSS or JavaScript files has to travel from America region to Australia region over internet which is nothing but different network paths, like DNS, Load balancer, etc and finally on browser.
It could take long time for it, isn’t it ? Not only that but you have to multiply path for all of your files, resources and numbers might be in hundreds sometime.
CDN helps load your page faster and reduce server load significantly.
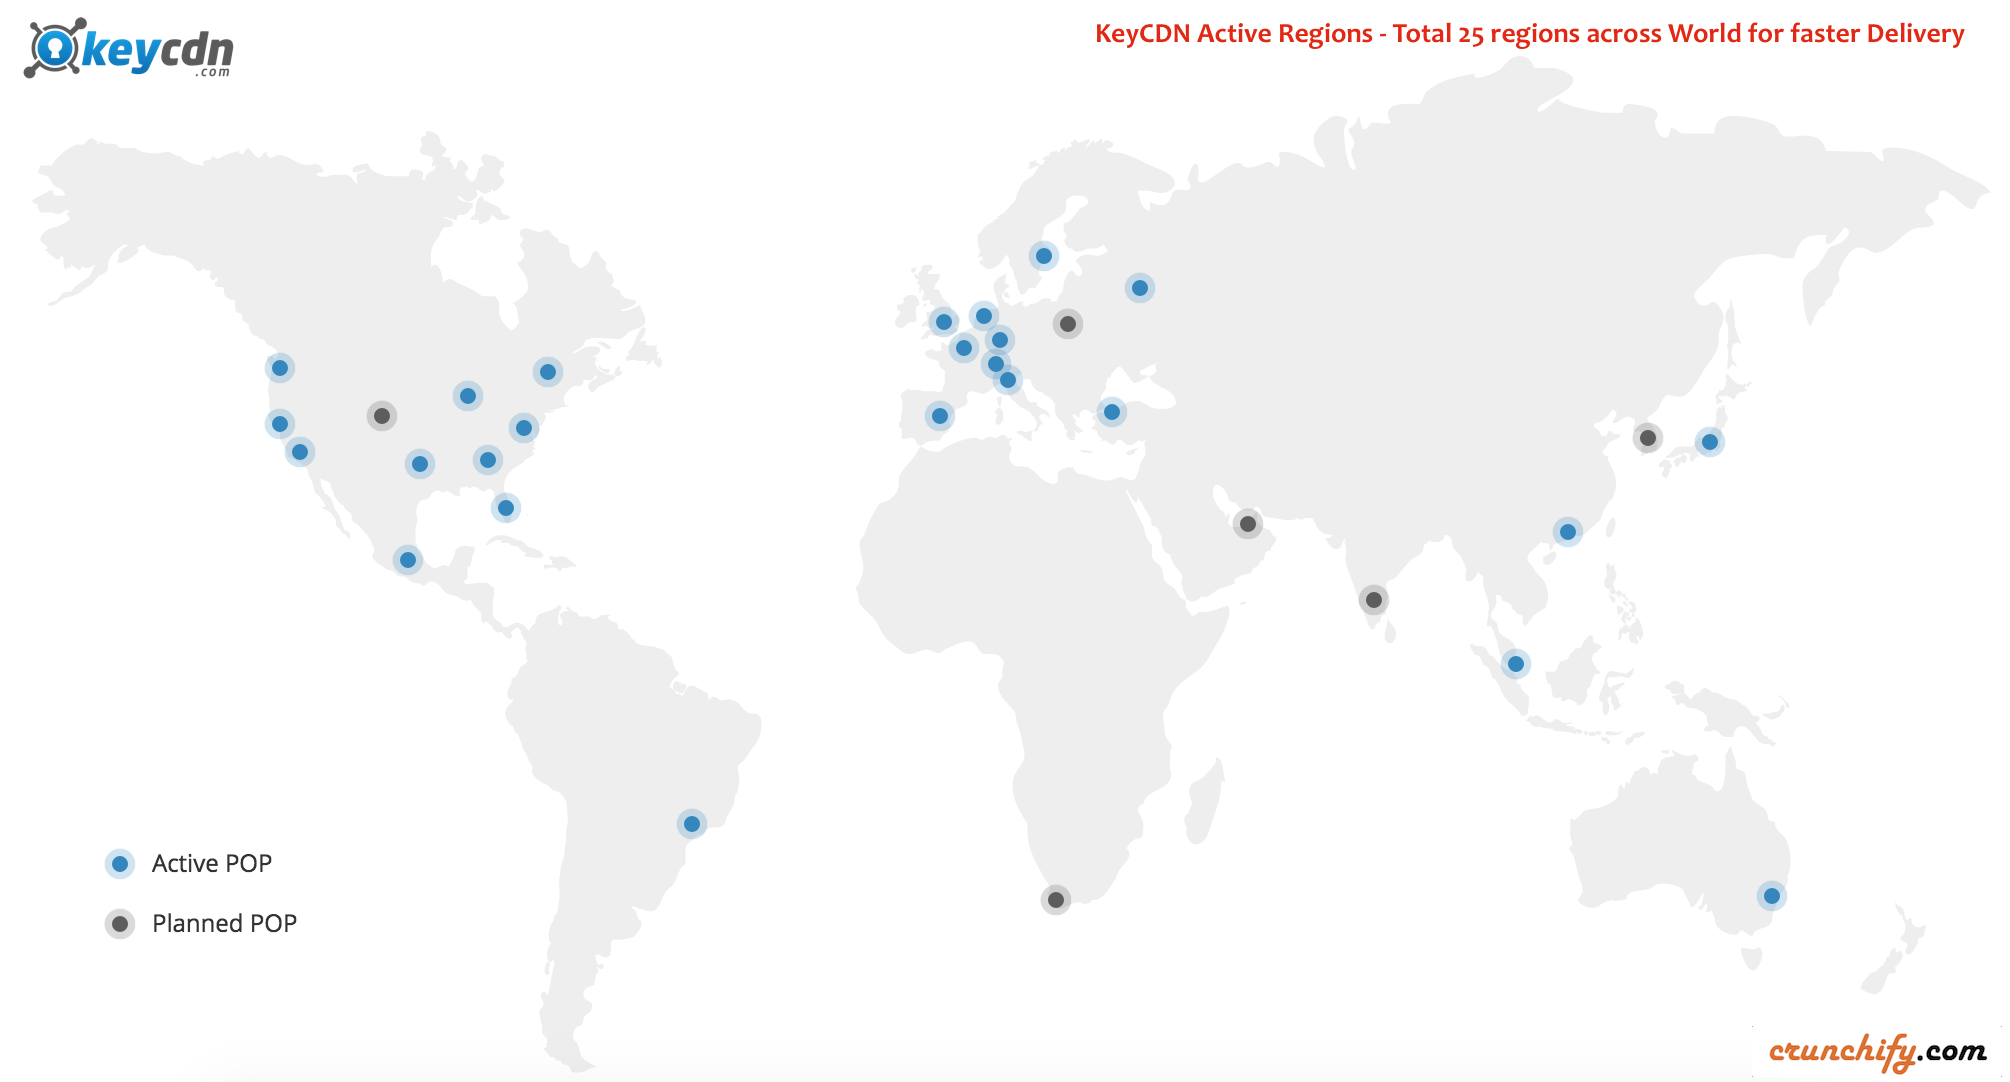
As you could see in above image, KeyCDN has number of 25 active regions around the world, all of your hosting contents will be distributed to all regions and for customers all of your files will be delivered by local KeyCDN regions.
That’s the huge win for customers and site owner as page load faster, better user experience, users likely to come back to your site again and conversion rate will increase over time.
Take a look at below diagram. Almost all pages on Crunchify loads in less than half a second. Which is also one of the signal for Google to index your site higher in Search Result (SERP).

So, that’s a quick introduction on CDN network. In additional to all above benefits let’s take a look at some more features below.
What are the key features of KeyCDN?
We got a chance to play with KeyCDN over last week. Here is a summary of features which are eye catching and what we observed.
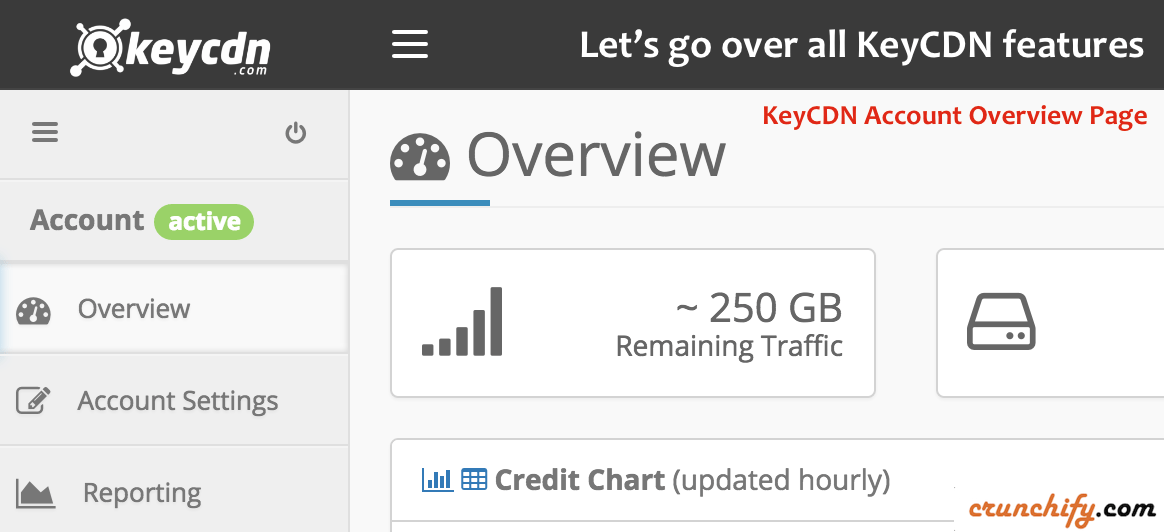
Immediately after you login to KeyCDN, you will see Overview tab with Traffic, Storage and Credit stats.
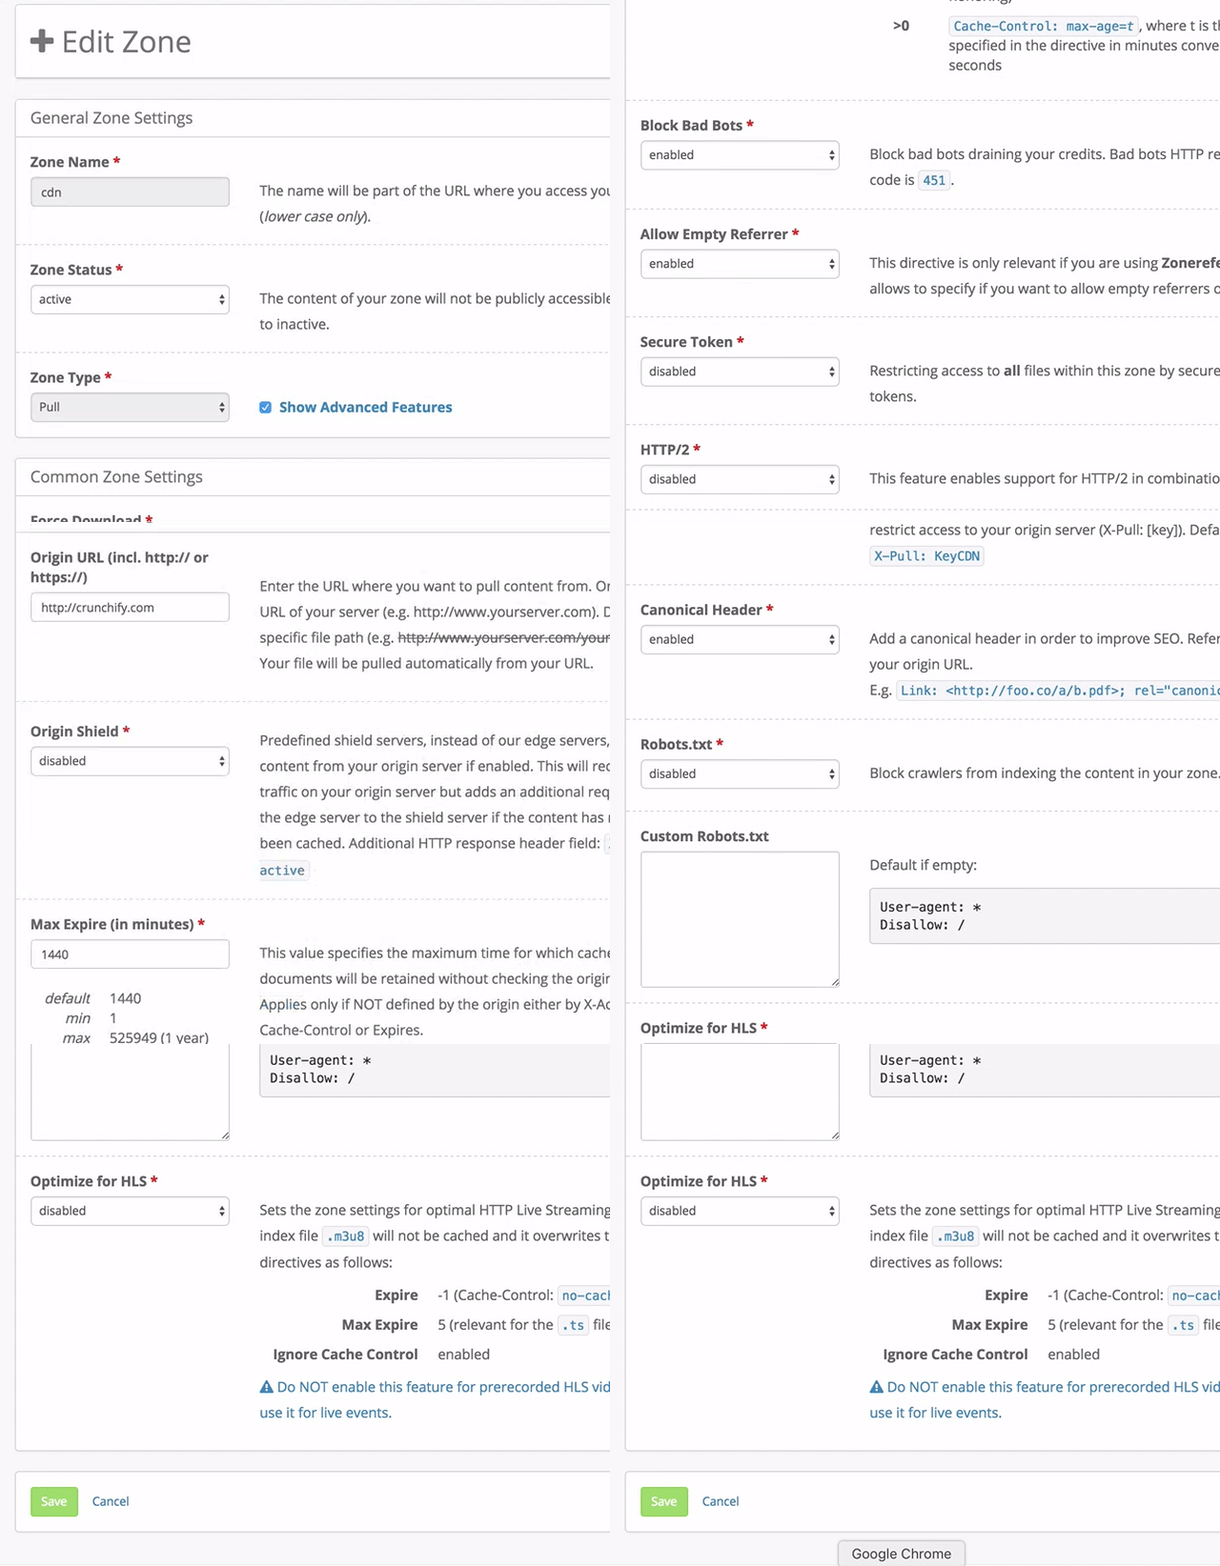
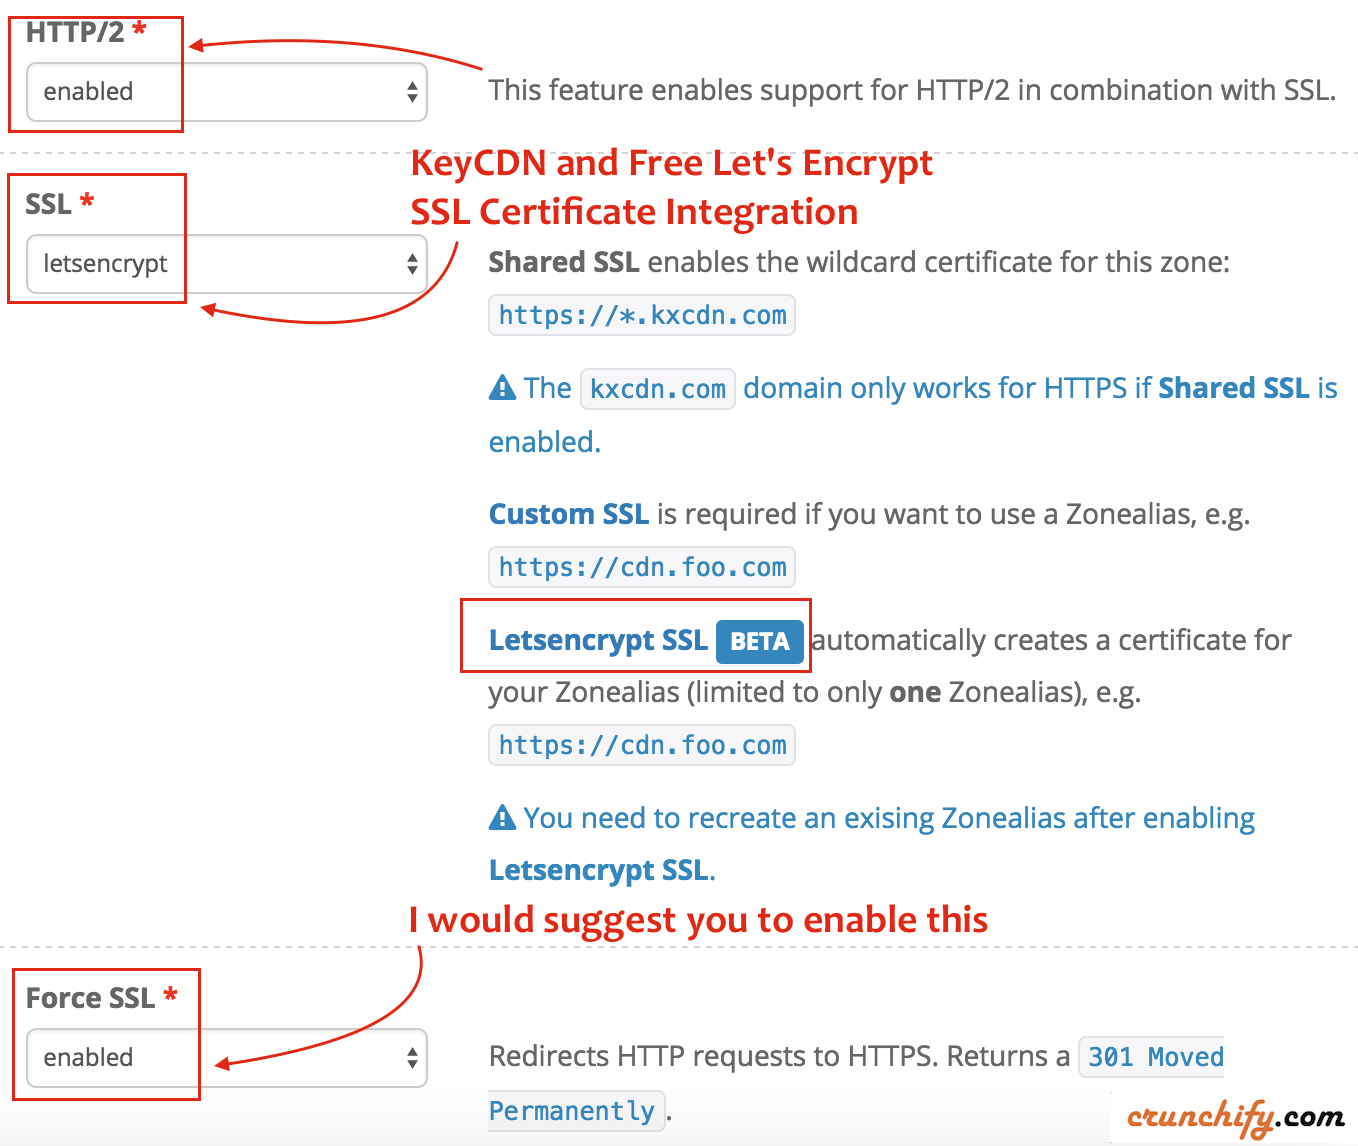
First thing you need to do is to create Pull Zone for your site. Setting might be tricky if you want to enable SSL and Let's encrypt cert but other than than it’s just a single click to create pull zone.
Take a look at KeyCDN Pull Zone features:
As you see below below, you will have list of options to create Free SSL certificate with let's encrypt integration.
In addition to above standout features KeyCDN also comes with all standards features like:
Reporting Features:
Account Features:
- 2 factor authentication
- Access Rules – Restrict the access to your account by IP
- Default Referral Program
- Payment Options
How about Pricing?
Immediately after signup, you will be greeted with 250GB Free Traffic credit and $10 credit.
As far as I know, KeyCDN provide one of the best competitive pricing option. If you compare it with MaxCDN then it’s nearly half of the price.
MaxCDN monthly price for 1TB bandwidth – $79
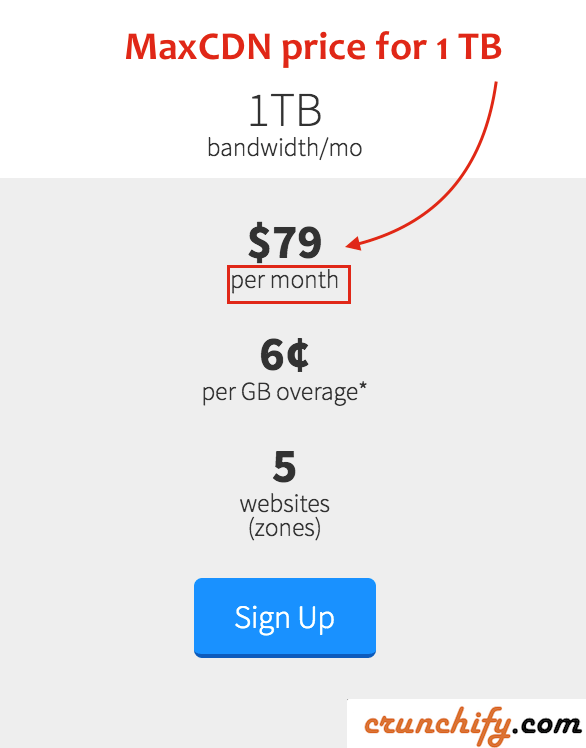
KeyCDN monthly price for 1TB bandwidth – $40

How do I get started on KeyCDN?
Step-1
Sign up and Login to KeyCDN. You will have 1 month of trial period in which you could use 250GB Free bandwidth.
Step-2
- Go to Account Setting
- I would suggest to secure your account with 2-step authentication
- Go to
General tabto make sure everything is right
Step-3
- Jump to Zone section to create your first zone
- Provide Zone name:
cdn - Set Zone Status:
active - Select Zone Type:
pull - Provide Origin URL:
https://crunchify.com(your site) - You may not need Advanced setting unless you want to setup SSL and Let’s Encrypt Certificate
- Click Save

Step-4
- Go to
cPanel - Click on
Advanced Zone Editor - Select
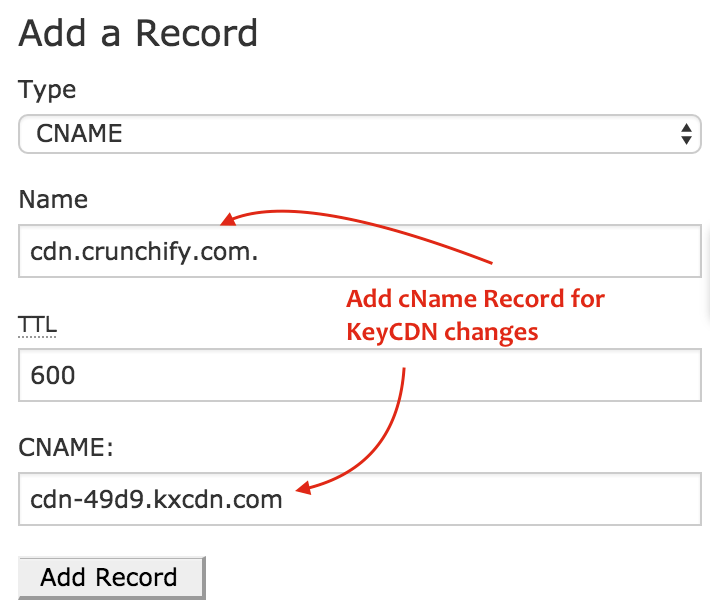
Domain. In my case crunchify.com - Add
CNAMERecord as below
Step-5
If you are using WP Super Cache plugin then enable CDN option and provide CDN URL for off-site URL.

Step-6
You should be all setup by now. Just visit KeyCDN again and check Reporting Tab to see all detailed stats insight.
