The Ultimate Guide To Bing Webmaster Tools
I’m a very big fan of Google Search Console (aka: Webmaster Tools). I have been using it since very long time, say almost 8 years. But let me admit, I ignored Bing for so many years.
Even though I get only fraction of traffic from Bing Search result, it’s worth having Bing Webmaster Tools Account for detailed SEO reports. In last month, I have fixed 3 SEO issues which I only got it from Bing Webmaster Tools.
Take a look at recent enhancements on Crunchify.com:
- Missing ALT tag for Images
- Fix H1 Tag Missing error
- Add Rich Snippet for review posts
Point I wanted to highlight here is, if you haven’t yet started using Bing Webmaster Tools then it’s worth using it now.
This is a a Bloggers Guide To Use Bing Webmaster Tools to Improve your site SEO.
In order to get started, please follow below steps.
Step-1
Go to Bing Webmaster Tools. You don’t need @live or @outlook email. You could signup using your personal @gmail or any other custom domain IDs.
Step-2
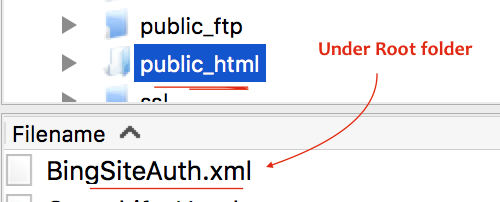
Verify your ownership using BingSiteAuth.xml file download and put it under your blog’s root folder.

Step-3
Add your sitemap.xml file and wait for few weeks so Bing could generate detailed SEO Reports.

Step-4
Checkout all results and make enhancements based on suggestion.
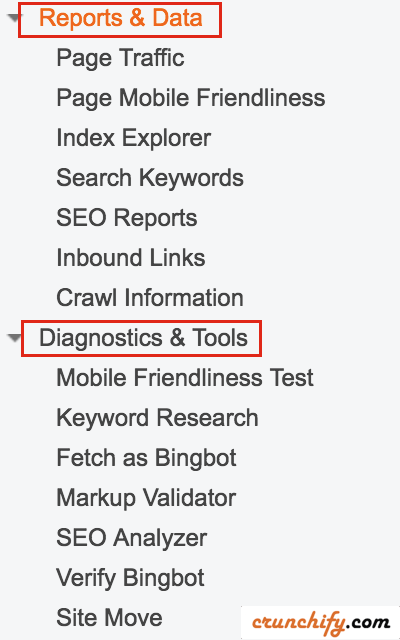
- Click on Dashboard
- Click on
Reports & Data - Click on
SEO Reports

What are the benefits? Why another webmaster tool?
Point-1
Bing webmaster tool provides nice dashboard interface. Google already provides number of different reports in Search Console, but it doesn’t hurt to get additional report from Bing too.
Point-2
New Diagnostic tools and reporting tools. Follow each links to get detailed reports.

Point-3 Better HTML Page Source Highlights

Point-4
Internally your fixes and enhancements on your blog will also help fix some of those issues, which Google may have seen before and went unnoticed before 🙂
